
ASICMiner Blade Setup Guide
Contents:
0a) What type of blade do I have?
0b) What You Need
1) Powering
2) Cooling
3) Mounting [case/stand]
4) Configuration
5) Troubleshooting
6) Where to buy
0a) What type of blade do I have?
0b) What You Need
1) Powering
2) Cooling
3) Mounting [case/stand]
4) Configuration
5) Troubleshooting
6) Where to buy
0) What type of blade do I have?
There are 4 current types of blades in the wild:
There are 4 current types of blades in the wild:
|
V1 batch 1s
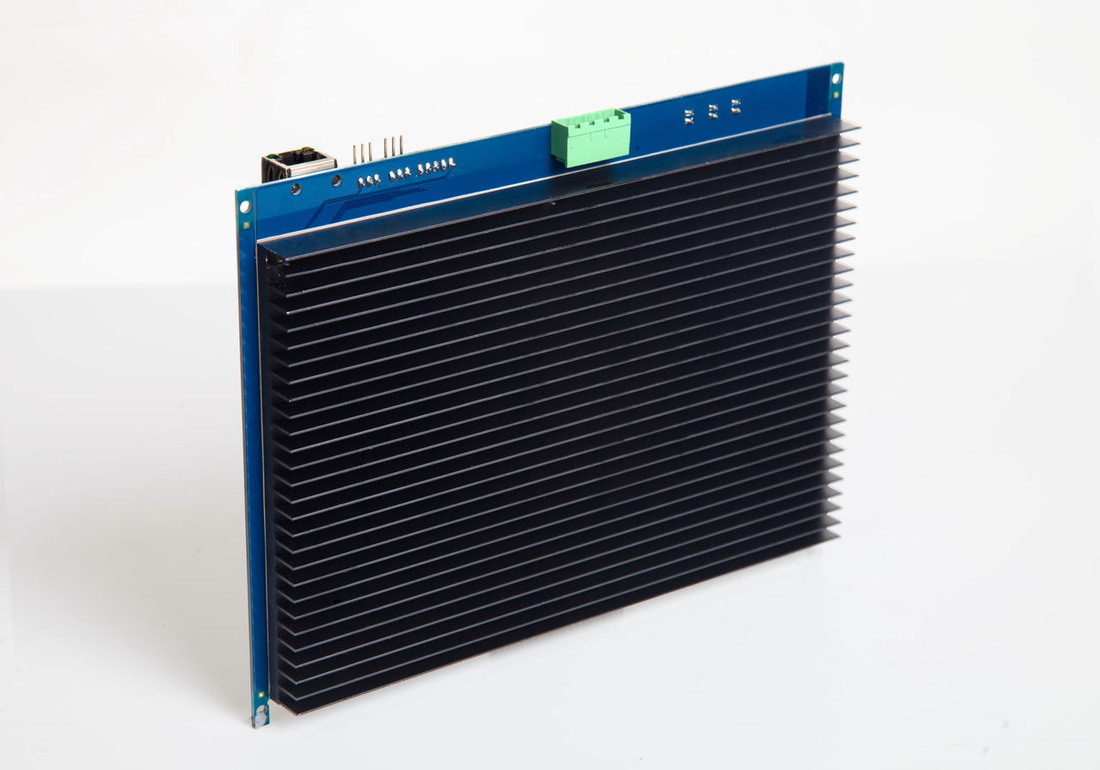
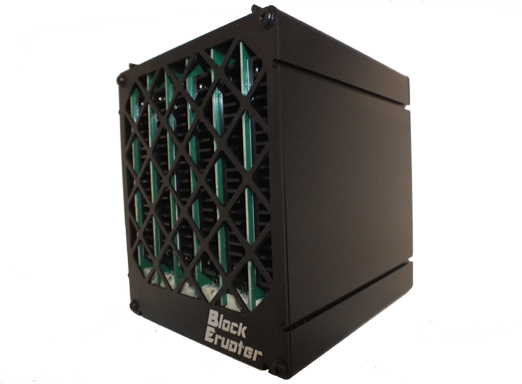
V1 batch 2-3.5s V2 V3 (Cubes) |
- No overclockable firmware and only 10 were sold into the wild.
- All other V1 blades sold at auction. Have overclockable firmware. - One single board, includes a backpane connector and is smaller. No overclocking. - A great consumer product with no more wiring, cooling or mounting complications. |

0b) What you need
You will need the following per blade:
You will need the following per blade:
- A network cable.
- 1x PCI-E 6 pin extender.
- OR 1x ATX motherboard extender.
- OR 1x dual molex extender.
- 1x Fan controller (per two blades).
- 2x 120mm PWM controllable fans.
- A power supply (see next section)
1) Powering
Blades do not come with a power supply and you will need a typical computer PSU. The limit of how much power we can safely draw is actually due to the cable diameters - which are only capable of ~10A [18 gauge]. The requirements per blade are:
Estimated power consumption is as follows.
V1 blades:
V2 blades:
Blades do not come with a power supply and you will need a typical computer PSU. The limit of how much power we can safely draw is actually due to the cable diameters - which are only capable of ~10A [18 gauge]. The requirements per blade are:
- 1xPCI-E 6 pin power connector
- At least 12A on the/each 12V rail
Estimated power consumption is as follows.
V1 blades:
- 75W (Low power mode @ 1.05V)
- 83W (Low power mode @ 1.10V)
- 100W (Stock @ 1.20V)
- 120W (Overclocked @ 1.20V)
V2 blades:
- 100W (Stock)
1a) Powering V1s
V1 B2+ blades come at 1.2V on stock, and you will want to run them overclocked. So, we need 10A+ per rail/cable strand. I would recommend the following PSUs:
V1 B2+ blades come at 1.2V on stock, and you will want to run them overclocked. So, we need 10A+ per rail/cable strand. I would recommend the following PSUs:
|
For 4 blades:
For 6 blades: |


|


|


|
|


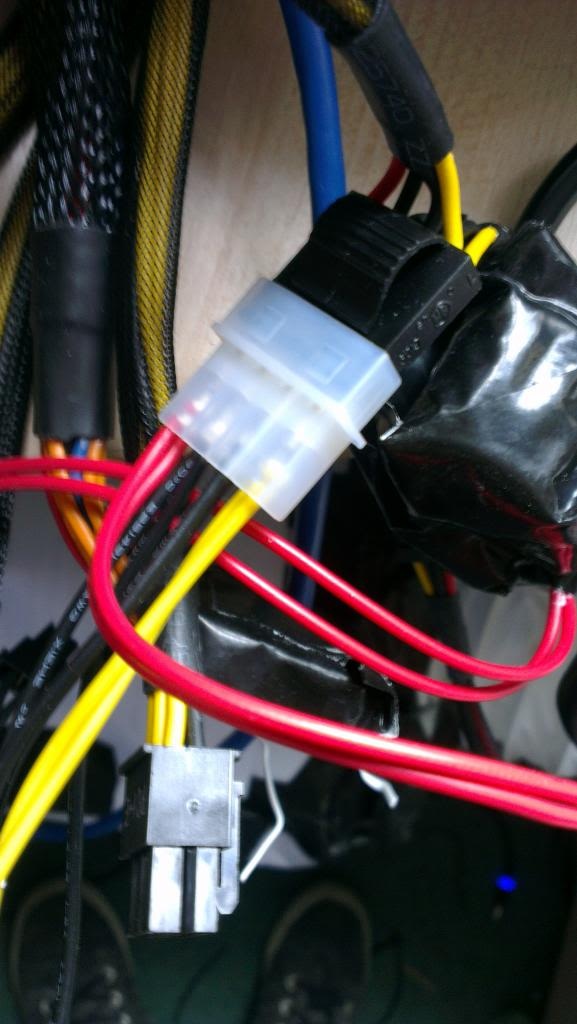
Blades require manually wiring each cable from the PSU into the blade, and we don't want to cut the PSU's directly in case you need to use it for other tasks later. Instead, we buy extension cables and cut those. Per blade you need a 6/8 pin PCI-E connector [preferred!!!!], a 4 pin ATX motherboard connector or TWO molex connectors. Regardless with what you go with, the wire preparation below is the same.
|
PCI-E extenders:
ATX extenders: Molex extenders: |


|


|


|
|


We also need to tell the PSU to always be on, as there isn't a motherboard to do this. Cut a paperclip into a U and insert it into the green wire and either black wire to the side of the green wire. Tape it up for safety. The power supply will now be controlled by its switch on the rear socket.
Remember to plug the fuse in [red disk], either way round will do.
Remember to plug the fuse in [red disk], either way round will do.
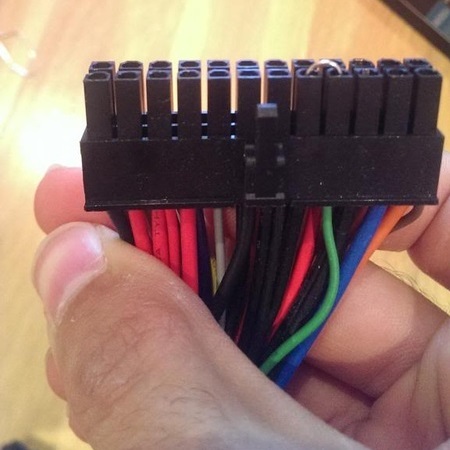
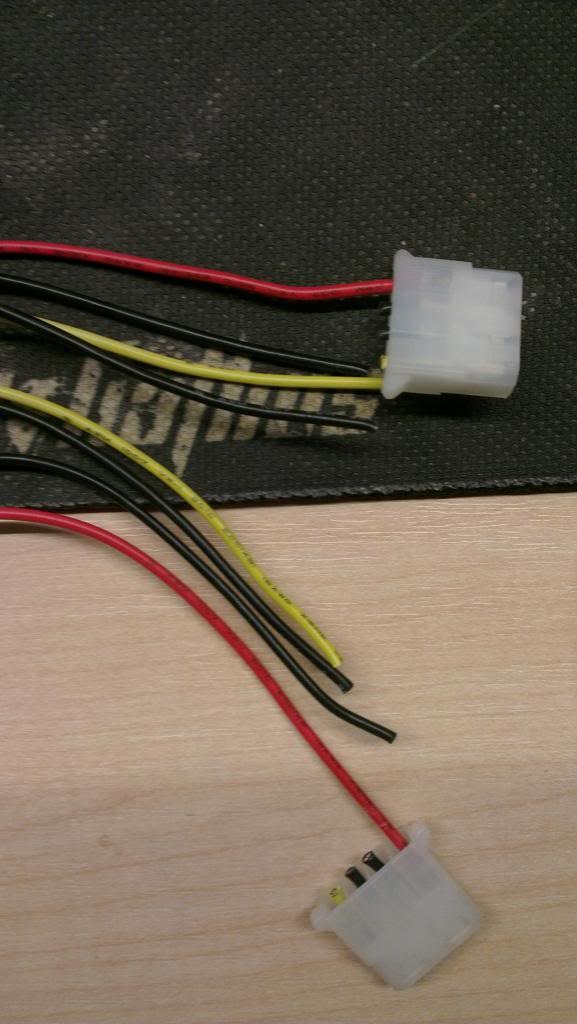
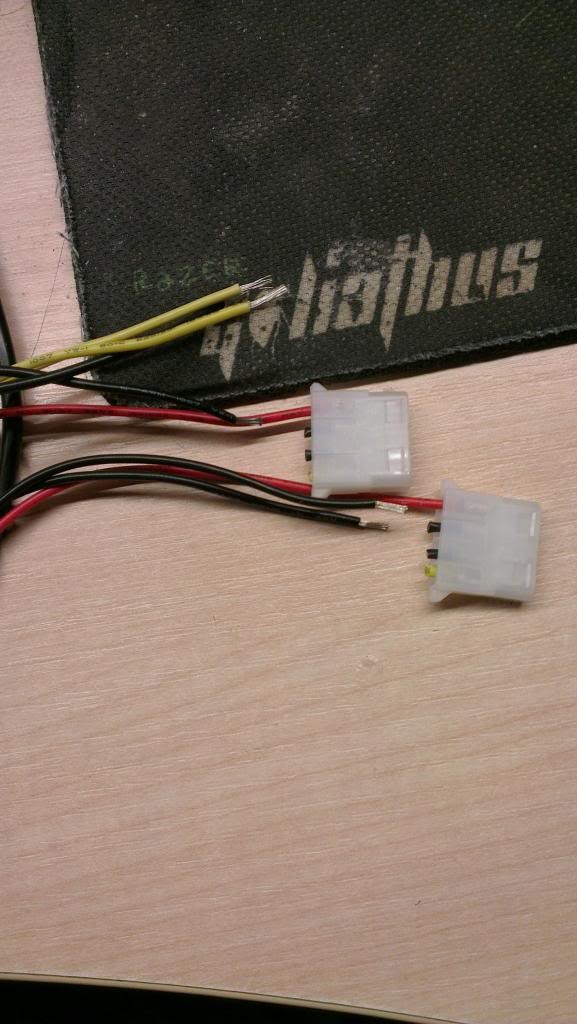
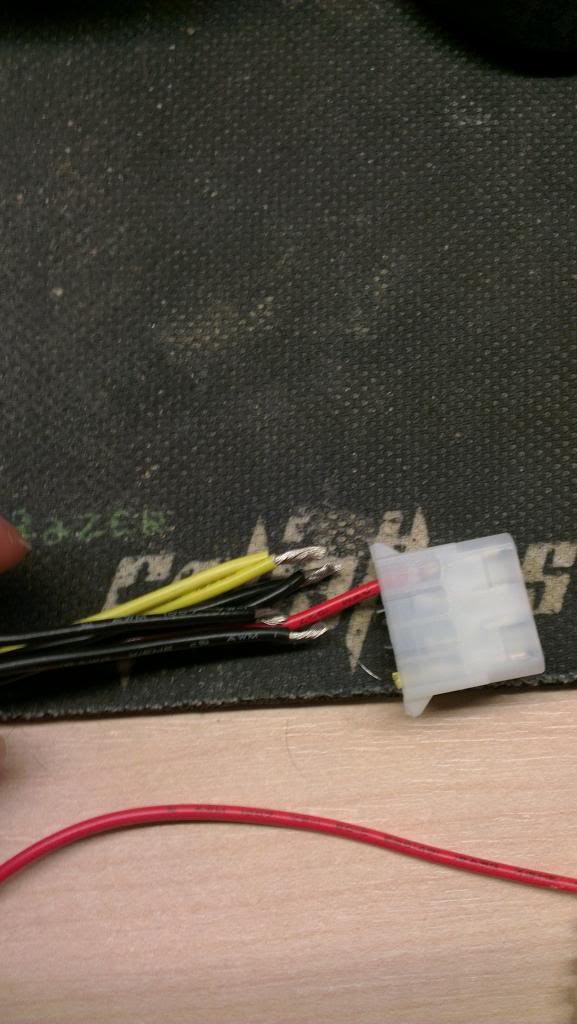
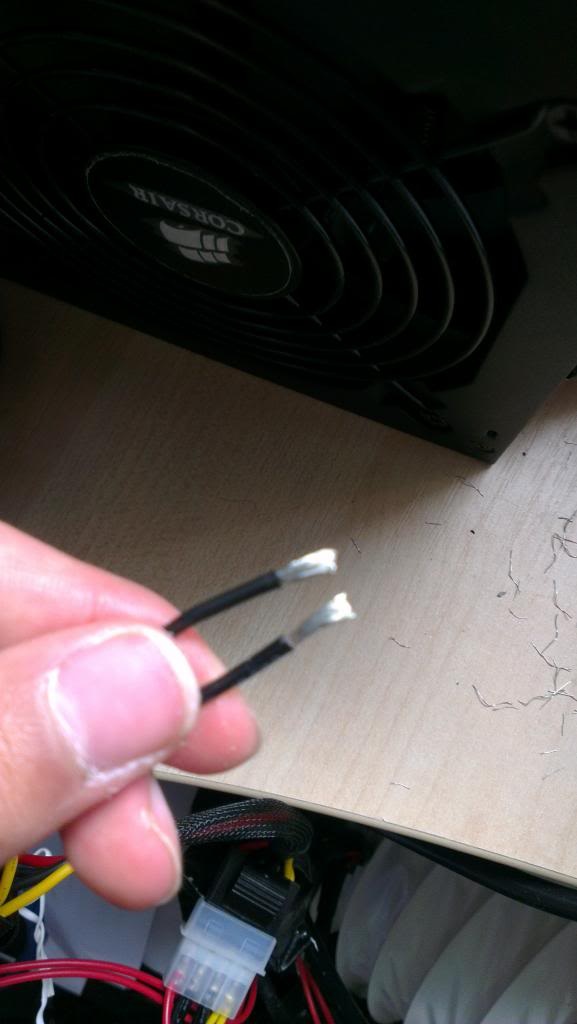
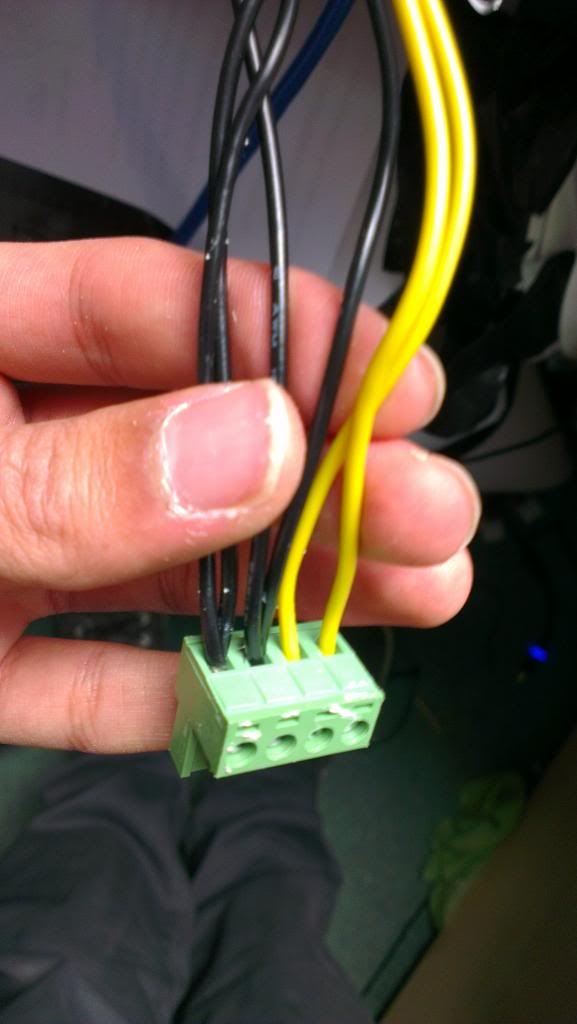
Cut the black [ground/-ve] and yellow [12V/+ve] cables at the end of each split, then tape the connectors with remaining red wire [5V] together or remove entirely. Strip back about 0.5cm from each cable end, with wire strippers or otherwise. I just used household scissors.
Then we will screw them in to the connector provided with the blades. The polarity is drawn on the back of the blade, the black cables are grounds (-ve), the yellow is (+ve). Depending on which type of connector you are using, there will be multiple of both. Use as many as you can fit, and you can use both ports for each polarity.
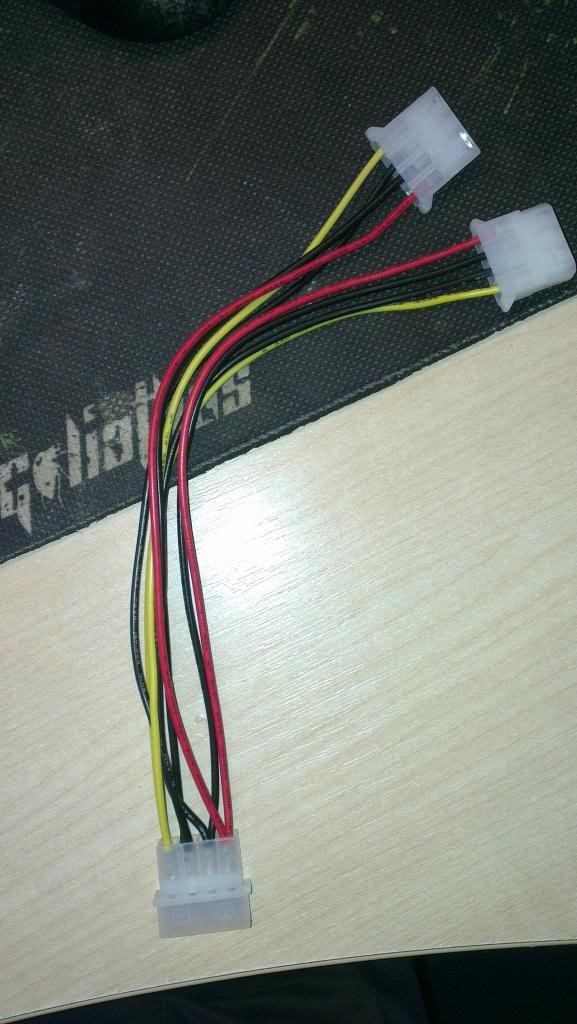
Wire prep for molex connectors. Remember, we still prefer PCI-E or ATX motherboard extenders:
Then we will screw them in to the connector provided with the blades. The polarity is drawn on the back of the blade, the black cables are grounds (-ve), the yellow is (+ve). Depending on which type of connector you are using, there will be multiple of both. Use as many as you can fit, and you can use both ports for each polarity.
Wire prep for molex connectors. Remember, we still prefer PCI-E or ATX motherboard extenders:
|
|
|
|
|
|
|
1b) Powering V2s
V2 blades can be plugged into a backpane. The backpane can then be powered as above by two screw terminals [one set for 12V +ve and one for ground -ve], or by a server PSU:
V2 blades can be plugged into a backpane. The backpane can then be powered as above by two screw terminals [one set for 12V +ve and one for ground -ve], or by a server PSU:
|
Server PSU:
For 4 blades: For 6 blades: |


|


|


|
|


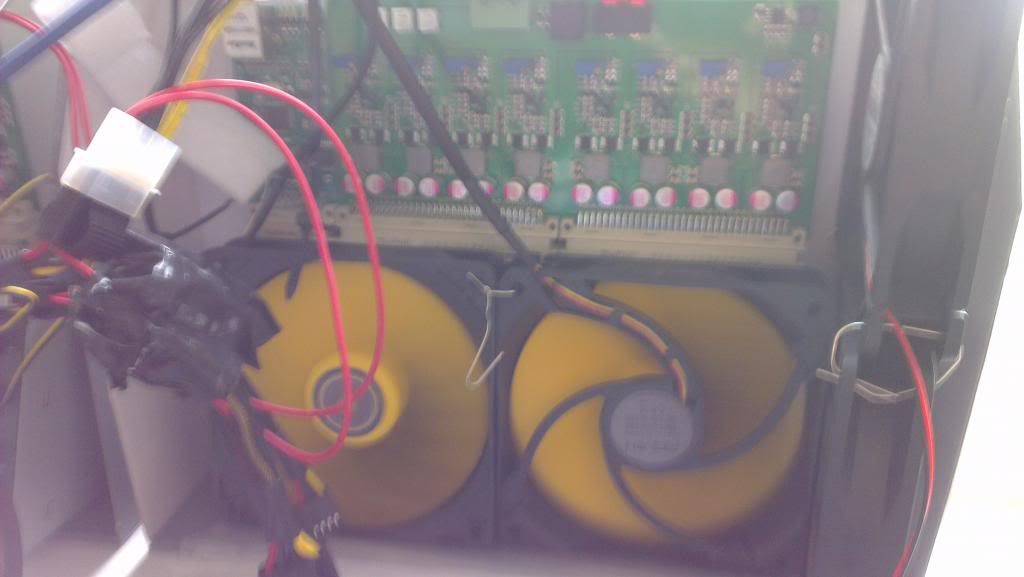
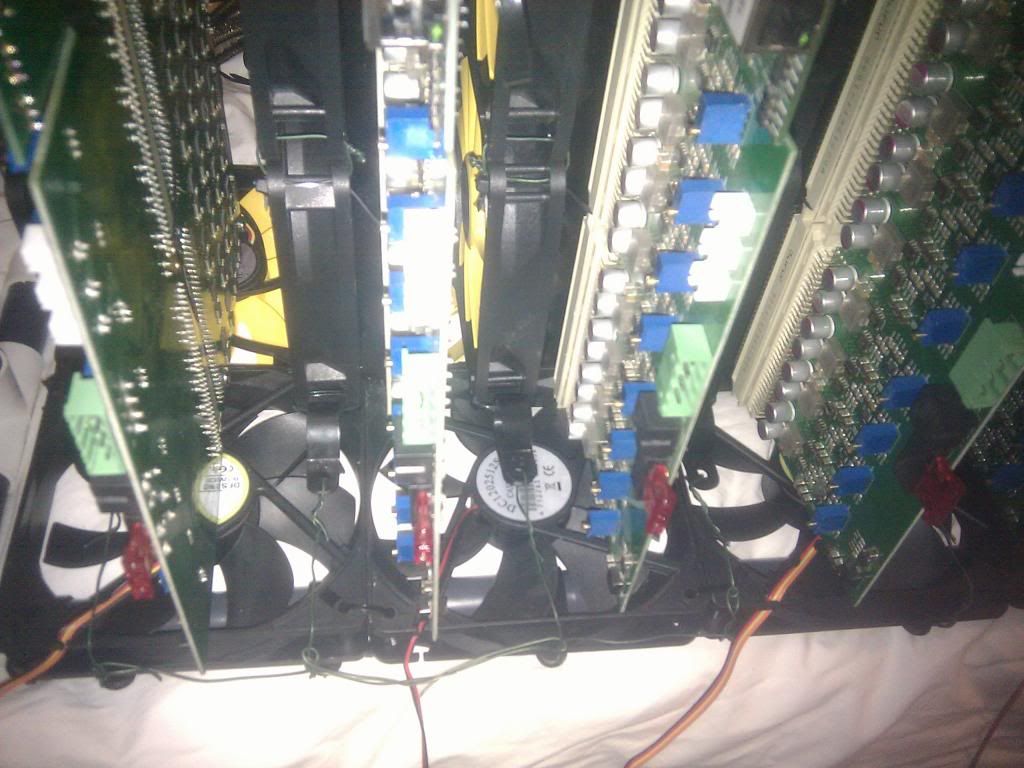
2) Cooling
We want high CFM fans, but also the ability to control them to reduce excessive noise (+power consumption and heat). If you have access to box fans, use them! They are cheap, easy to move and can cool 4-8 blades at once.
We want high CFM fans, but also the ability to control them to reduce excessive noise (+power consumption and heat). If you have access to box fans, use them! They are cheap, easy to move and can cool 4-8 blades at once.
|
Box Fan:
|

|

|

|
|

Else, use the configuration I have, a fan controller per two blades, and 2x120mm fans.
|
Fan Controller:
120mm Fans: |


|


|


|
|


|
|
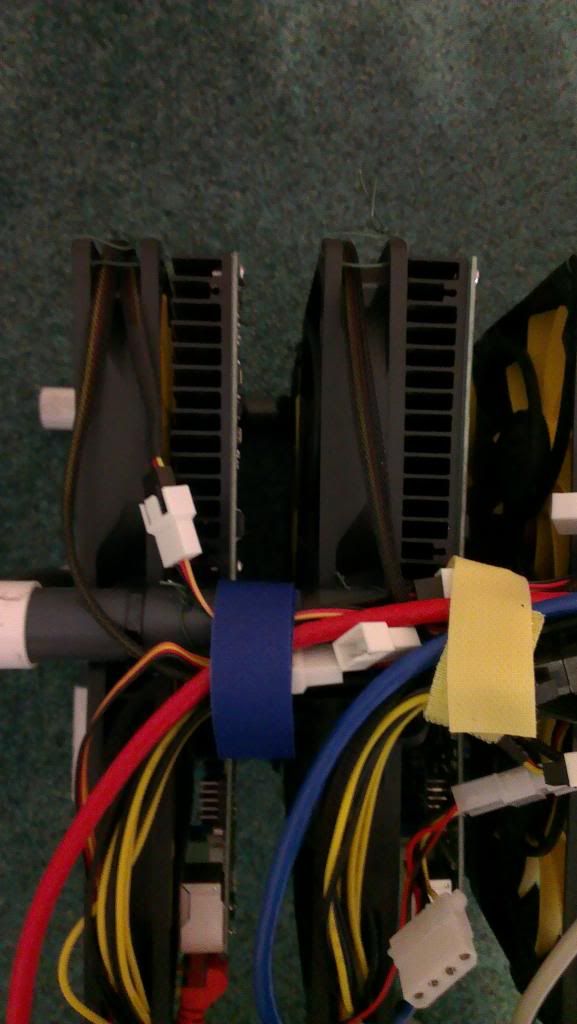
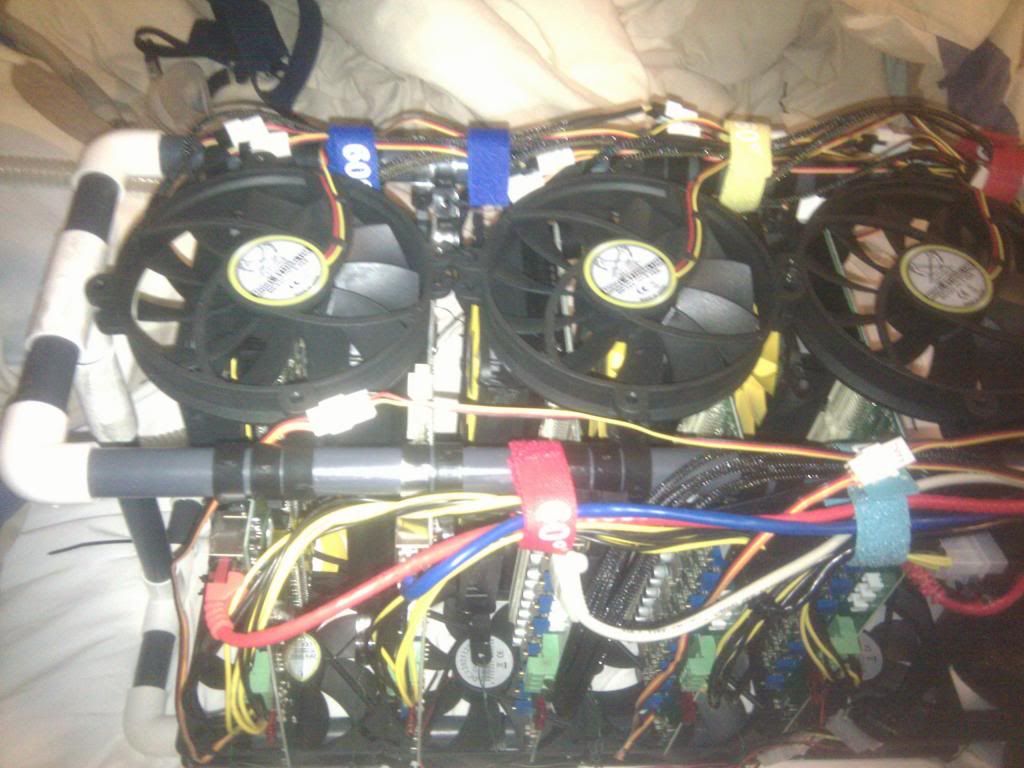
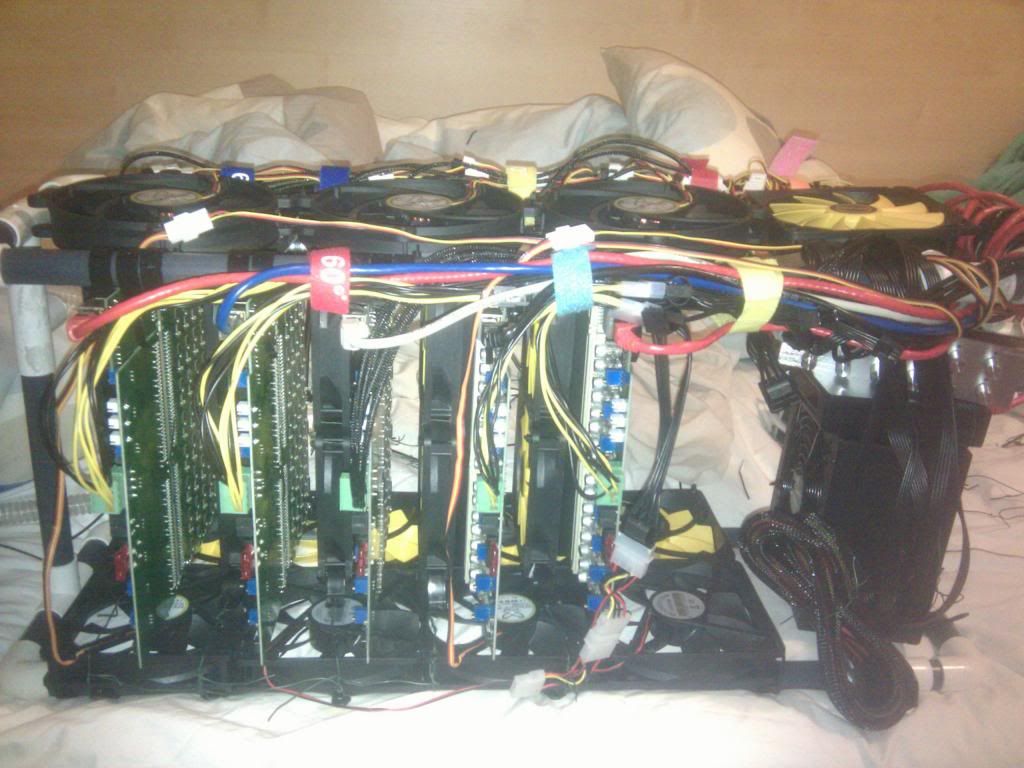
3) Mounting
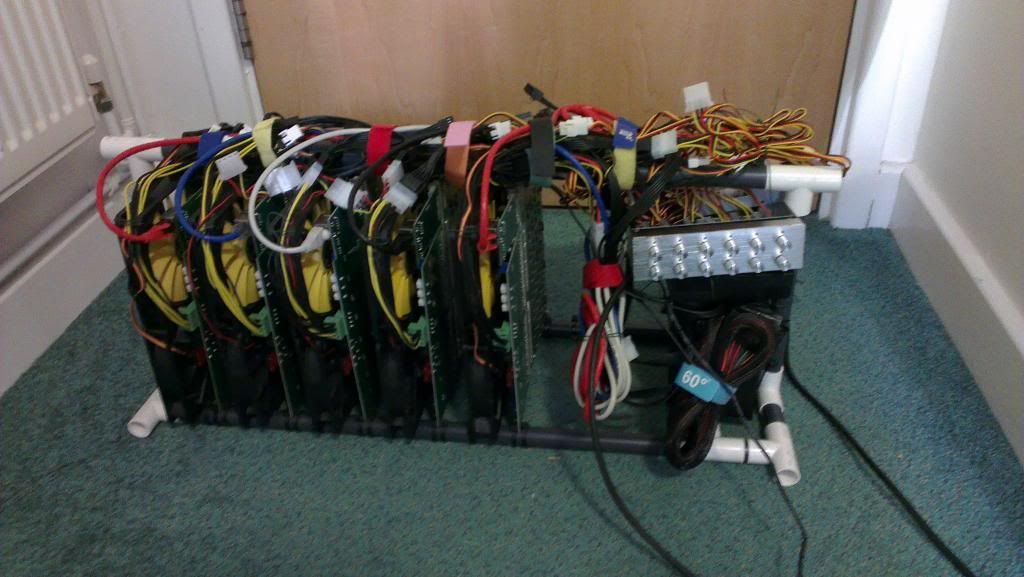
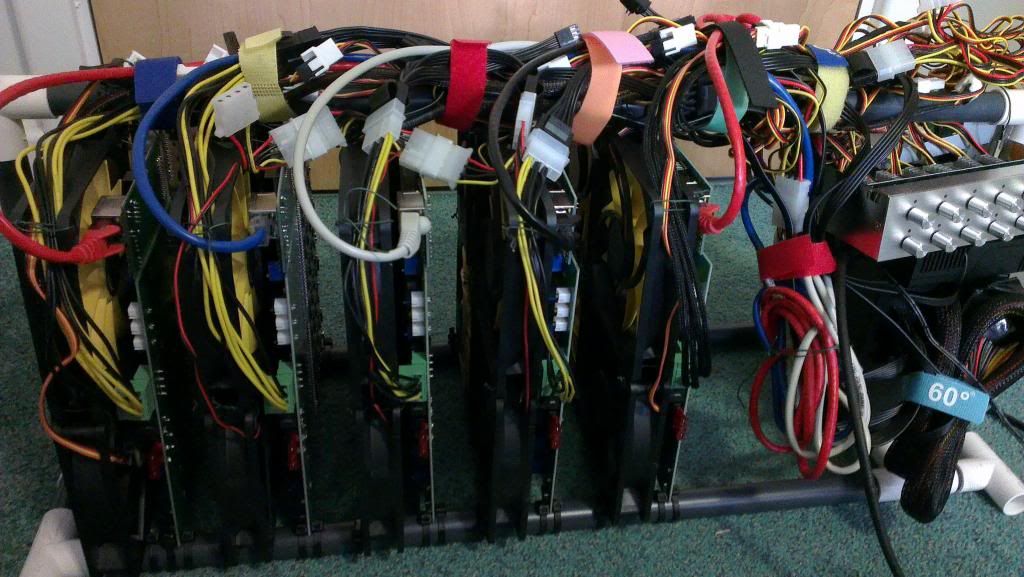
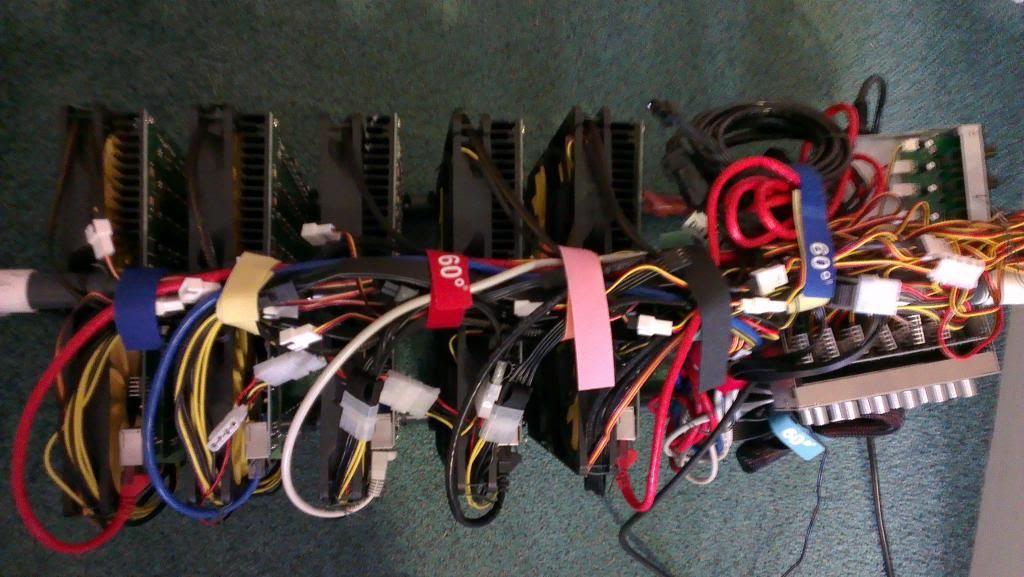
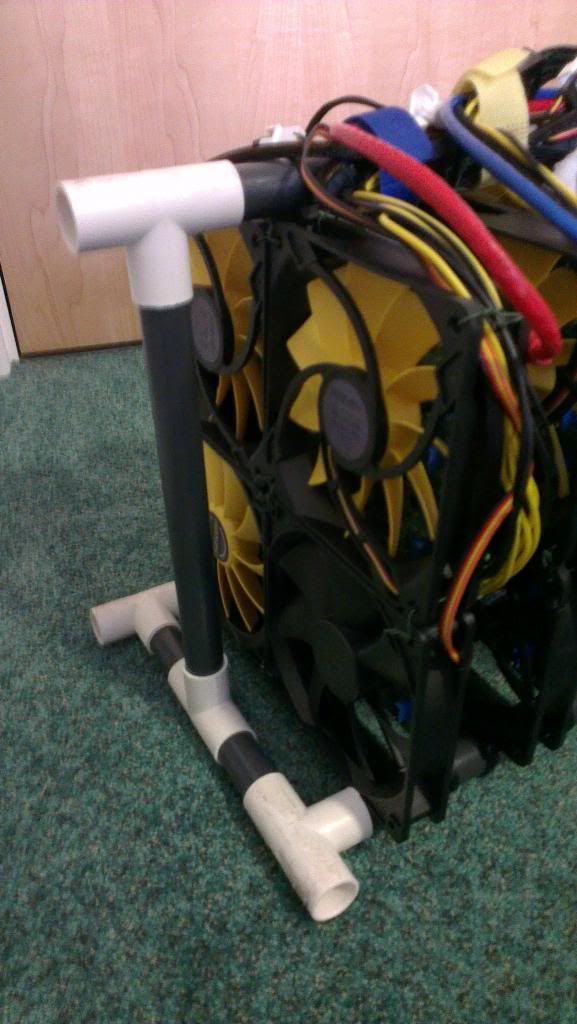
This is the hardest part for V1 blades. V2 blades should really be mounted on a back panel and V3 are self mounting. I've tried lots of different configurations for V1 and the one I've found the best is mounting it vertically, using drawers. You'll also need about 5 paper-clips per blade, and maybe 10 long cable ties.
We need to mount the blades vertically as the back of the blades get hot and need cooling to. Its easier to see how I've done it with pictures:

|
|
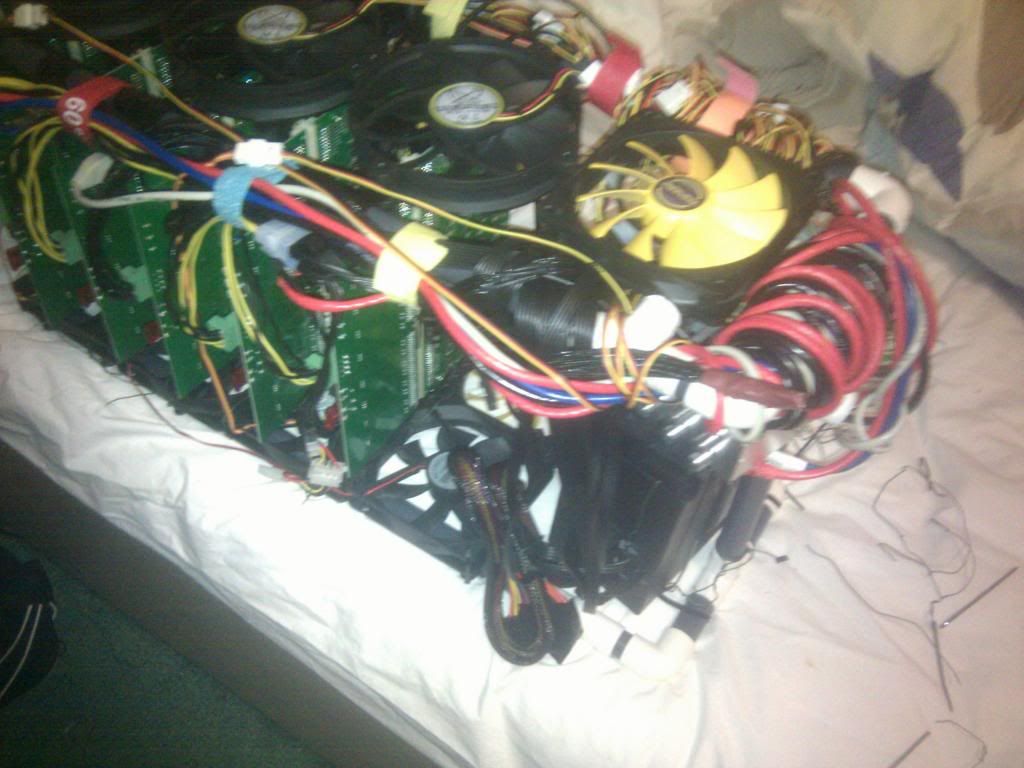
Alternatively you could mount them in a frame but this gets more complicated.

|
|
|
|
|
Or even a wind tunnel. [Americans can just buy box fans, us Europeans aren't so lucky!

|
|
|
|
4) Configuration
If you want to change pool, create a .bat file in notepad (save as .bat). Move the stratum proxy to the location below and put the following text inside for your choice of pool. Change pool port and address for different pools.
- Power on as above.
- Plug in a network cable from the blade to your router. USB is for debugging only and serves no function for us.
- Change your router's subnet to 1, ie 192.168.1.x. This is just temporary. If this is not possible, see below indented steps.
- Plug in a network cable from the Cube to your computer.
- Disable Wifi if applicable.
- Navigate to Control Panel -> Network and Sharing Centre -> Change Adapter Settings
- Right click on your ethernet adapter -> Properties
- Click on "Internet Protocol Version 4" and click properties
- Select "Use the following IP address" and enter the following:
- IP Address: 192.168.1.1, Subnet Mask: 255.255.255.0, Default Gateway: 192.168.1.254
- Resume normal steps.
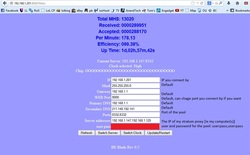
- Using a browser, navigate to 192.168.1.254:8000 - this goes to the blades's configuration page.
- Change the IP to something memorable like .200. If you have multiple blades, connect them one by one and change to .200, .201 etc as you go. If you don't you'll have conflicting IPs. You can also change your subnet back now if you want to.
- Bladesuse the extinct getwork protocol and so we need to use a stratum proxy. Download the proxy and open the file.
- On the blade config page, enter the server address the IP of the computer with the stratum proxy on. Enter it twice as the cube needs two pools to start mining, ie "192.168.1.102,192.168.1.102". If you are unsure what IP your computer is at, open cmd and type "ipcongif /all".
- Username and password is for Slush's pool, stick with that for now. Again enter it twice, user:password,user:password.
- Click update, then navigate back to the IP of the bladeyou set using a browser.
- [V1s only] Set clock to high by hitting change clocks.
If you want to change pool, create a .bat file in notepad (save as .bat). Move the stratum proxy to the location below and put the following text inside for your choice of pool. Change pool port and address for different pools.
cd C:\Program Files (x86)\Proxy
mining_proxy.exe -o mint.bitminter.com -p 3333
cd C:\Program Files (x86)\Proxy
mining_proxy.exe -o us1.ghash.io -p 3333
cd C:\Program Files (x86)\Proxy
mining_proxy.exe -o stratum.mining.eligius.st -p 3334
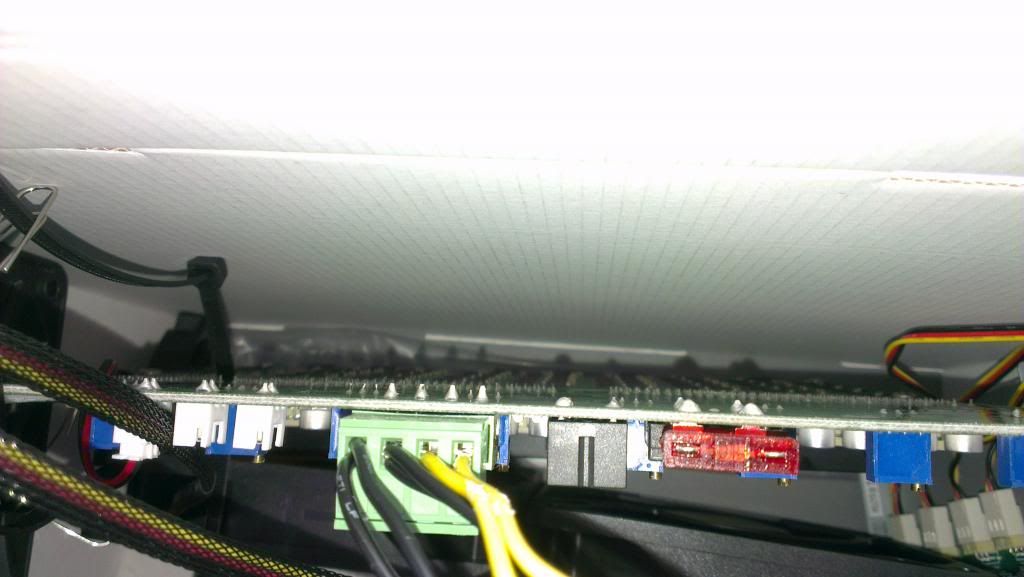
Final configuration should look like this:
|
|
5) Troubleshooting
|
Problem
Three or for "x" in a row on "Chips". More than two "x" scattered on "Chips". Hashrate turns to zero and all "x". The blade misreports the hashrate to a very high number but hashes at a very low speed. I need to reset my blade. My cables are braided or aren't color coded. I still can't get it to work! |
Solution
- The corresponding power lane does not work or is not supplying enough voltage. Try measuring each power lane to find the dysfunctional lane and tuning it higher. If it doesn't work please ask us to send you a new power module. - Some of the chips could not work on high clock in the current voltage. Try tuning the voltage of the whole power module a little higher. If it doesn't work please downclock to Low. - Either the power module is broken or the whole blade has some problems. If you bought more than one blade, try using another functional ones' power module to see if it fixes the problem. If so, ask friedcat to send you a new power module. If not, please return the blade to friedcat, who will send you a new one and cover shipping costs. - Most probably it's the problem with the ethernet controller. Try hardware-rest as shown shown below. If it doesn't work please ask friedcat to send you a new ethernet controller. It may also be caused by the failure of the hashing board. If so, ask friedcat to send you a new power module. If not, please return the blade to friedcat, who will send you a new one and cover shipping costs. - See diagrams for V1 and V2 blades to find which two pins to short with a paper clip. - See below diagram for pin-outs. 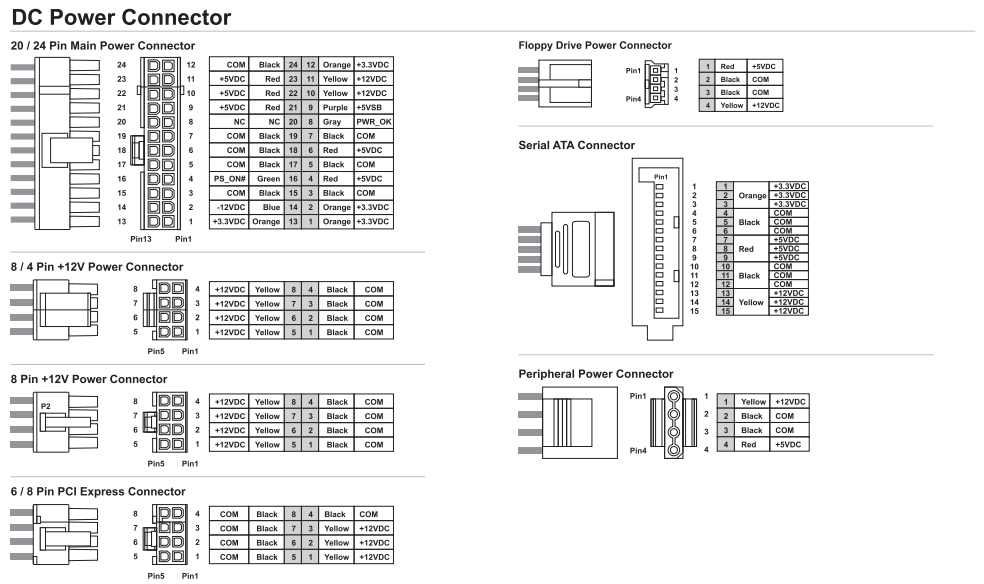
- Post a screenshot here with your cube's configuration page, cmd with ipconfig /all and your stratum proxy.
|
Disclaimer: No warranty is provided with this information. It is your own responsibility if you or your property are injured or damaged following the information.
6) Where to buy


|
|
|