Technobit HEX16B Setup Guide
Contents:
0a) What to expect?
0b) What you need
1) Powering
2) Cooling
3) Mounting
4a) Configuration (TL-MR3020)
4b) Configuration (Windows PC)
4c) Configuration (RapsberryPi)
5) Troubleshooting
6) Where to buy
0a) What to expect?
0b) What you need
1) Powering
2) Cooling
3) Mounting
4a) Configuration (TL-MR3020)
4b) Configuration (Windows PC)
4c) Configuration (RapsberryPi)
5) Troubleshooting
6) Where to buy
0) What to expect
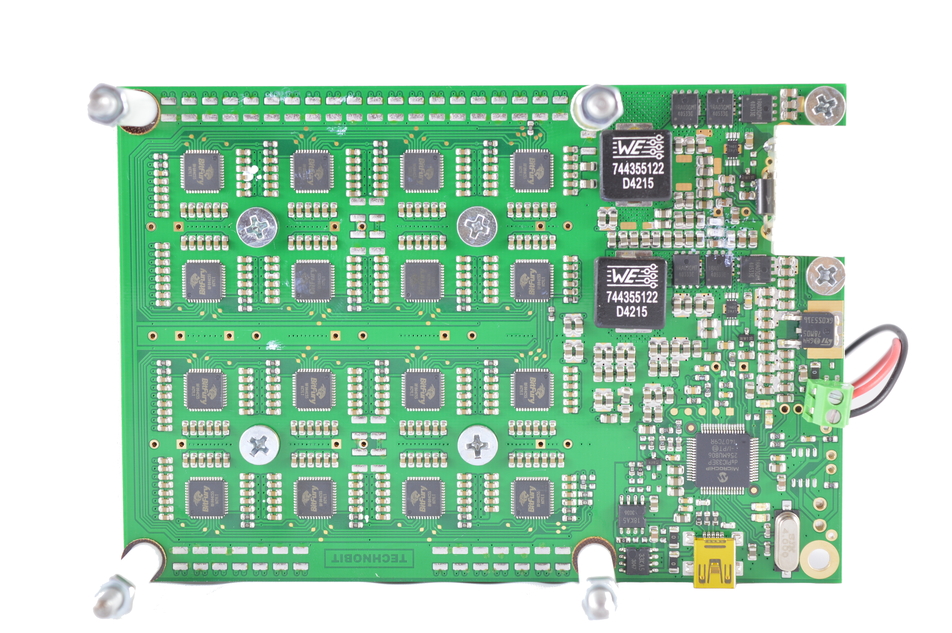
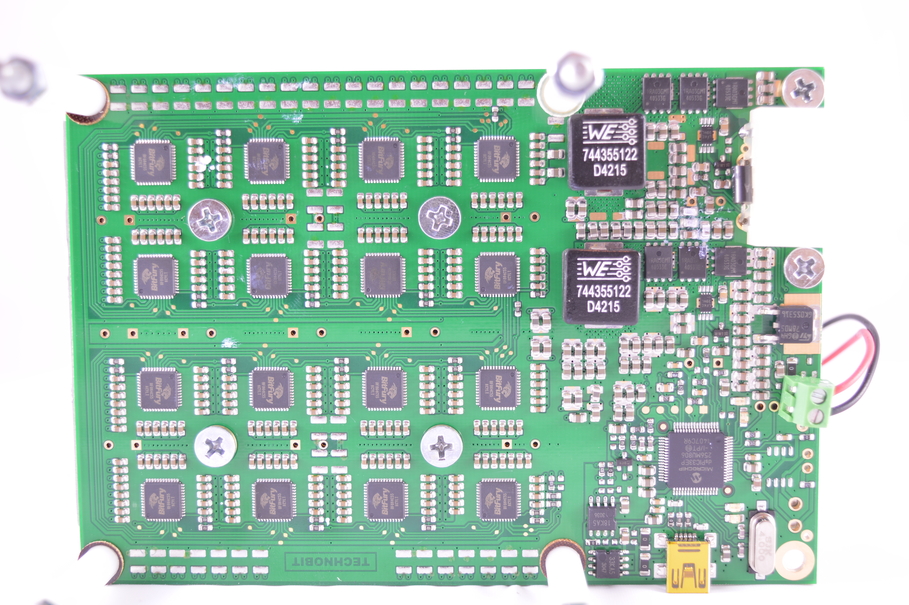
The Technobit HEX16B is a blade style ASIC mining board utilising 16 Bitfury Gen 2 chips. An external controller is required - this can be a TL-MR3020 router with custom WRT firmware, a Raspberry Pi with Raspian or a windows based PC.
Per mining board:
Chips - 16x Bitfury Gen 2s
Hashrate - ~60GH
Power.Consumption - 85W
0b) What you need
You will need one of the following sets:
Using a TP-LINK as controller (recommended):
OR using a PC as controller:
OR using a Raspberry Pi as controller:
AND
You will need one of the following sets:
Using a TP-LINK as controller (recommended):
- A TP-LINK TL-MR3020 router.
- A network cable.
- A USB to mini USB cable.
- Another USB to mini USB cable or mains to mini USB cable.
OR using a PC as controller:
OR using a Raspberry Pi as controller:
- A Raspberry Pi.
- A Raspberry Pi case.
- A Raspberry Pi heatsink.
- An 8GB SDHC class 10 card.
- A powered USB hub.
- A micro USB power supply.
- A HDMI to DVI / HDMI to HDMI cable (depending on your monitor).
- An SD card reader would be beneficial.
- A network cable.
- A USB to mini USB cable.
AND
- A power supply (see next section)
1) Powering
As with all blade style miners, the HEX16B does not come with a power supply. You will need a typical computer PSU with:
As with all blade style miners, the HEX16B does not come with a power supply. You will need a typical computer PSU with:
- 1x molex per mining card
- At least 10A on the/each 12V rail per mining card
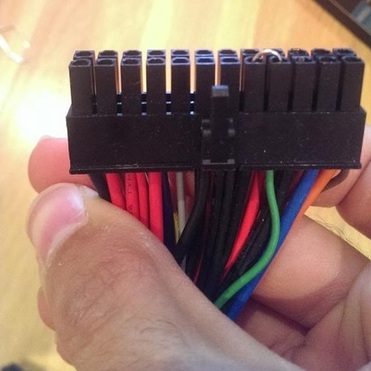
We need to tell the PSU to always be on, as there isn't a motherboard to do this.
- Cut a paperclip into a U and insert it into the green wire and to either black wire either side of the green wire. Tape it up for safety.
- Plug 2x PCIE 6 pin into each blade. I would recommend running each PCI-E connector from a different cable rail when overclocking.
- Plug the PSU into the mains.
- The power supply will now be controlled by its switch on the rear socket.
2) Cooling
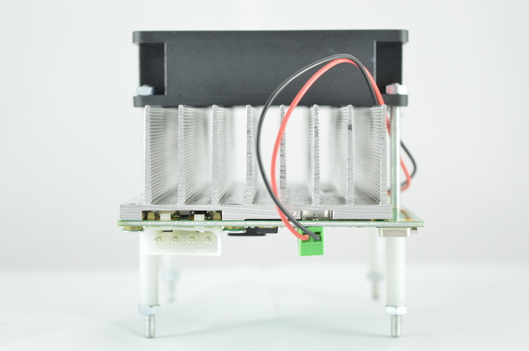
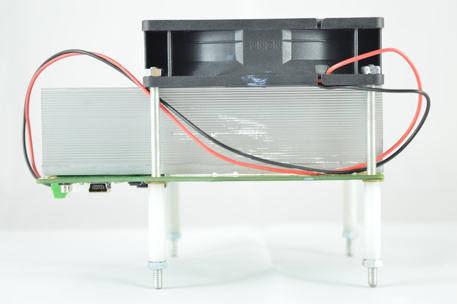
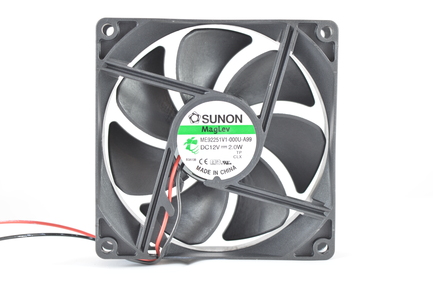
Mining boards come with one bottom side, oversize aluminium heatsink with a Sunon Maglev ME92251V1-000U-A99 92mm fan. Noise levels are very reasonable at 32 dBA while pushing 51.5 CFM.
Mining boards come with one bottom side, oversize aluminium heatsink with a Sunon Maglev ME92251V1-000U-A99 92mm fan. Noise levels are very reasonable at 32 dBA while pushing 51.5 CFM.
|
|
3) Mounting
Technobit HEX16Bs are fully stackable and come with long standoffs. Dimensions of the blade mining card are 235 x 90 x 100 mm.
Technobit HEX16Bs are fully stackable and come with long standoffs. Dimensions of the blade mining card are 235 x 90 x 100 mm.
4a) Configuration (TL-MR3020)
An external controller is required which can be a TP-LINK TL-MR3020 router, a Raspberry Pi with Raspian or a Windows based PC.
Using a modified TP Link MR3020
An external controller is required which can be a TP-LINK TL-MR3020 router, a Raspberry Pi with Raspian or a Windows based PC.
Using a modified TP Link MR3020
- Power on as above.
- Plug in a USB to mini USB cable from the HEX8A1 to the TL-MR3020.
- Plug in a network cable from the TL-MR3020 to your router.
- Plug in your TL-MR3020's power cable - this can either be a USB to mini USB cable or mains to mini USB. ~0.3A @ 5V is required.
- Flash Technobit's custom WRT firmware (or purchase their preflashed TL-MR3020)
- Change your router's subnet to 0, ie 192.168.0.x. This is just temporary. If this is not possible, see below indented steps.
- Plug in a network cable from the TL-MR3020 to your computer.
- Navigate to Control Panel -> Network and Sharing Centre -> Change Adapter Settings
- (If applicable) Right click on your wifi adapter -> Disable.
- Right click on your ethernet adapter -> Properties
- Click on "Internet Protocol Version 4" and click properties
- Select "Use the following IP address" and enter the following:
- IP Address: 192.168.0.1, Subnet Mask: 255.255.255.0, Default Gateway: 192.168.0.99
- Resume normal steps.
- Navigate to 192.168.0.99/ from a browser window.
- Login with default username "root" and NO password.
- Navigate to Network -> Interfaces and click edit.
- Change protocol to DHCP client, click Save and Apply.
- (If applicable)At this point you can plug the TL-MR3020 back into your router and reset your computer settings.
- Navigate to your router and look up list of clients. Find the IP the TL-MR3020 has now been assigned and navigate to that with a browser window.
- Login if prompted and navigate to Status -> Cgminer Configuration.
- Enter pool information and miner details as in the format below.
- Click save and apply, then navigate to Status -> Cgminer Status to check mining has started.
stratum+tcp://mint.bitminter.com:3333
stratum+tcp://us1.ghash.io:3333
stratum+tcp://stratum.mining.eligius.st:3334
4b) Configuration (Windows PC)
Using a Windows based PC
Using a Windows based PC
- Plug in a USB to mini USB cable from the HEX8A1 to your Windows based PC/laptop.
- Windows will try and install its own drivers. Wait until it finishes.
- Download the Zadig tool and run it.
- Choose the HEX8A1 and "WinUSB". Click install driver.
- Once installed, you may have to restart.
- Download this specific version of cgminer and extract it.
- Edit cgminer.conf using notepad, with your pool and miner information in it, an example as below.
- Run cgminer.exe to start mining.
{
"pools" : [
{
"url" : "stratum.btcguild.com:3333",
"user" : "dogie_HEX8A1",
"pass" : "123"
},
{
"url" : "eu-stratum.btcguild.com:3333",
"user" : "dogie_HEX8A1",
"pass" : "123"
}
]
,
"expiry" : "120",
"hotplug" : "5",
"log" : "5",
"no-pool-disable" : true,
"queue" : "1",
"scan-time" : "60",
"set_default_to_c" : false,
"set_default_to_b" : false,
"set_default_to_8" : false,
"hexminera-voltage" : "1340",
"hexminera-options" : "16:450",
"hexminerb-voltage" : "900",
"hexminerb-options" : "16:540",
"hexminerc-voltage" : "1020",
"hexminerc-options" : "16:1300",
"hexminer8-set-diff-to-one" : "0",
"hexminer8-chip-mask" : "255",
"hexminer8-voltage" : "1000",
"hexminer8-options" : "8:260",
"kernel-path" : "/usr/local/bin"
}
BTCGuild
stratum.btcguild.com:3333
GHash IO
us1.ghash.io:3333
- This line will open up a file editor. Enter the line below to the end of the code in the file.
- Once finished, press Ctrl + x to exit, Y to confirm and enter to save.
@/usr/bin/lxterminal --geometry=90x35 -e sudo ./cgminer/cgminer -c /home/pi/cgminer/nominal.conf
Eligius
stratum.mining.eligius.st:3334
4c) Configuration (Raspberry Pi)
Using a Raspberry Pi
You will need the following:
Using a Raspberry Pi
You will need the following:
- A Raspberry Pi.
- A Raspberry Pi case.
- A Raspberry Pi heatsink.
- A 8GB SDHC class 10 card.
- A powered USB hub.
- A micro USB power supply.
- A HDMI to DVI / HDMI to HDMI cable (depending on your monitor).
- An SD card reader would be beneficial.
- A network cable.
- Power on as above.
- Put SD card into another computer.
- Download Raspbian OS
- Download Win32 Disk Imager and use it to flash SD card with Raspbian.
- Put the SD card into the Raspbery Pi.
- Plug in the following:
- An ethernet cable from the Raspberry Pi to your router.
- A HDMI to DVI / HDMI to HDMI cable from the Raspberry Pi to your monitor.
- An external USB hub to Raspberry Pi.
- A USB mouse and keyboard into the USB hub.
- A micro USB power adapter into Raspberry Pi - this will boot it up.
- Once booted, a first time config will pop up
- Run expand_rootfs
- Run configure_keyboard to put your local layout on (it defaults to UK).
- Run update to get the latest files.
- Boot to desktop.
- Open "LX Terminal". Type the following commands, one line at a time. Press enter after each one.
sudo apt-get update
sudo apt-get install libusb-1.0-0-dev libusb-1.0-0 libcurl4-openssl-dev libncurses5-dev libudev-dev
wget http://ck.kolivas.org/apps/cgminer/4.2/cgminer-4.2.2.tar.bz2
tar xvf cgminer-4.2.2.tar.bz2
mv /home/pi/cgminer-4.2.2/ /home/pi/cgminer/
cd cgminer
wget https://www.dropbox.com/s/1kspms3gw0336du/5ed45a0d7a3bd71ed1b8726e5f1cdac55bf68196.patch
patch -p1 < 5ed45a0d7a3bd71ed1b8726e5f1cdac55bf68196.patch
./configure --enable-hexminera --enable-hexminerb --enable-hexminerc --enable-hexminer8 --hexminer8-set-diff-to-one 0 --hexminer8-chip-mask 255 --hexminer8-voltage 1000 --hexminer8-options 8:260 --hexminera-voltage 1340 --hexminera-options 16:450 --hexminerb-voltage 900 --hexminerb-options 16:1300 hexminerc-voltage 1020 --hexminerc-options 16:1300
sudo make
- Now enter 'sudo shutdown now' to turn the Pi off.
- Plug in a USB to mini USB cable from the HEX8A1 to an externally powered USB hub.
- Plug in the USB hub to the Pi and plug in its power supply.
- Turn on your power supply with its rear switch. Your power supply's fan should turn on gently.
- Turn the Pi back on (unplug and plug in its power cable).
- When back on desktop, reopen "LX Terminal".
- Enter the following code and click enter to start mining.
sudo nohup /home/pi/cgminer/cgminer -c /home/pi/cgminer/cgminer.conf
- If cgminer comes up and works fine, let it run for 5 minutes and check your hardware.
- Then reboot again with "sudo restart".
- Once booted up, enter the following command into "LX Terminal".
sudo nano /etc/xdg/lxsession/LXDE/autostart
- This line will open up a file editor. Enter the line below to the end of the code in the file.
- Once finished, press Ctrl + x to exit, Y to confirm and enter to save.
@/usr/bin/lxterminal --geometry=90x35 -e sudo ./cgminer/cgminer -c /home/pi/cgminer/cgminer.conf
- cgminer will now auto start when the Pi turns on, hurrah!
- Now run the following commands one by one to install the equivalent of TeamViewer.
sudo apt-get install x11vnc
x11vnc -storepasswd
****enter a password****
cd .config
mkdir autostart
cd autostart
nano x11vnc.desktop
- Same as last time, enter the below text at the end, then click Ctrl + X, Y and enter.
[Desktop Entry]
Encoding=UTF-8
Type=Application
Name=X11VNC
Comment=
Exec=x11vnc -forever -usepw -display :0 -ultrafilexfer
StartupNotify=false
Terminal=false
Hidden=false
- Now enter "nano /boot/config.txt"
- Scroll down until you find the line "#hdmi_force_hotplug=1" and delete the "#".
- Ctrl + X, Y and enter to save.
- You can now connect to your Pi externally by downloading TightVNC on your Windows PC and installing. You only need the viewer.
- Open it and enter the IP of your Pi, followed by two colons and then port 5900, ie "192.168.1.85::5900"
- This will auto start whenever the Pi is on.
- Turn off Pi with 'sudo shutdown now'. Unplug monitor, keyboard and mouse and put the Pi along with your miner where you want it to live long term. The Pi only requires wired internet and micro usb power. You can connect remotely from now on and don't need a monitor etc.
|
|
5) Troubleshooting
|
Problem
TBA as problems arise. |
Solution
|
Disclaimer: No warranty is provided with this information. It is your own responsibility if you or your property are injured or damaged following the information.
6) Where to buy
|
|
|

