
Technobit HEX4M Setup Guide
|
Contents
0) Introduction 0b) What You Need 1) Powering 2) Cooling 3a) Configuration (TL-MR3020) 3b) Configuration (Windows PC) 4) Troubleshooting 5) Where to buy |
|
0) Introduction
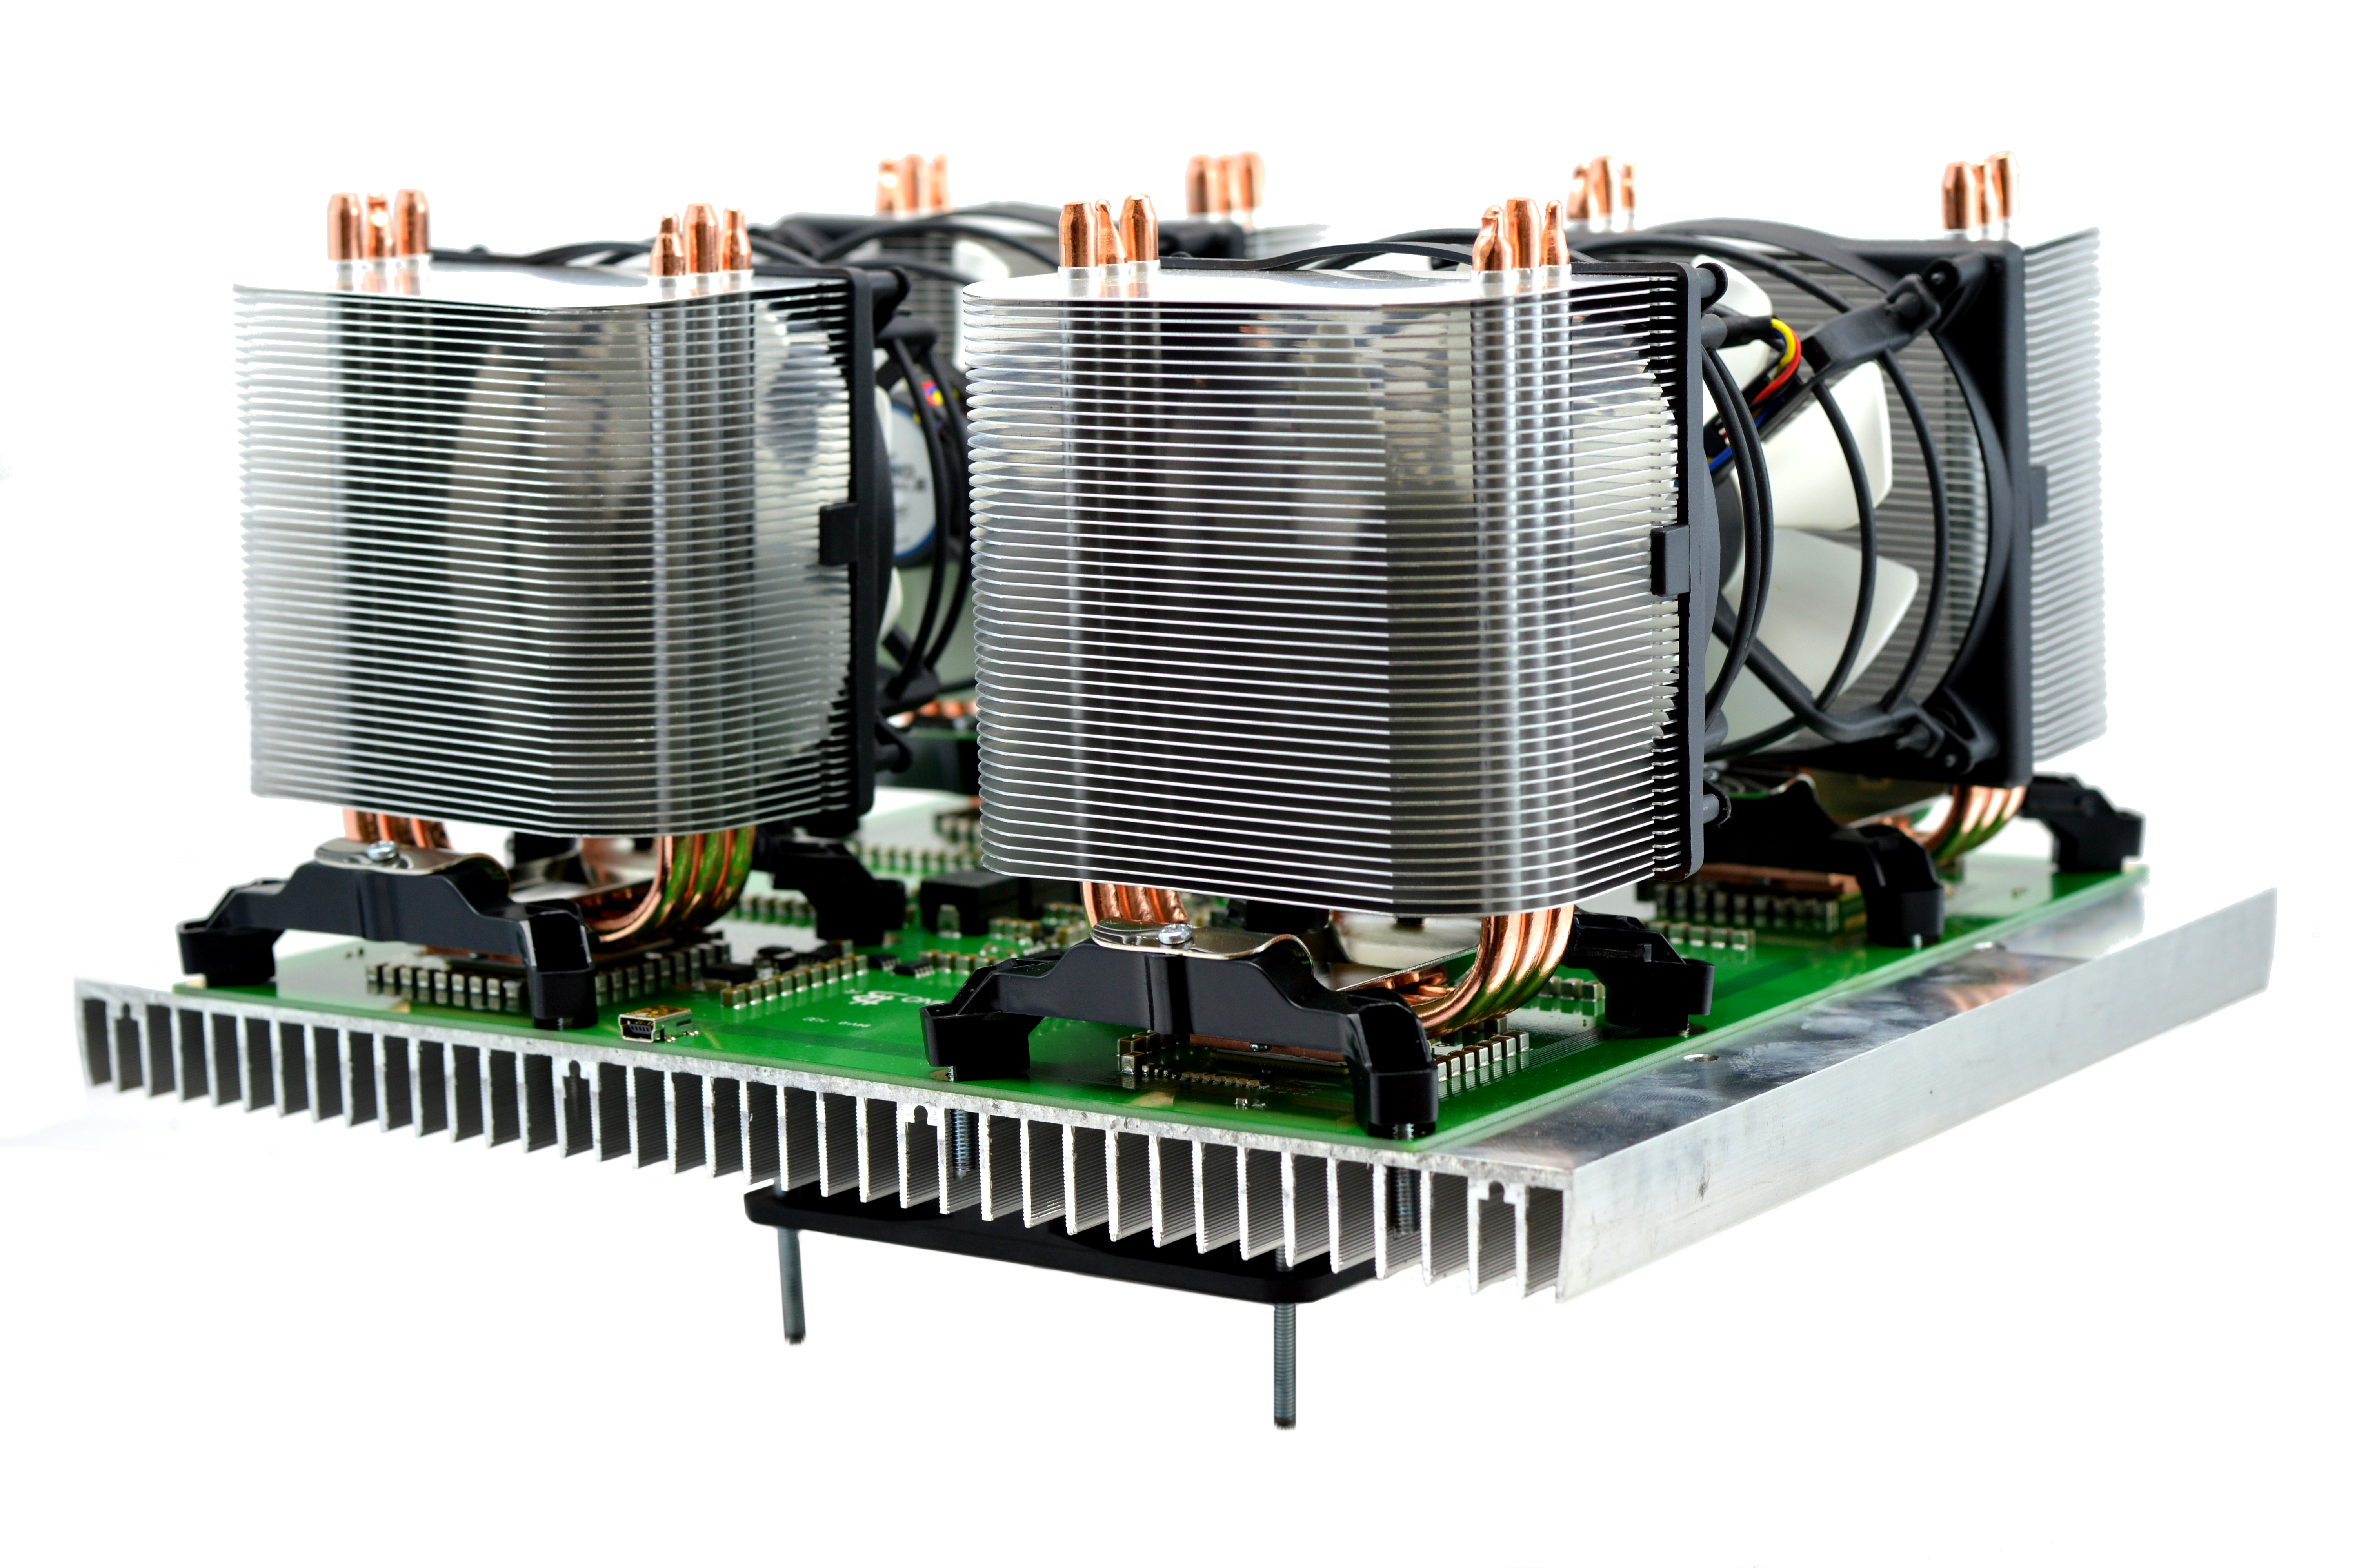
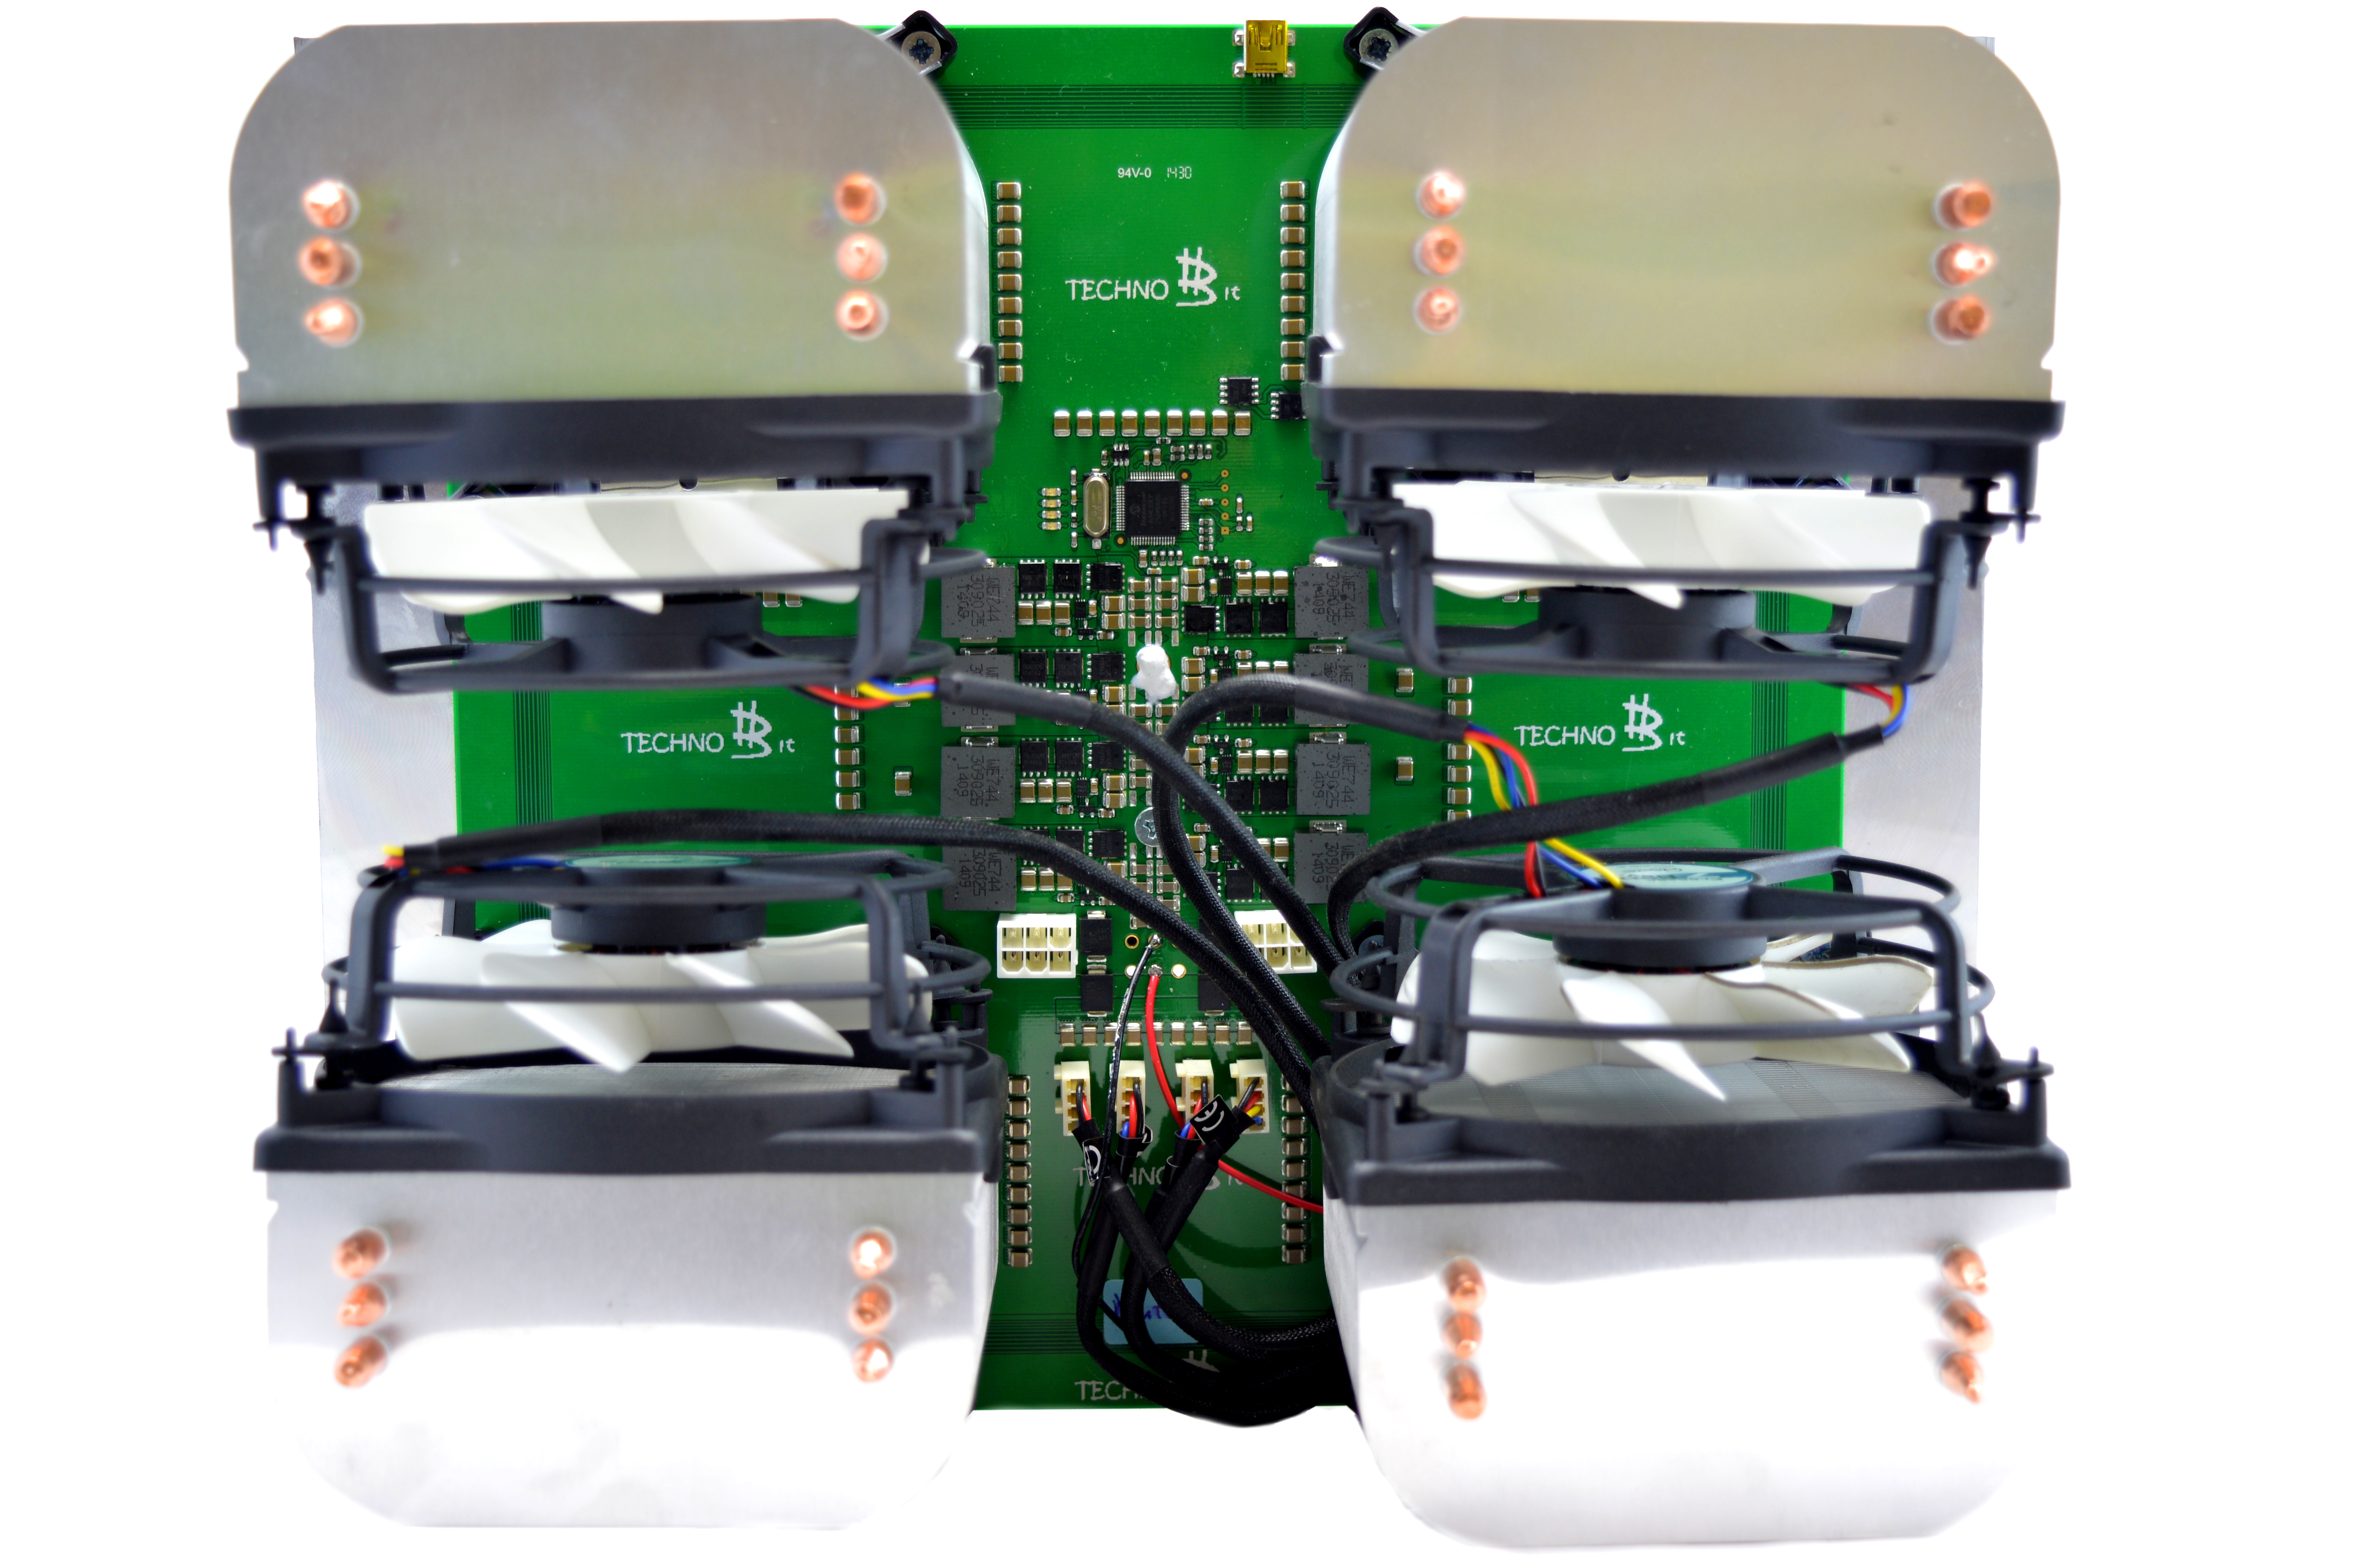
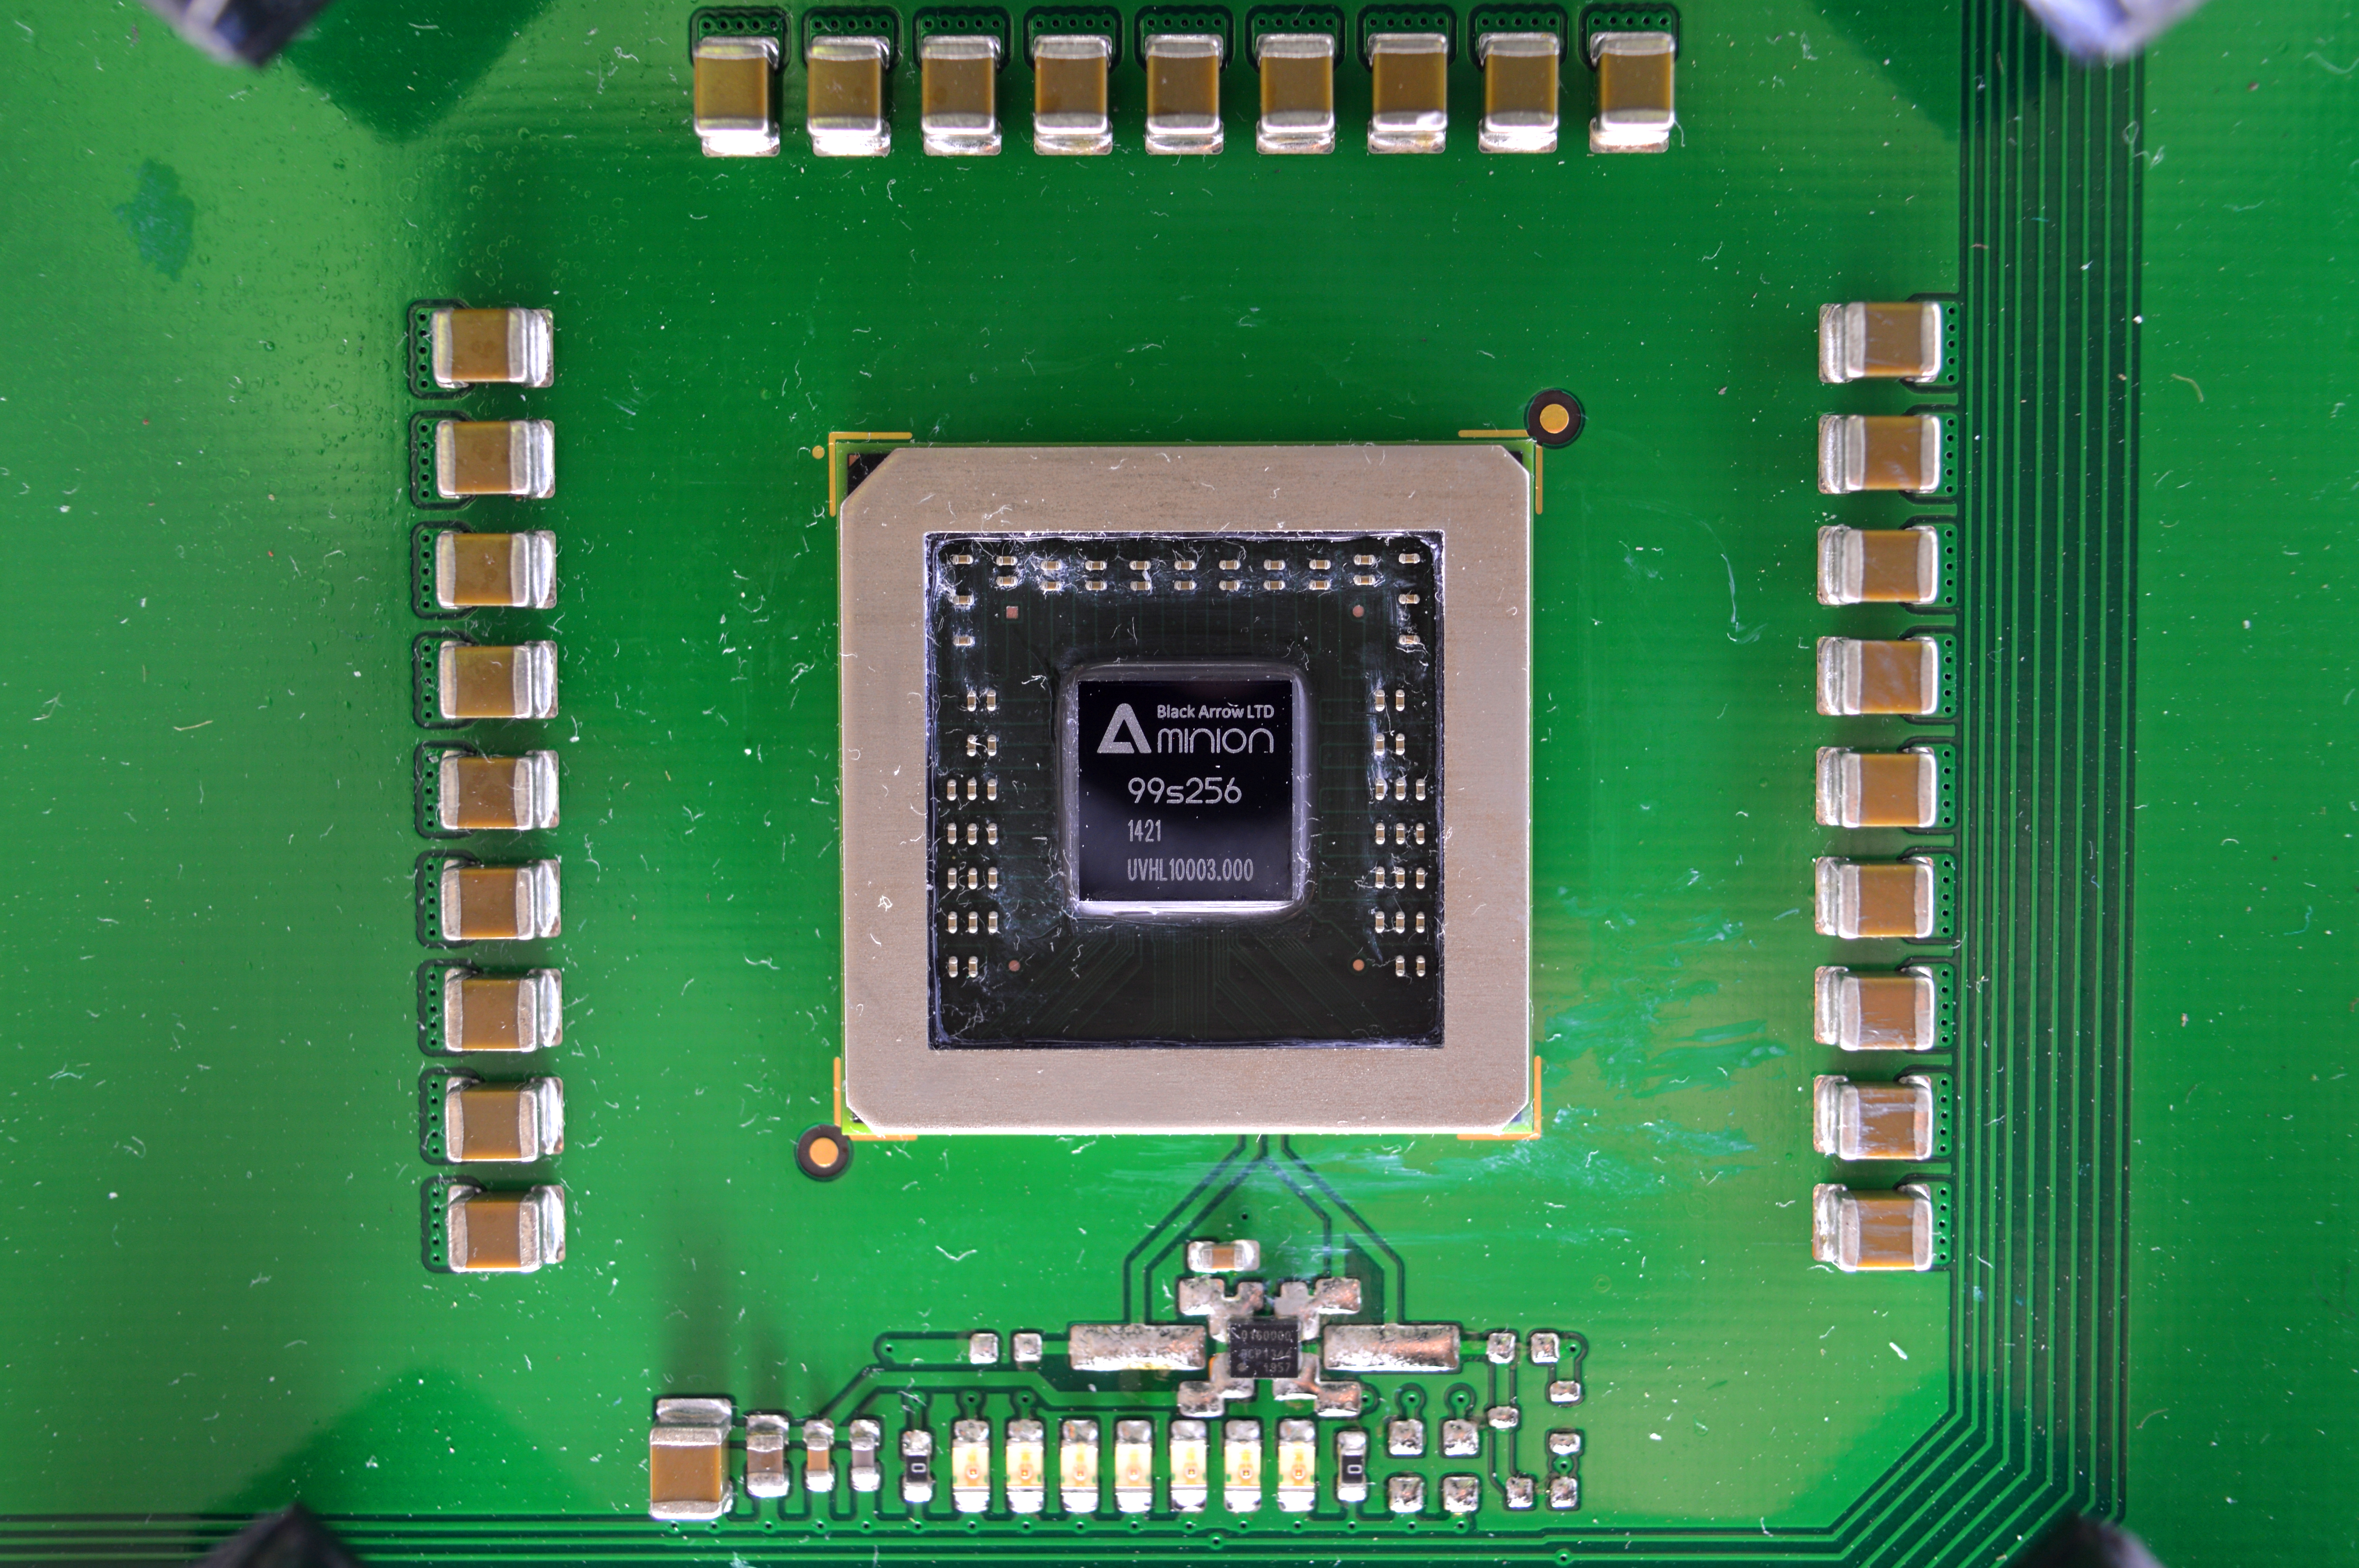
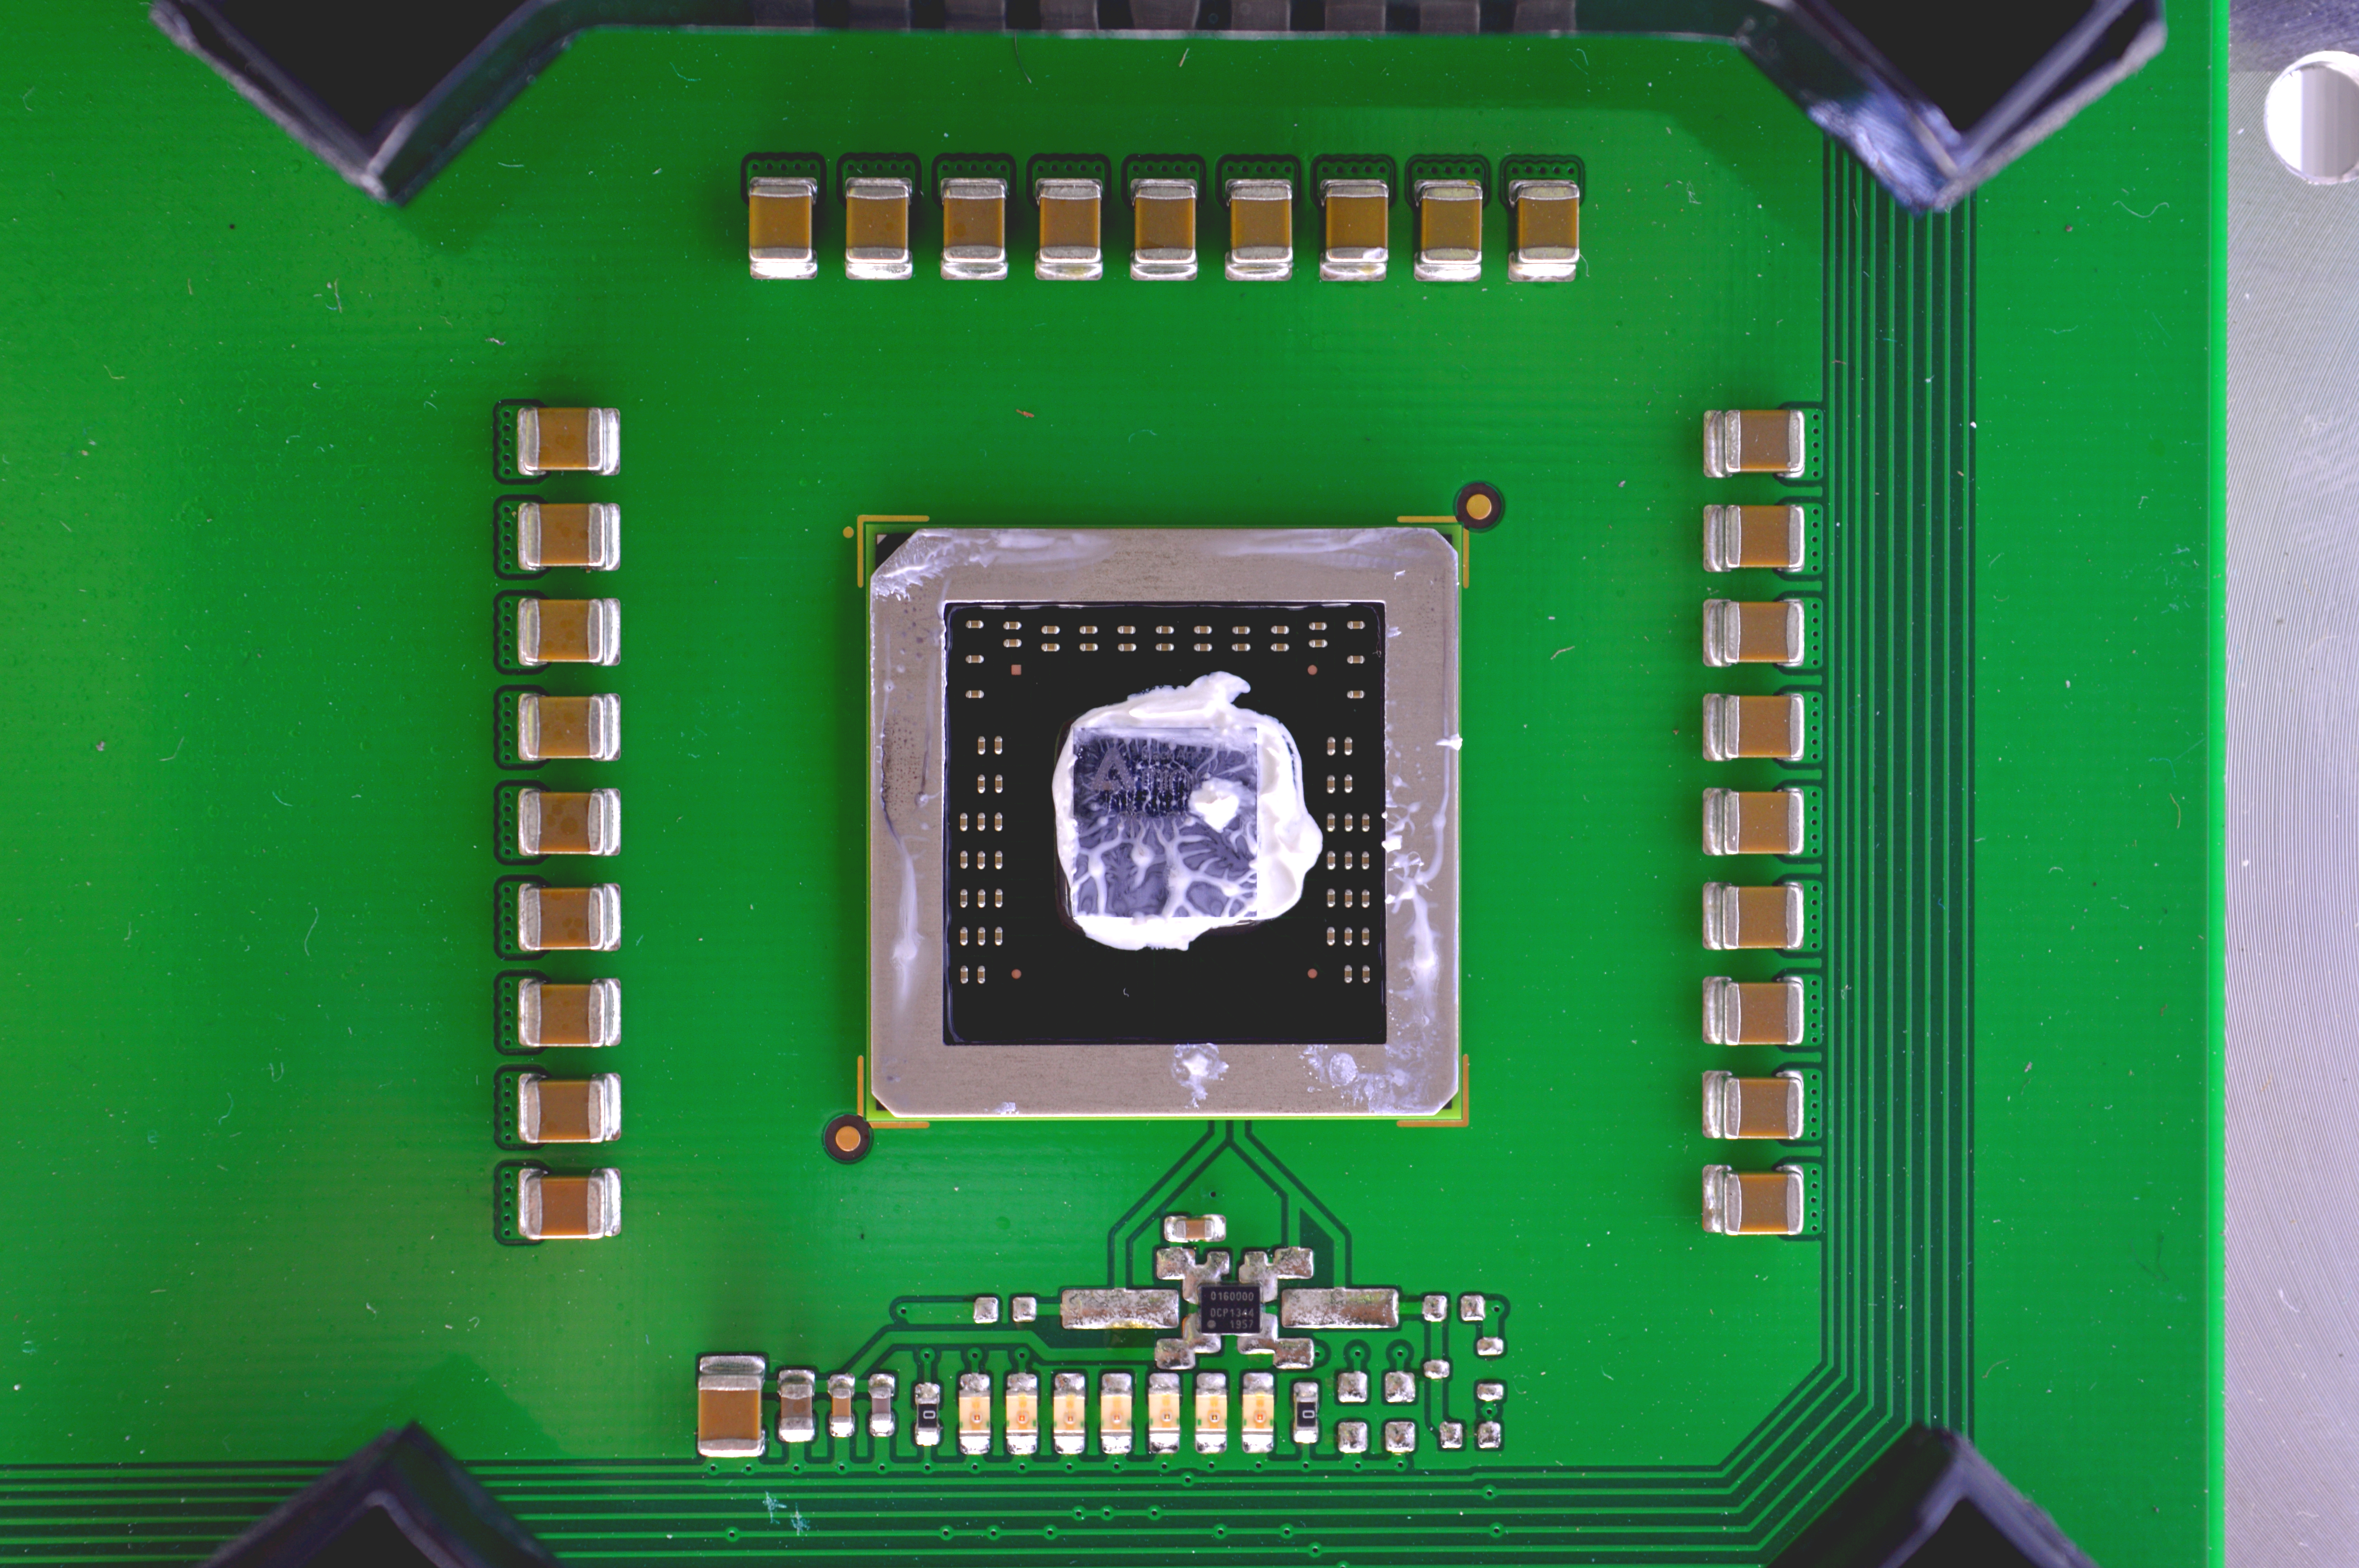
Technobit's HEX4M utilises four of BlackArrow's 28nm ASICs on a single, large PCB. Top side heatsinks are not provided as standard and an external controller in the form of TP-LINK TL-MR3020 or Windows PC is required.
Technobit's HEX4M utilises four of BlackArrow's 28nm ASICs on a single, large PCB. Top side heatsinks are not provided as standard and an external controller in the form of TP-LINK TL-MR3020 or Windows PC is required.
|
Chips
Rated Hash Rate Rated Voltage Rated Current Power Consumption |
- 4x BlackArrow Minion
- 400GH - 12V - 36A - ~430W |
|
|
0b) What You Need
You will need a few accessories, a power supply, four heatsinks and a controller to get started. I recommend getting the controller from Technobit as they will preload it with the latest firmware.
You will need a few accessories, a power supply, four heatsinks and a controller to get started. I recommend getting the controller from Technobit as they will preload it with the latest firmware.
Click your flag to find everything you need to get started at Amazon!


|


|


|
1) Powering
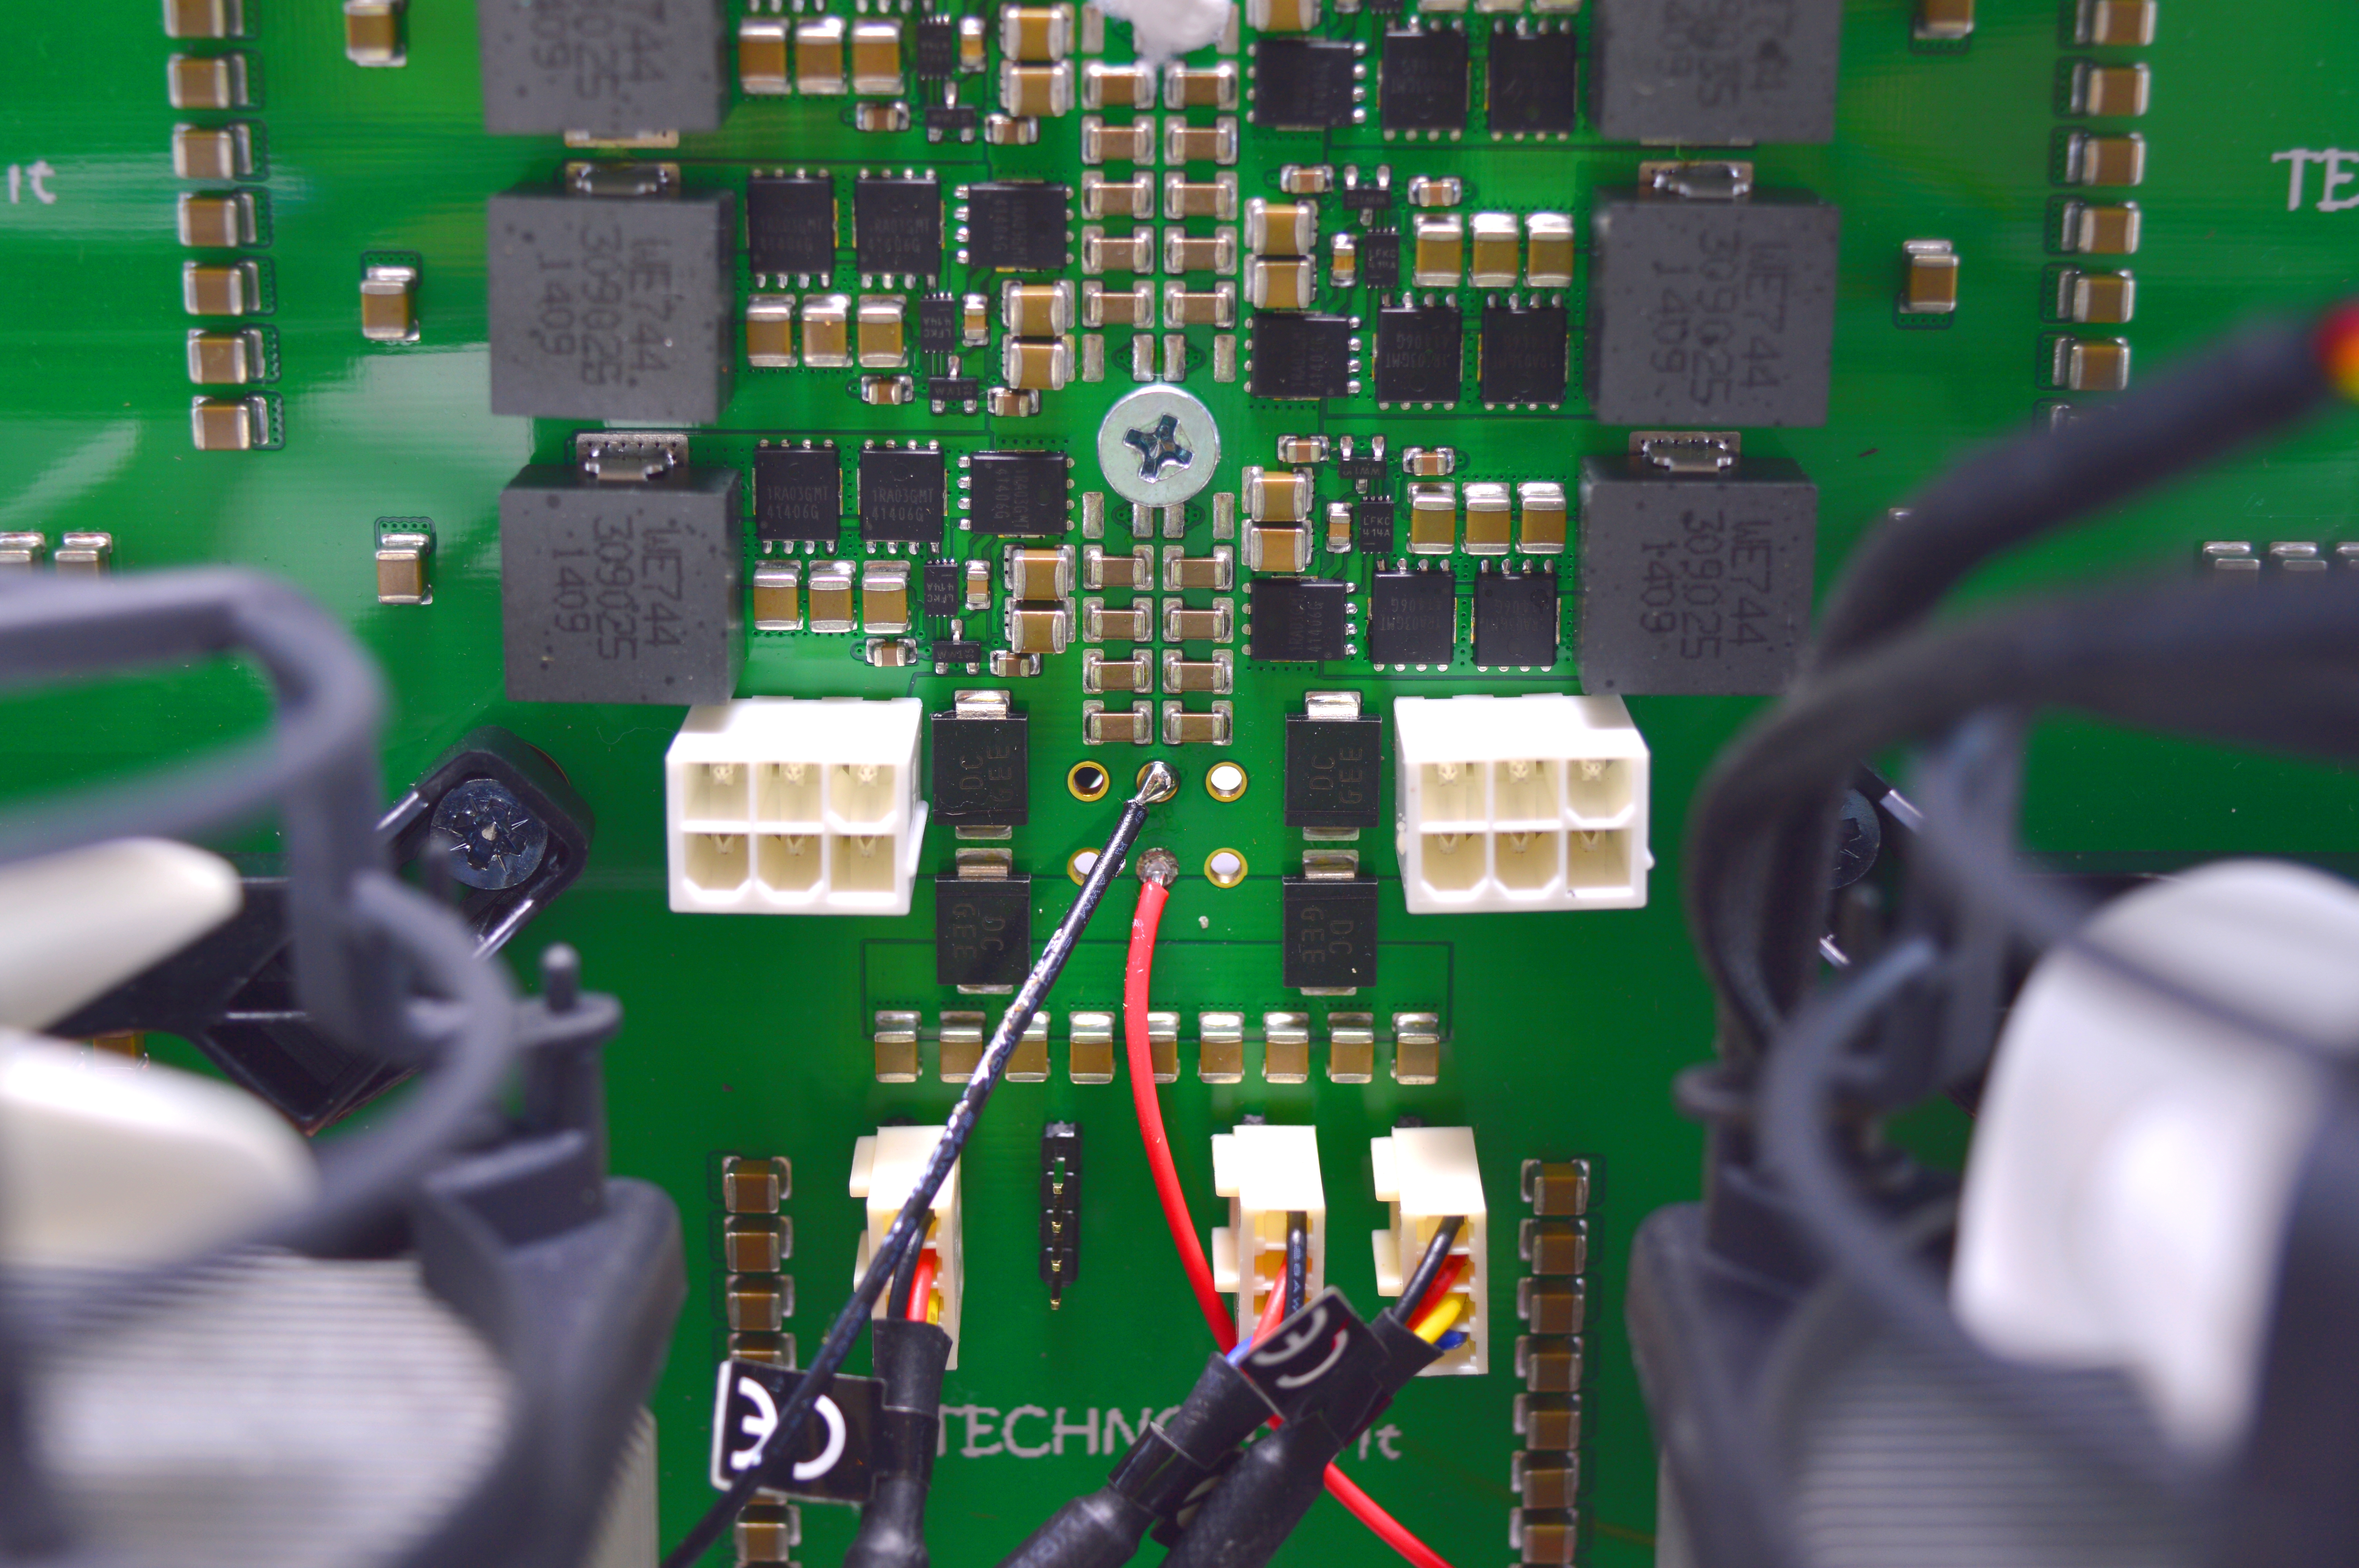
HEX4Ms do not come with a power supply, and you will need a typical computer PSU with 2xPCI-E 6 pin power connectors. We also need to tell the PSU to always be on, as there isn't a motherboard to do this. Cut a paperclip into a U and insert it into the green wire and either black wire to the side of the green wire. Tape it up for safety. The power supply will now be controlled by its switch on the rear socket.
HEX4Ms do not come with a power supply, and you will need a typical computer PSU with 2xPCI-E 6 pin power connectors. We also need to tell the PSU to always be on, as there isn't a motherboard to do this. Cut a paperclip into a U and insert it into the green wire and either black wire to the side of the green wire. Tape it up for safety. The power supply will now be controlled by its switch on the rear socket.
|

|
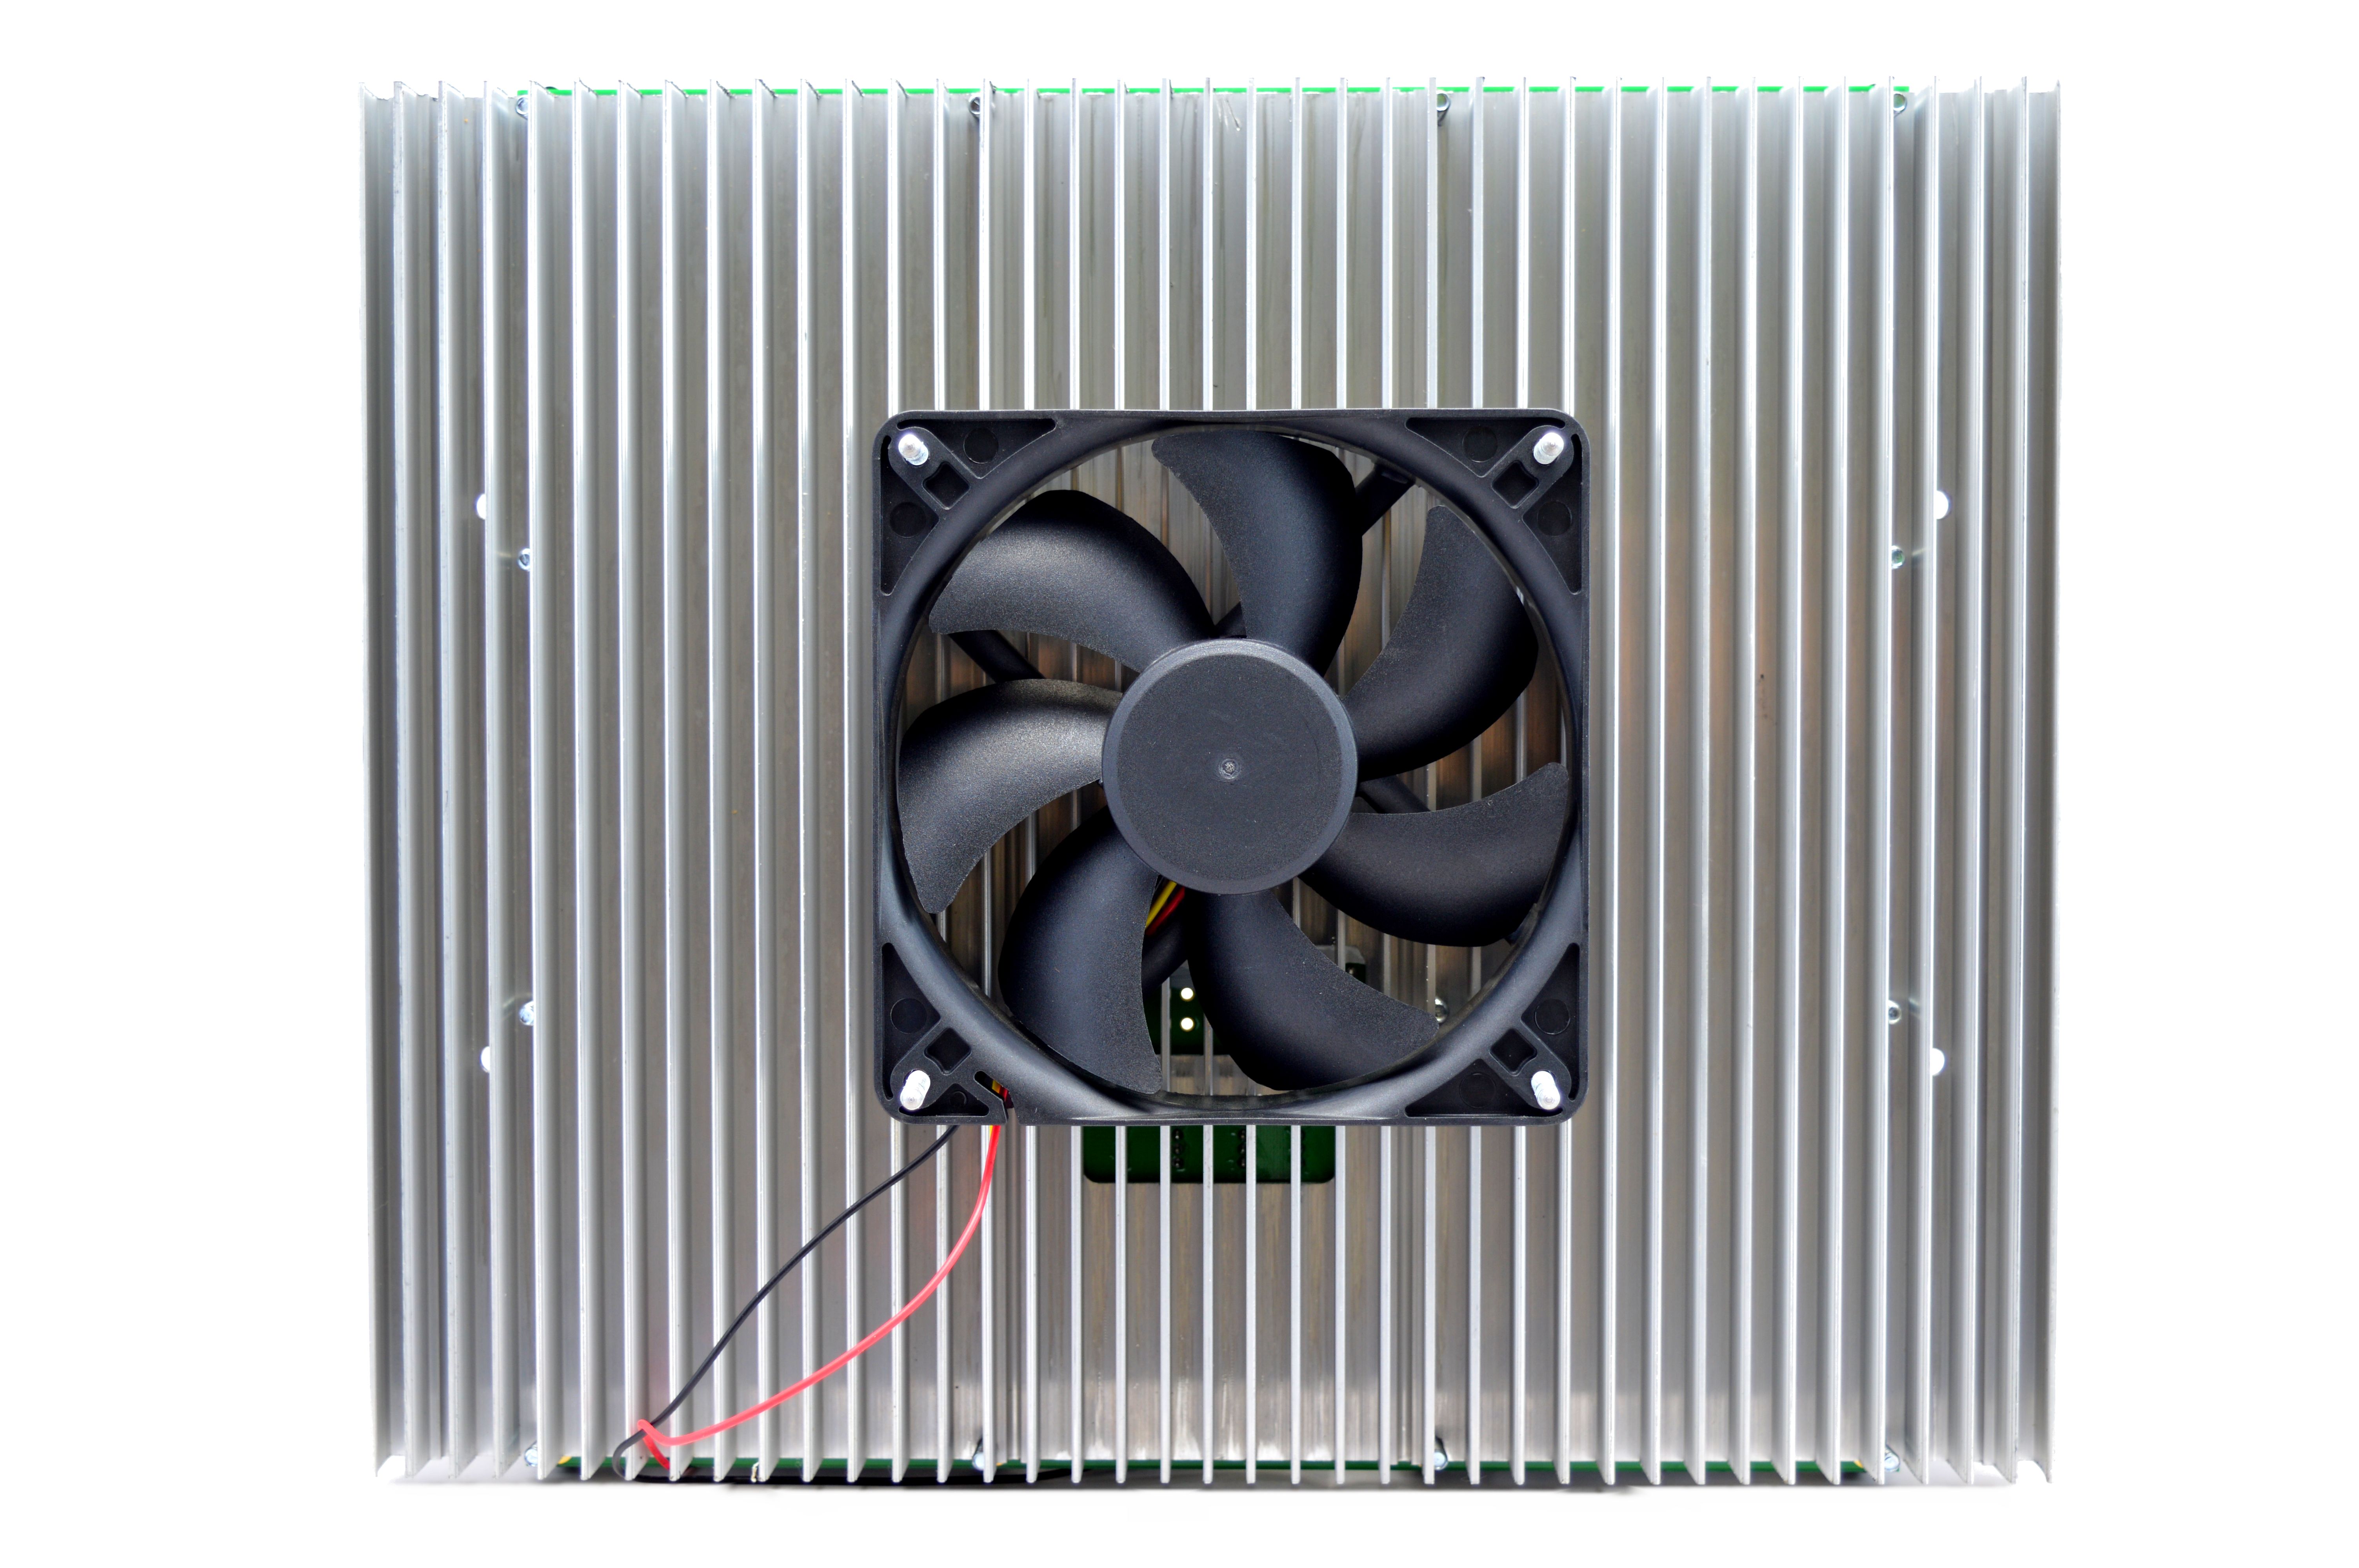
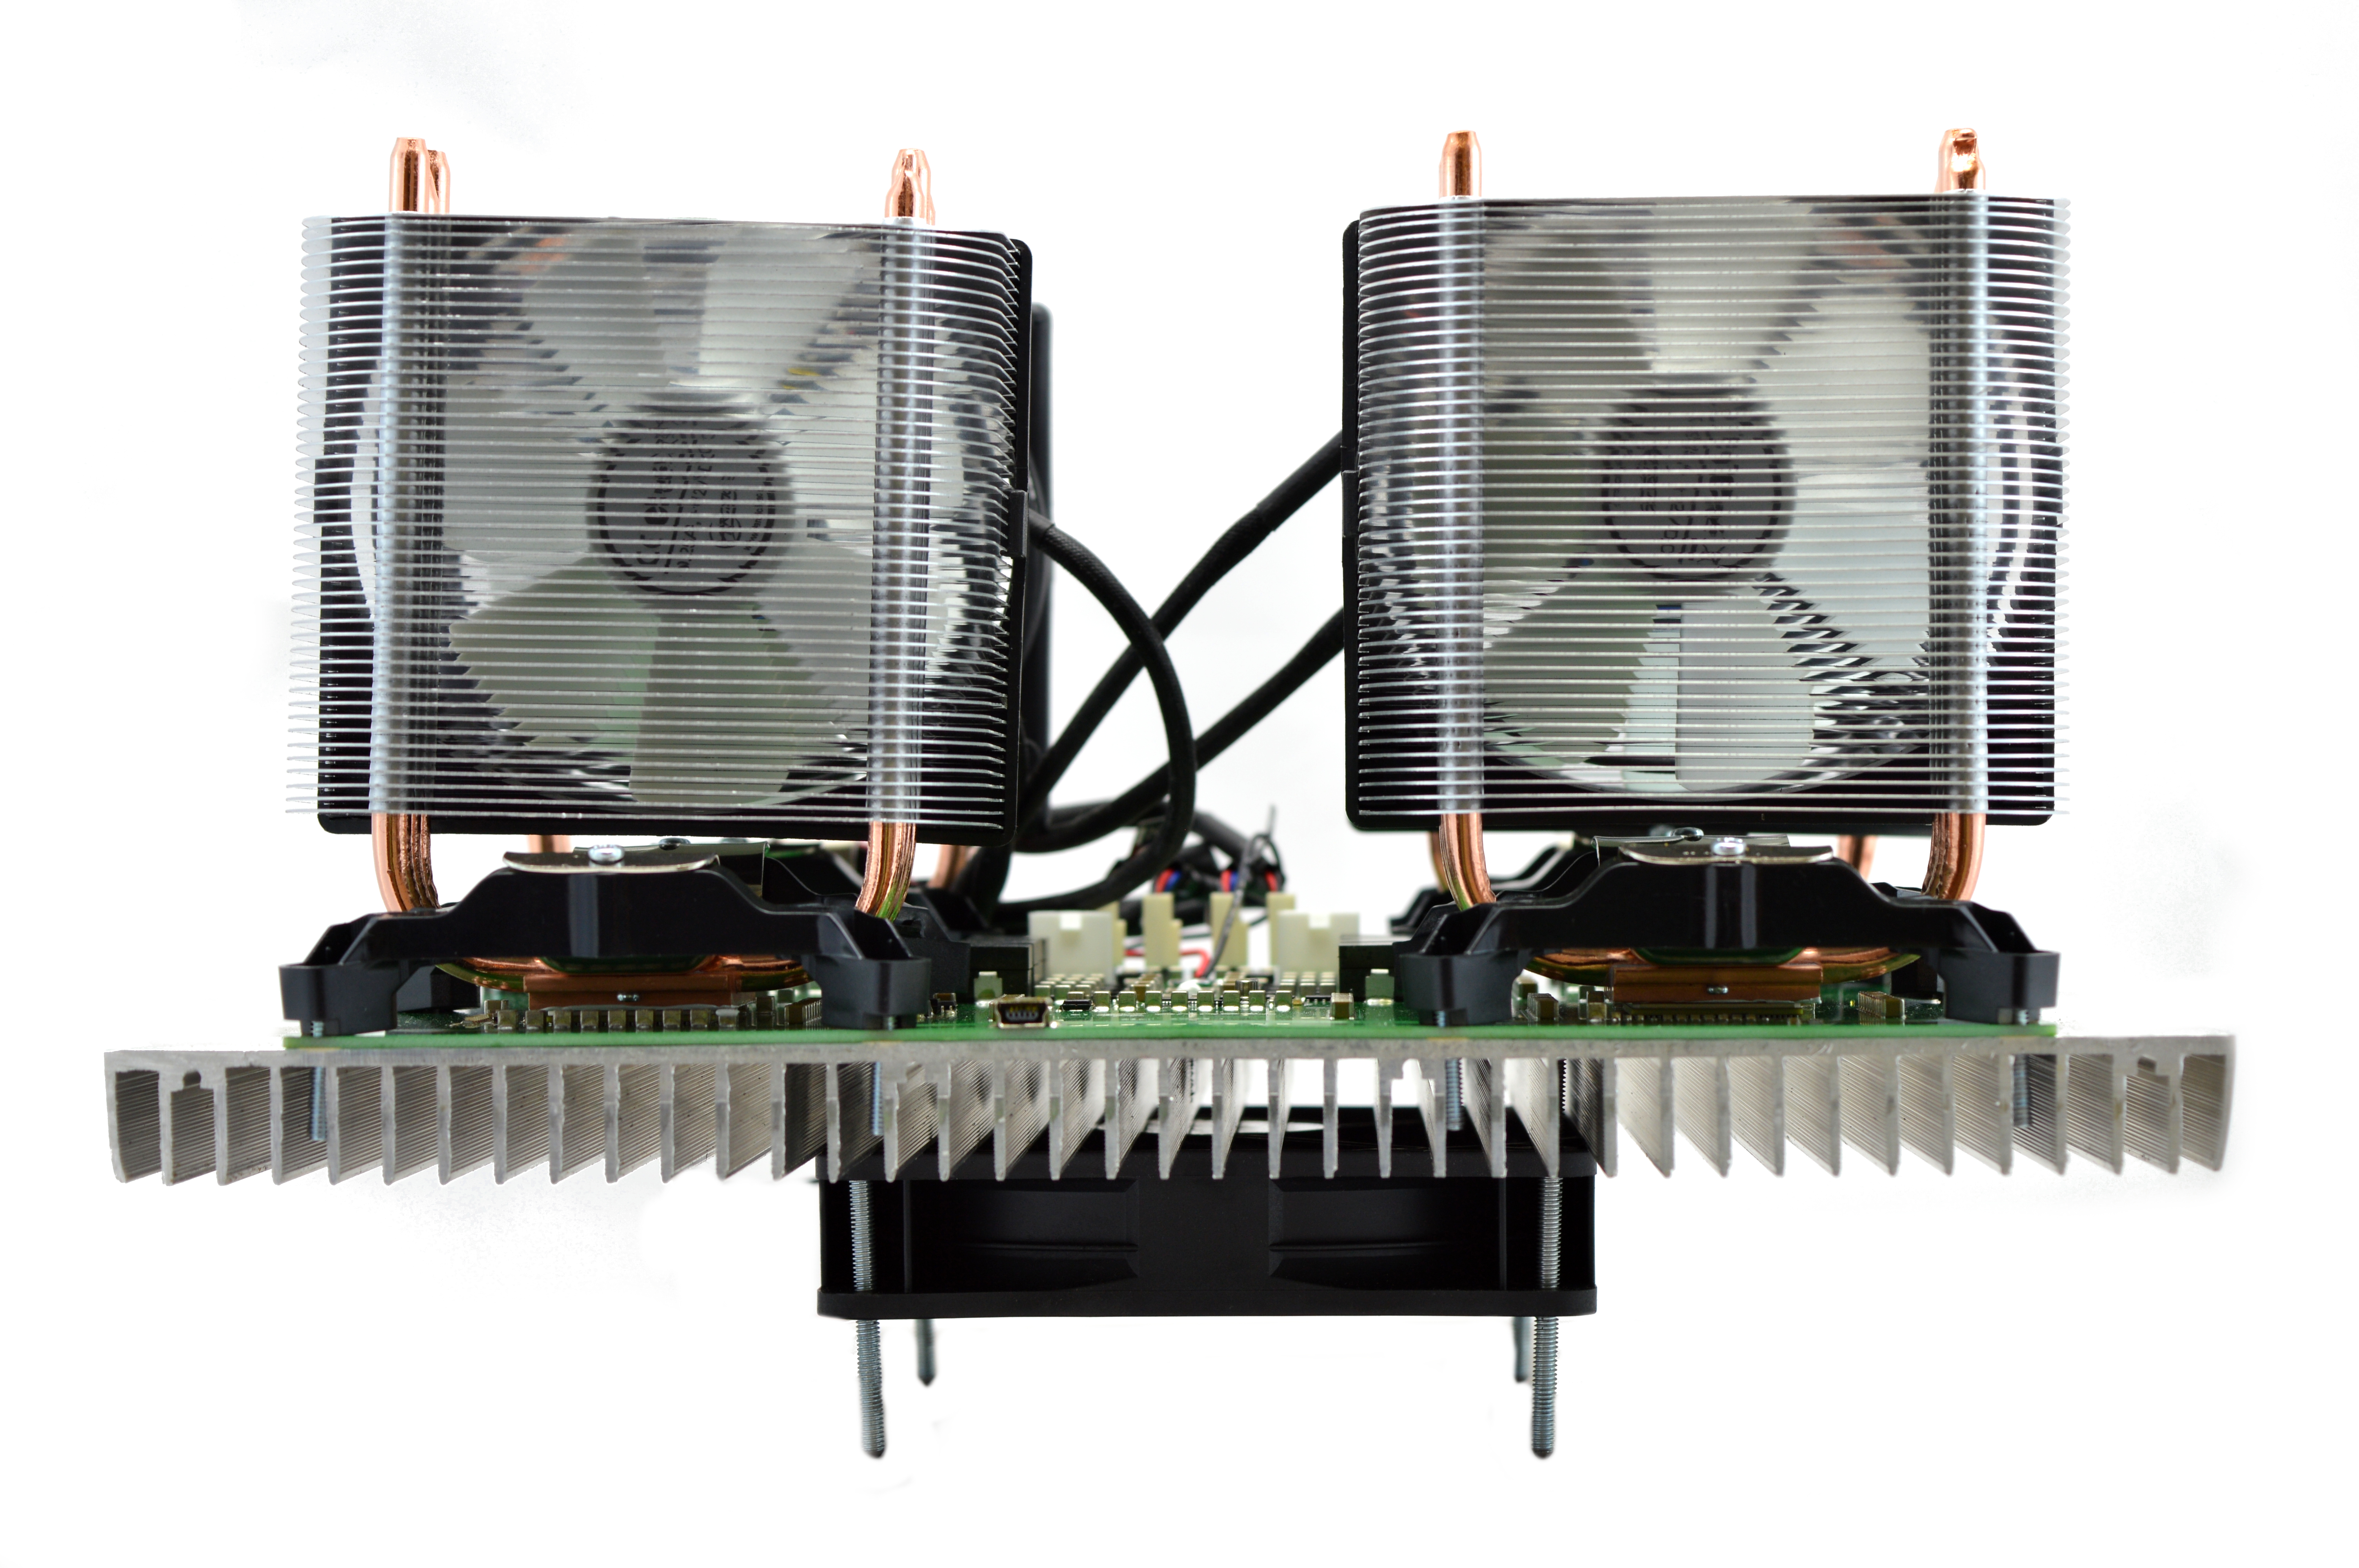
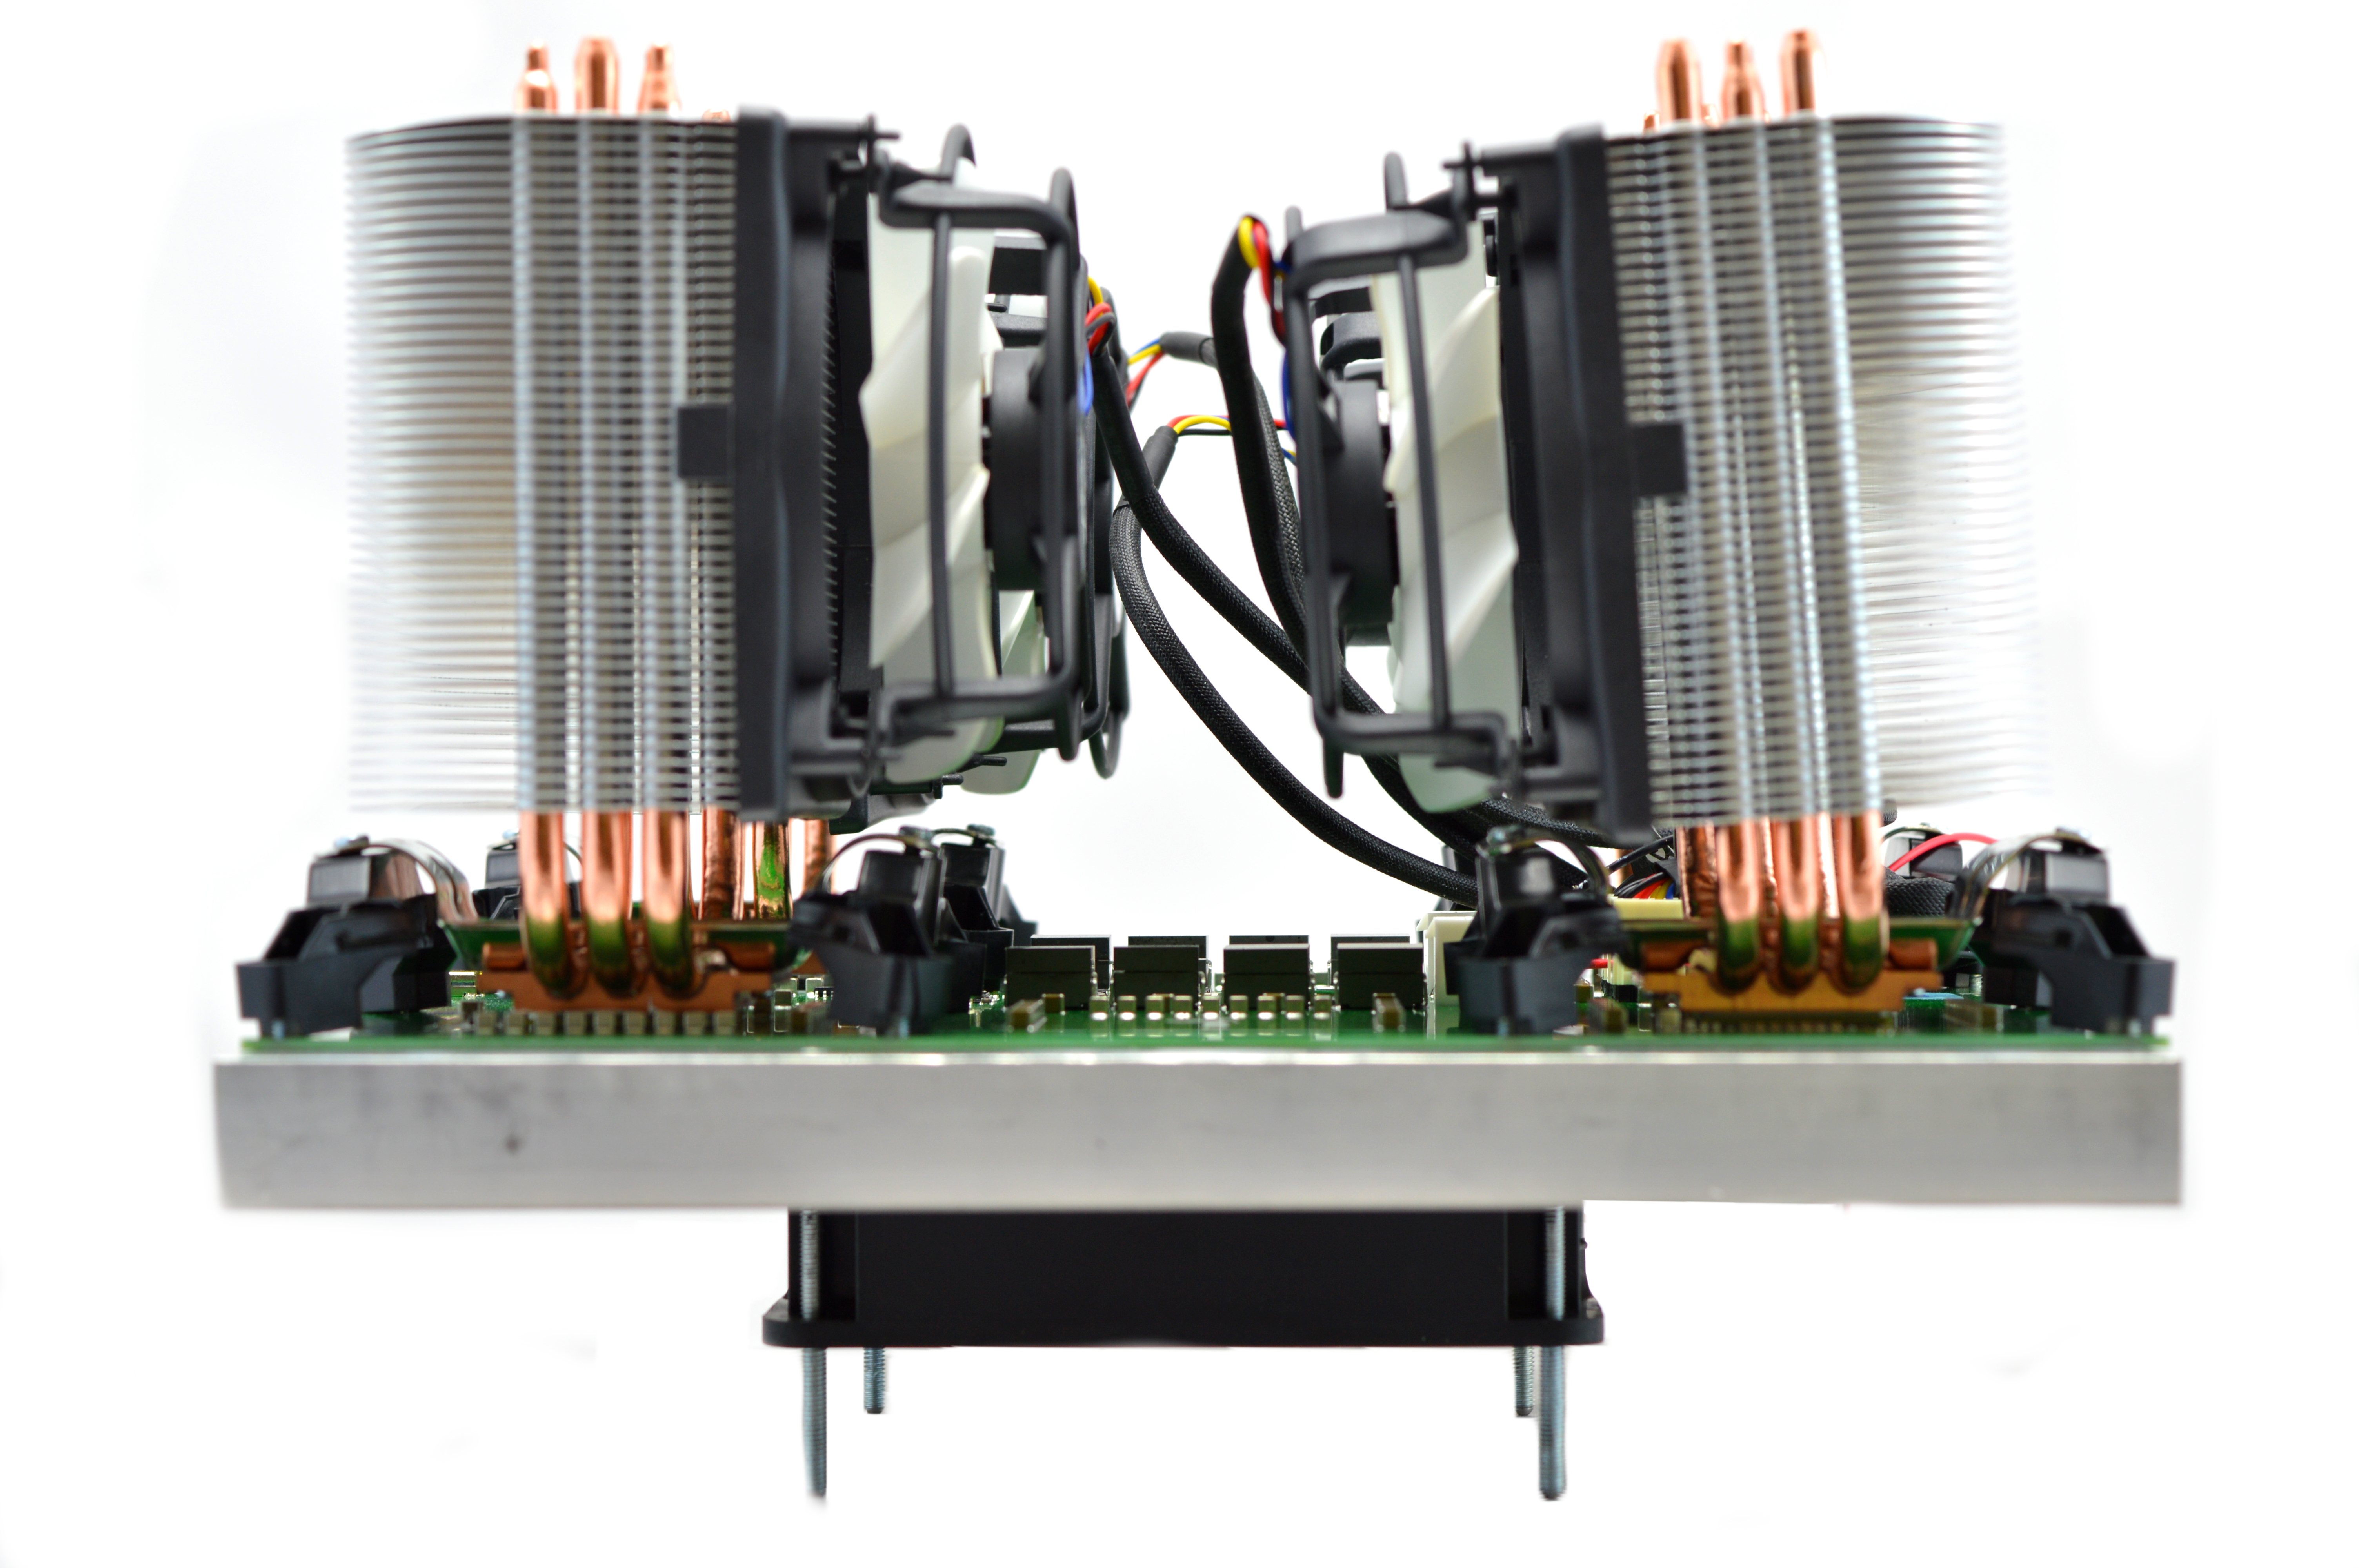
2) Cooling
An aluminium heatsink covers the entire backside of the board to provide structure and keep board temperatures down, and is cooled by a single 120mm heatsink. The minion chips each require a Arctic Freezer 7 Pro heatsink, or socket 1150 heatsink. You will have to be careful with compatibility due to how to backside heatsink interferes with how the chip's backplate would usually be installed.
An aluminium heatsink covers the entire backside of the board to provide structure and keep board temperatures down, and is cooled by a single 120mm heatsink. The minion chips each require a Arctic Freezer 7 Pro heatsink, or socket 1150 heatsink. You will have to be careful with compatibility due to how to backside heatsink interferes with how the chip's backplate would usually be installed.
|
|
|
|
3a) Configuration (TL-MR3020)
An external controller is required which can either be a TP-LINK TL-MR3020 router or a Windows based PC.
Wiring:
Software:
Alternative Subnet Change:
An external controller is required which can either be a TP-LINK TL-MR3020 router or a Windows based PC.
Wiring:
- Plug in an ethernet cable from the TL-MR3020 to you router.
- Plug a mini usb cable from the TL-MR3020 to the mains power adapter.
- Plug a mini usb cable from the HEX4M to the TL-MR3020.
- Plug in two PCI-E connectors into the HEX4M.
Software:
- Power on as above.
- Flash Technobit's latest custom WRT firmware (or purchase their preflashed TL-MR3020.
- Make sure or your router's subnet is 0, ie 192.168.0.x. If not then change it to 0, this is just temporary. ***If this is not possible, see below***
- Using a browser, navigate to 192.168.0.99 - this goes to the MR3020's configuration page.
- Login using "root" as the username and password.
- Navigate to Network -> Interfaces -> LAN -> Edit.
- Change protocol to DHCP and click "Save & Apply".
- Using a browser, navigate to your router and find the IP it has assigned the MR3020 and navigate to that IP.
- Navigate to the page CGminer -> Configuration. Enter your pool information in the below format.
- You can then change your router subnet back to whatever you are used to using.
Alternative Subnet Change:
- Unplug your computer from all internet sources.
- Plug in an ethernet cable from the MR3020 to your computer.
- Navigate to Control Panel -> Network and Sharing Centre -> Change Adapter Settings.
- Right click on your ethernet adapter -> Properties.
- Click on "Internet Protocol Version 4" and click properties.
- Select "Use the following IP address" and enter the following:
- IP Address: 192.168.0.1, Subnet Mask: 255.255.255.0, Default Gateway: 192.168.0.99.
- Plug in an ethernet cable from the MR3020 to you router.
- Restart the configuration instructions as above.
mint.bitminter.com:3333
us1.ghash.io:3333
stratum.mining.eligius.st:3334
3b) Configuration (Windows PC)
An external controller is required which can either be a TP-LINK TL-MR3020 router or a Windows based PC.
Wiring:
Software:
An external controller is required which can either be a TP-LINK TL-MR3020 router or a Windows based PC.
Wiring:
- Plug a mini usb cable from the HEX4M to your Windows PC.
- Plug in two PCI-E connectors into the HEX4M.
Software:
- Windows will try and install its own drivers. Wait until it finishes.
- Download the Zadig tool and run it.
- Choose the HEX4M and "WinUSB". Click install driver.
- Once installed, you may have to restart your PC.
- Download this specific version of cgminer and extract it.
- Edit cgminer.conf using notepad, with your pool and miner information in it, an example as below.
- Run cgminer.exe to start mining.
mint.bitminter.com:3333
us1.ghash.io:3333
stratum.mining.eligius.st:3334
|
|
4) Troubleshooting
|
Problem
My power supply's cables are braided or aren't color coded. |
Solution
- See below diagram for pin-outs. 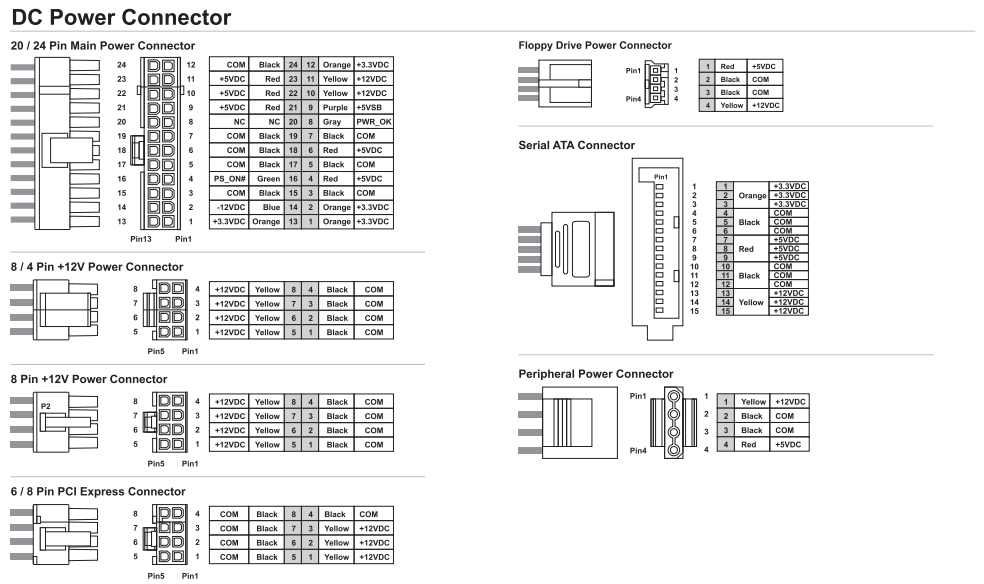
|
|
|
5) Where to buy


General Safety Tips


|
Do not touch equipment while powered, exposed electrical contacts may shock.
Fans may cause injury or shatter if material is ingested.
|


|
Sharp edges may be cut, especially around any internal casing or heatsinks.
If you are unsure of what to do, STOP and consult an expert.
|
|
|
|
Legal disclaimer: This information is for general guidance and does not constitute expert advice. We are not responsible if you, your property or a third party is injured or damaged as a result of any interaction with this information, and no warranty is provided. All text and images are covered under copyright law, dogiecoin.com.
|