
ASICMiner Prisma Setup Guide
|
Contents
0a) Introduction 0b) What You Need 1) Powering 2) Cooling 3) Case 4a) Configuration - BE Controller 4b) Configuration - Using Proxy (Optional) 4c) Configuration - USB 5) Troubleshooting 6) Where to buy |
|
0) Introduction
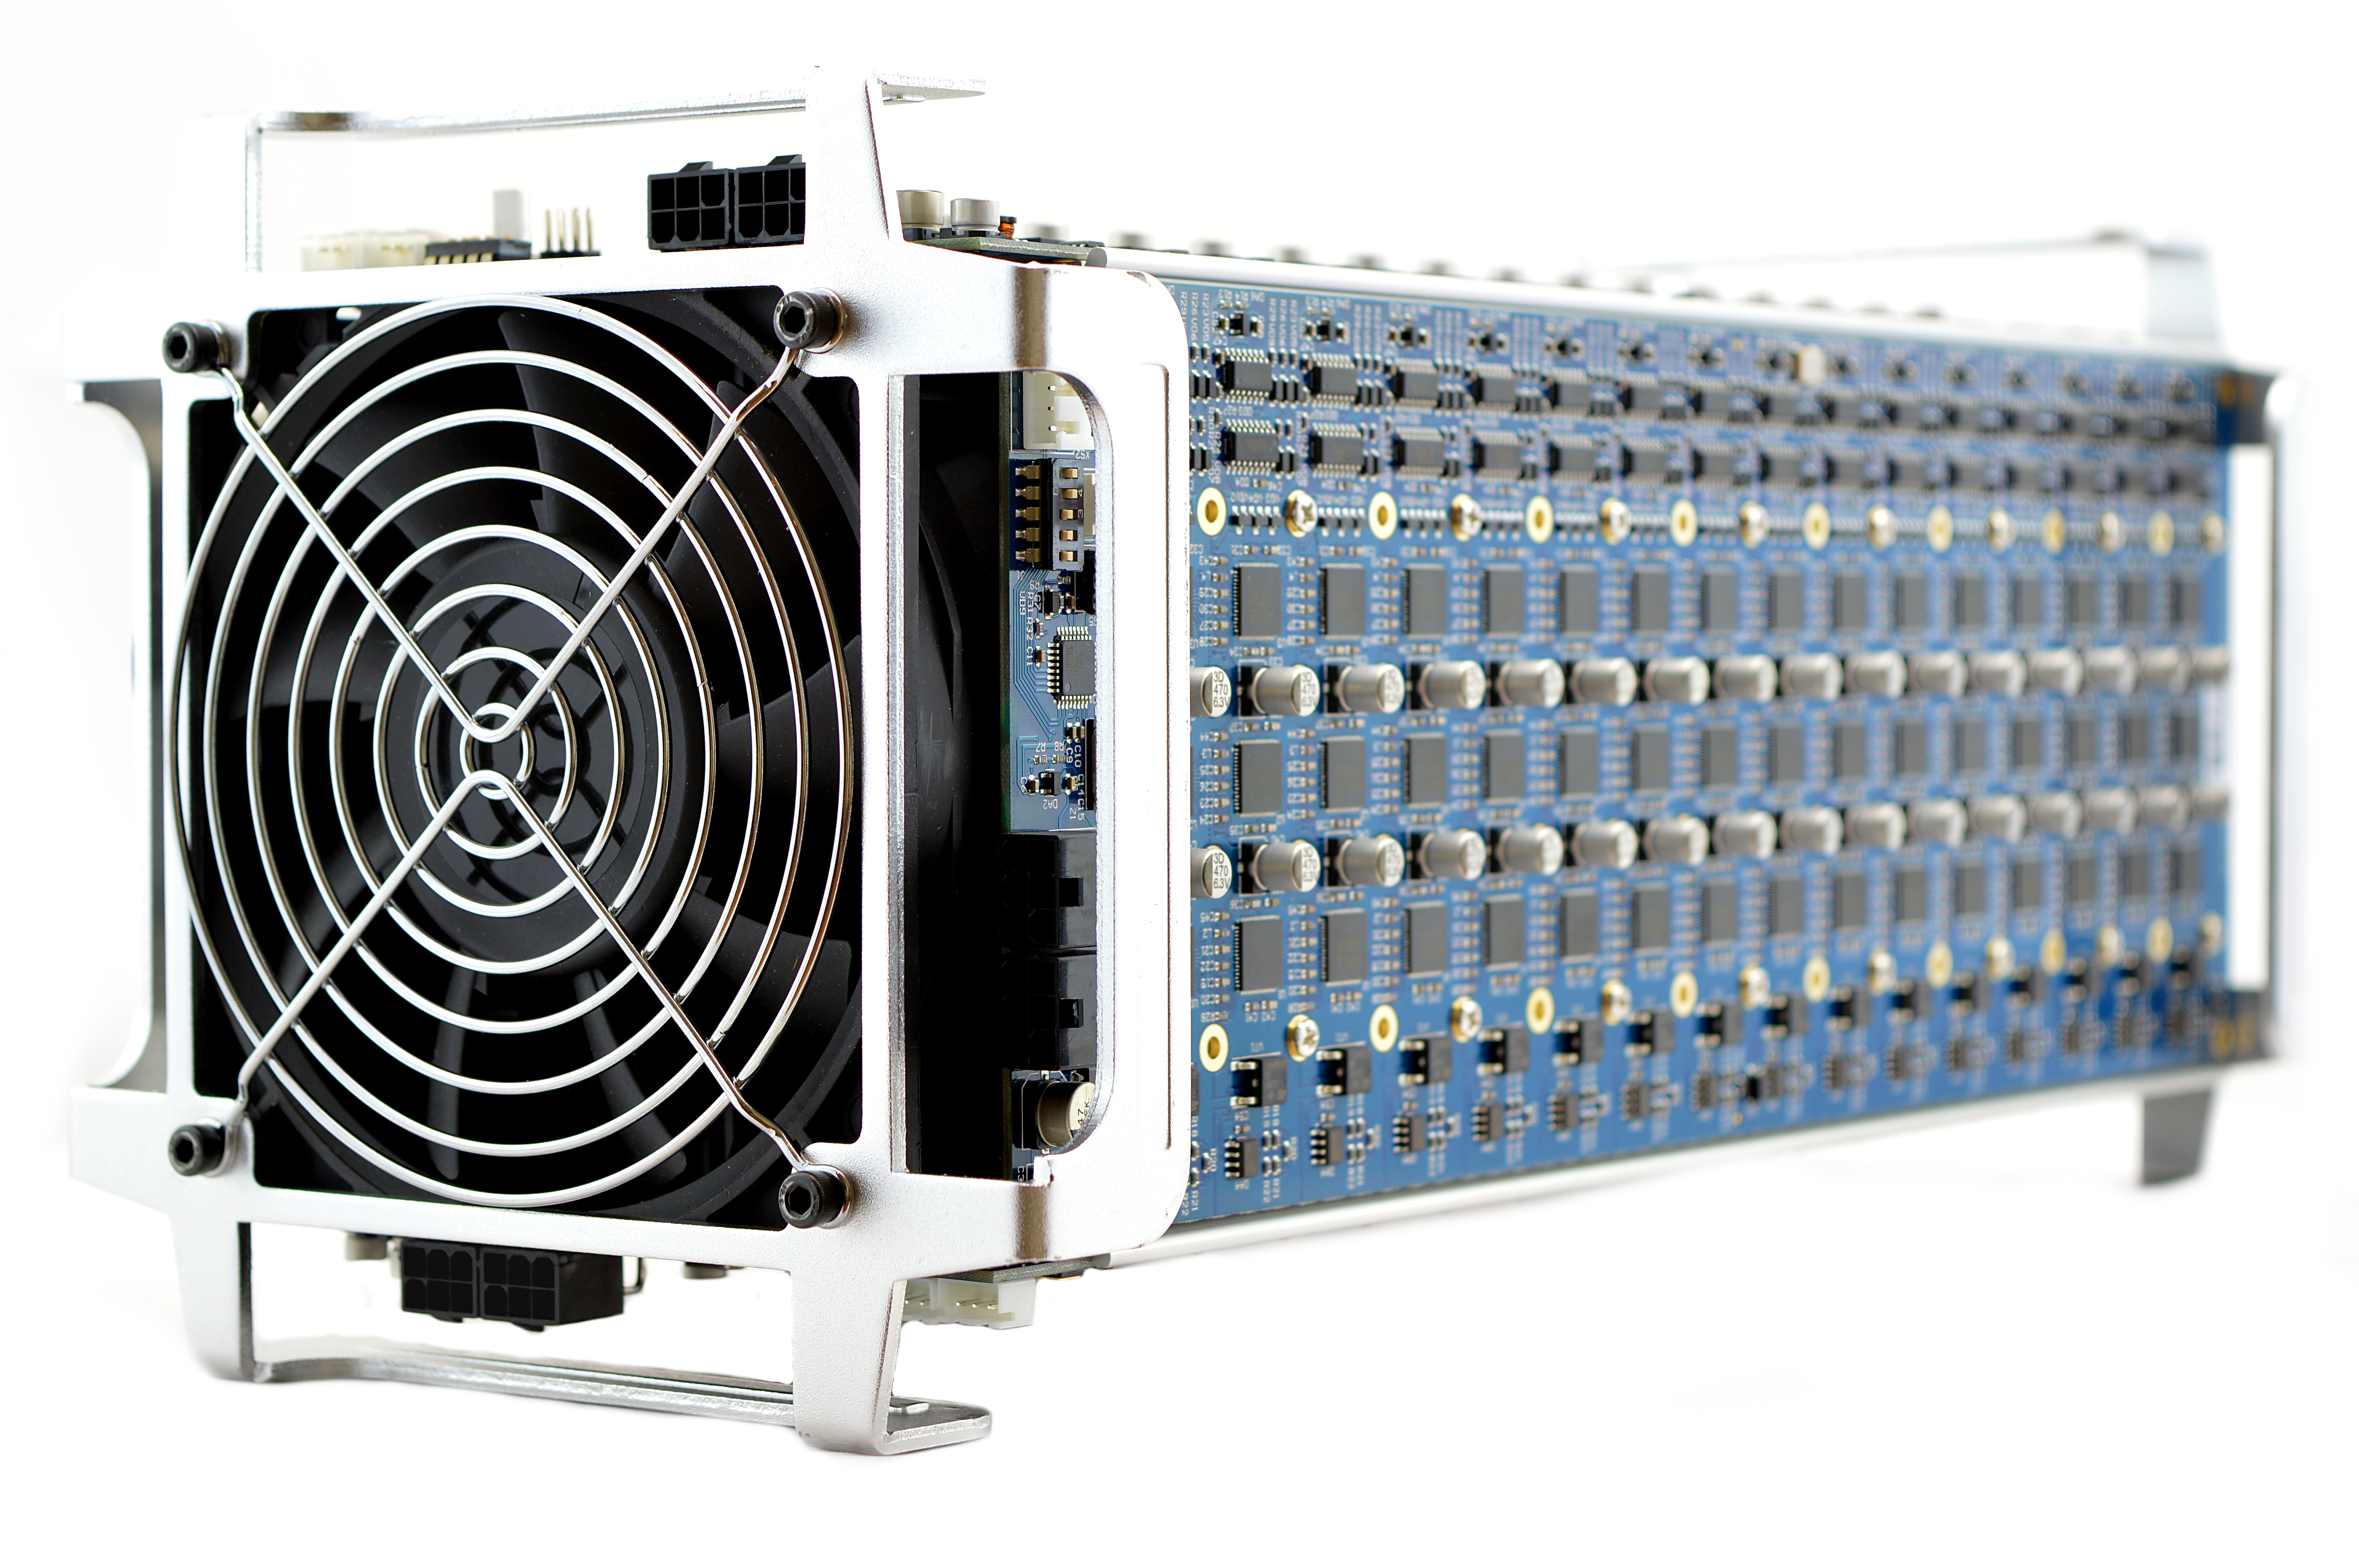
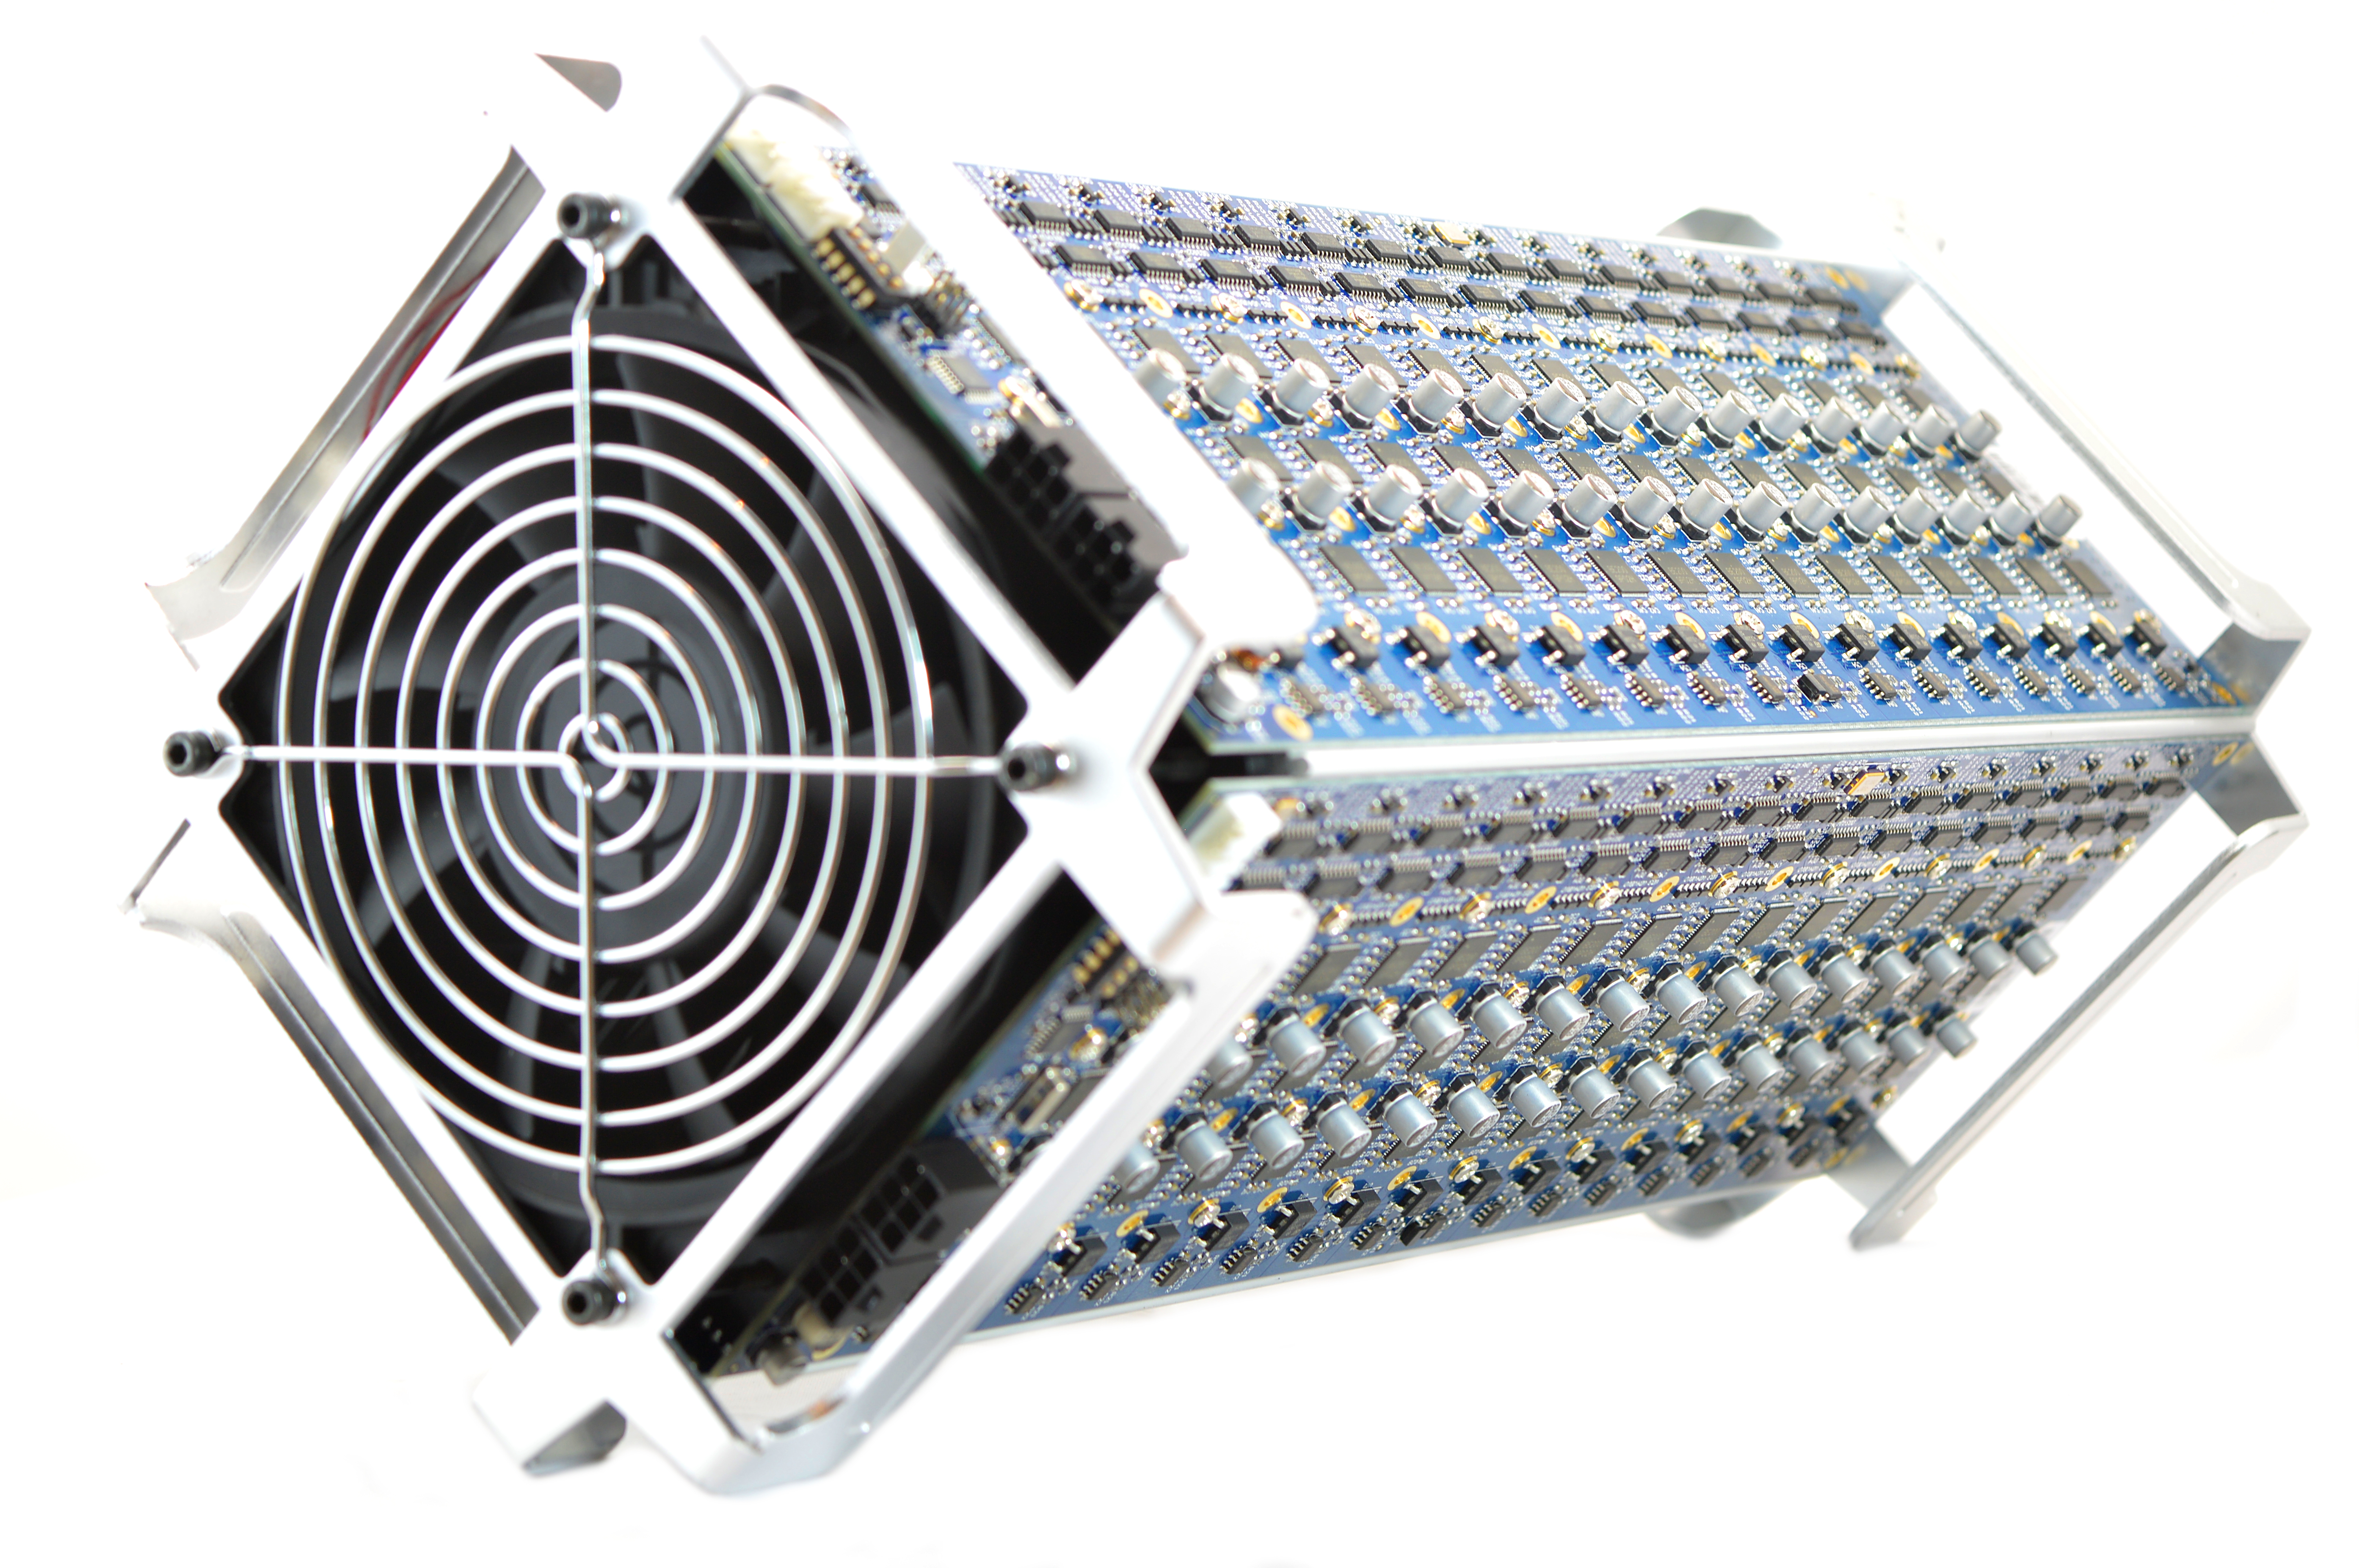
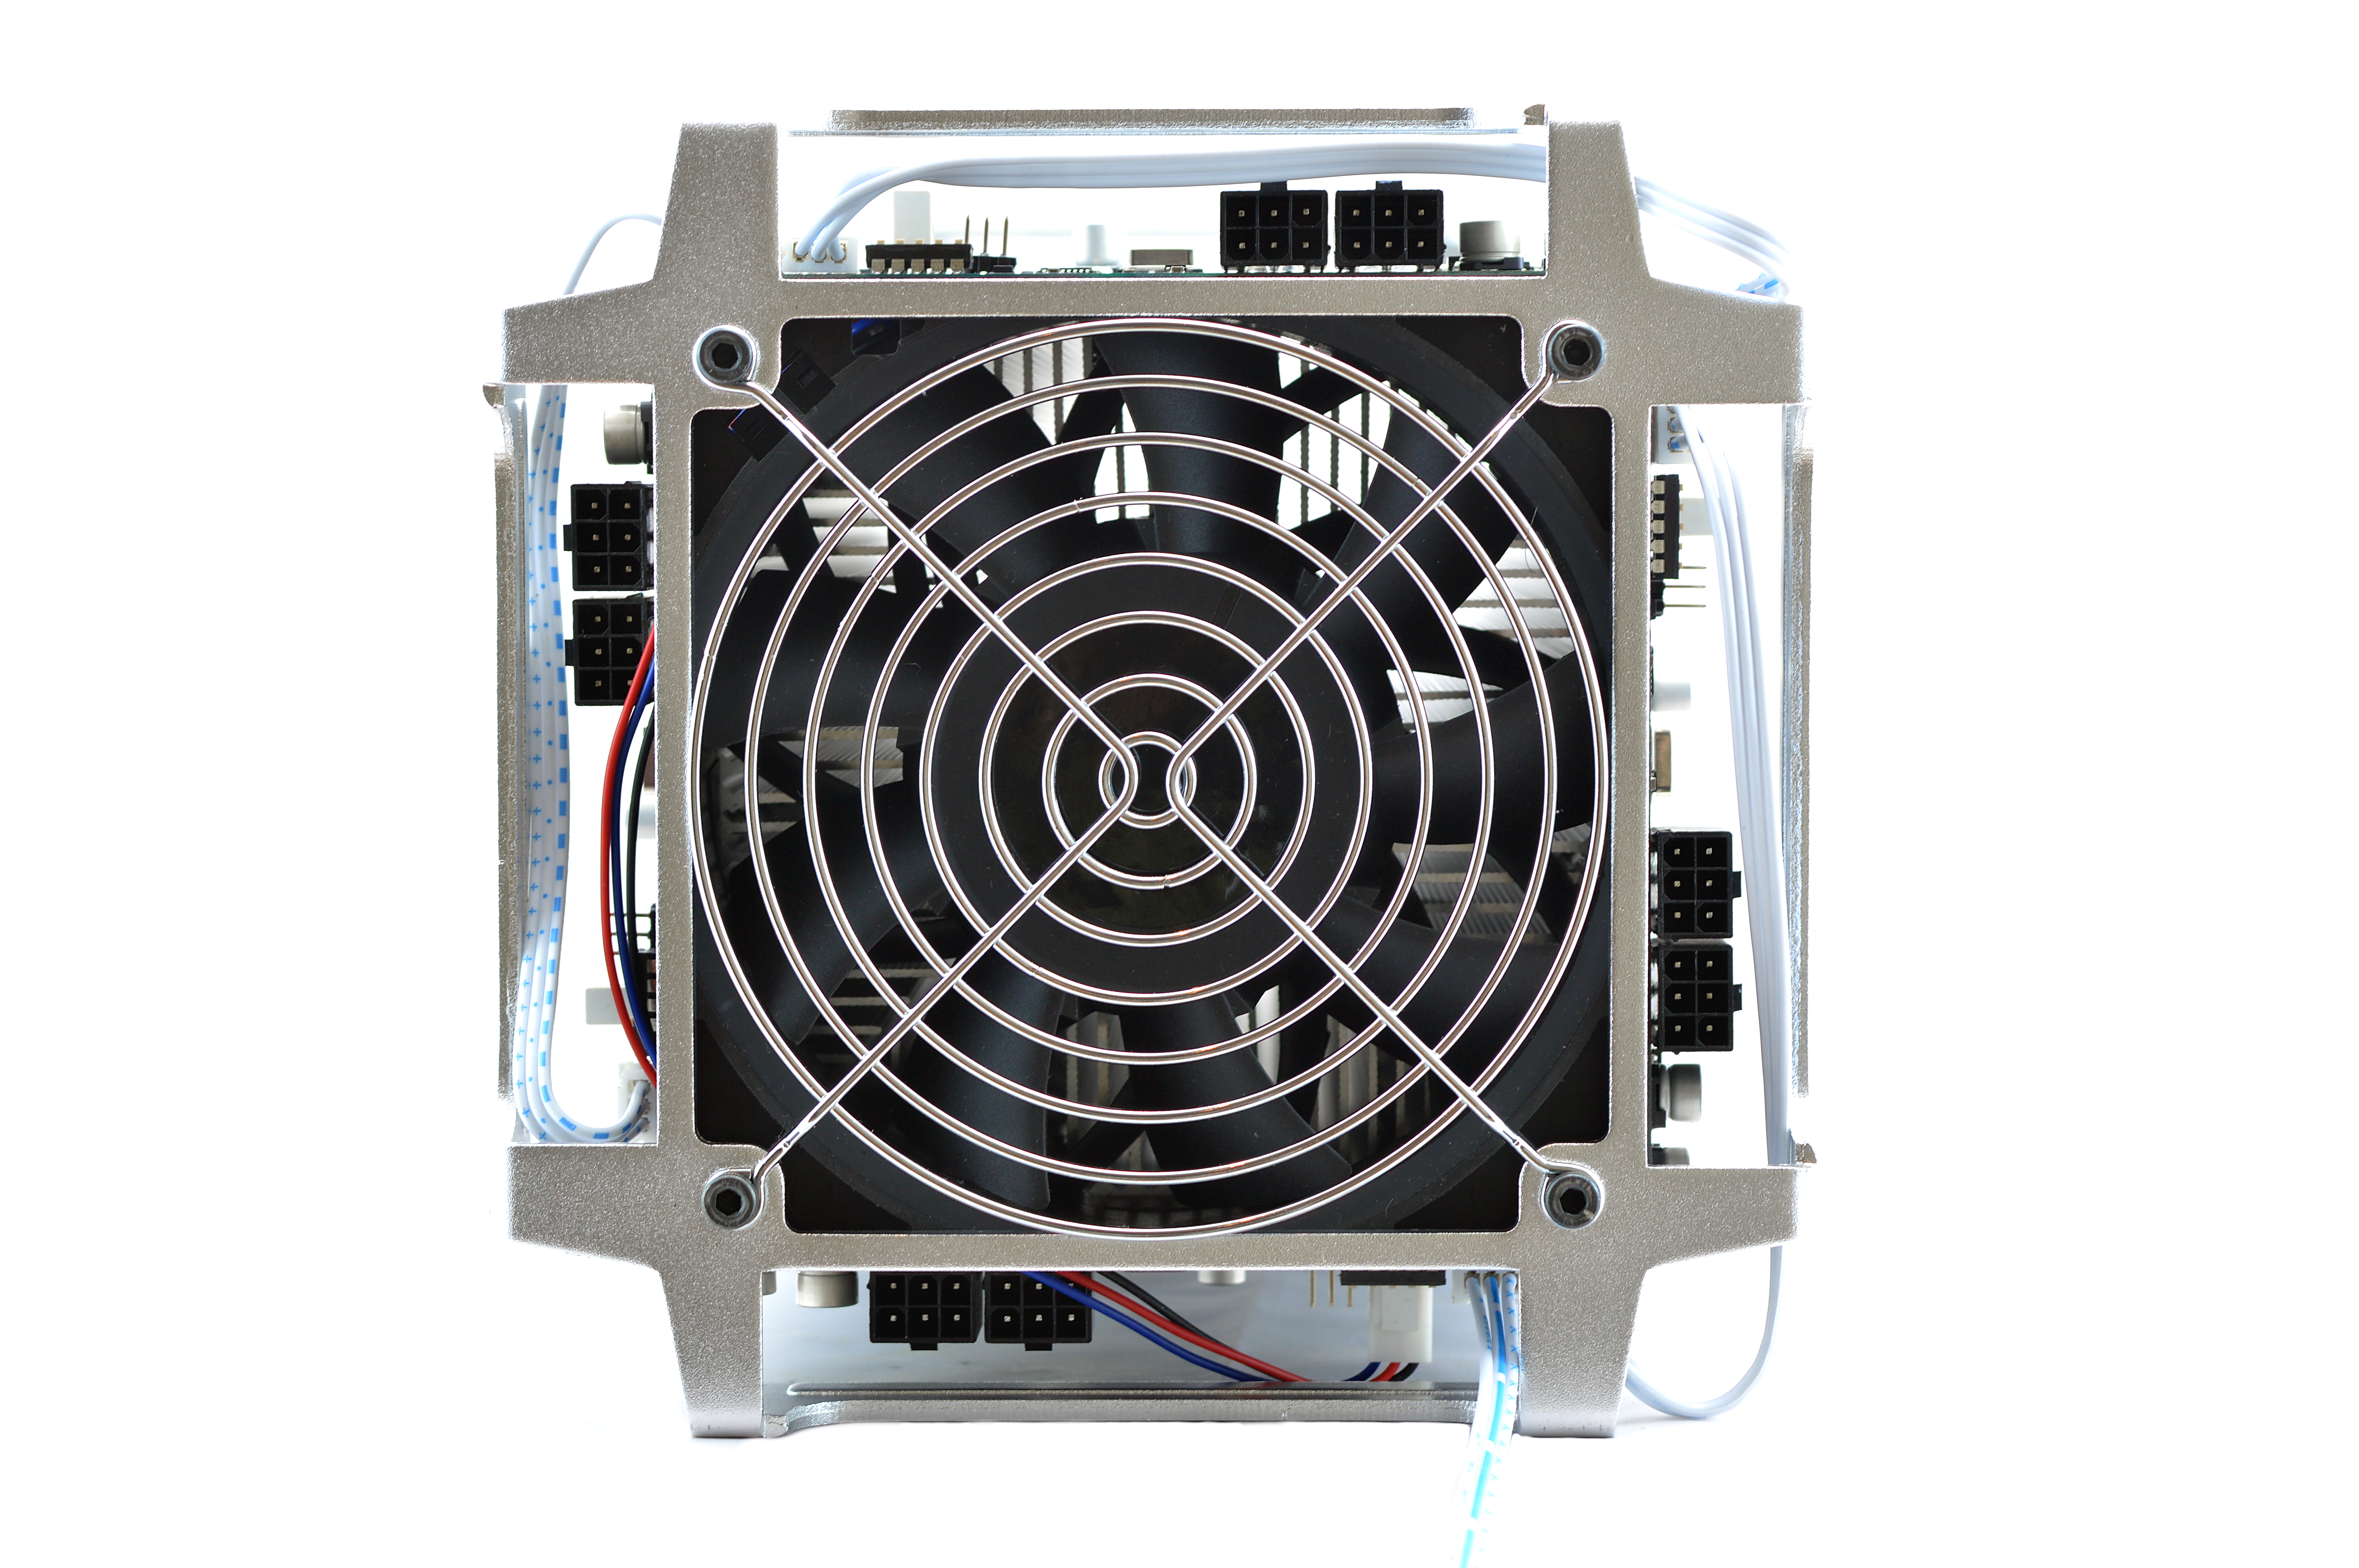
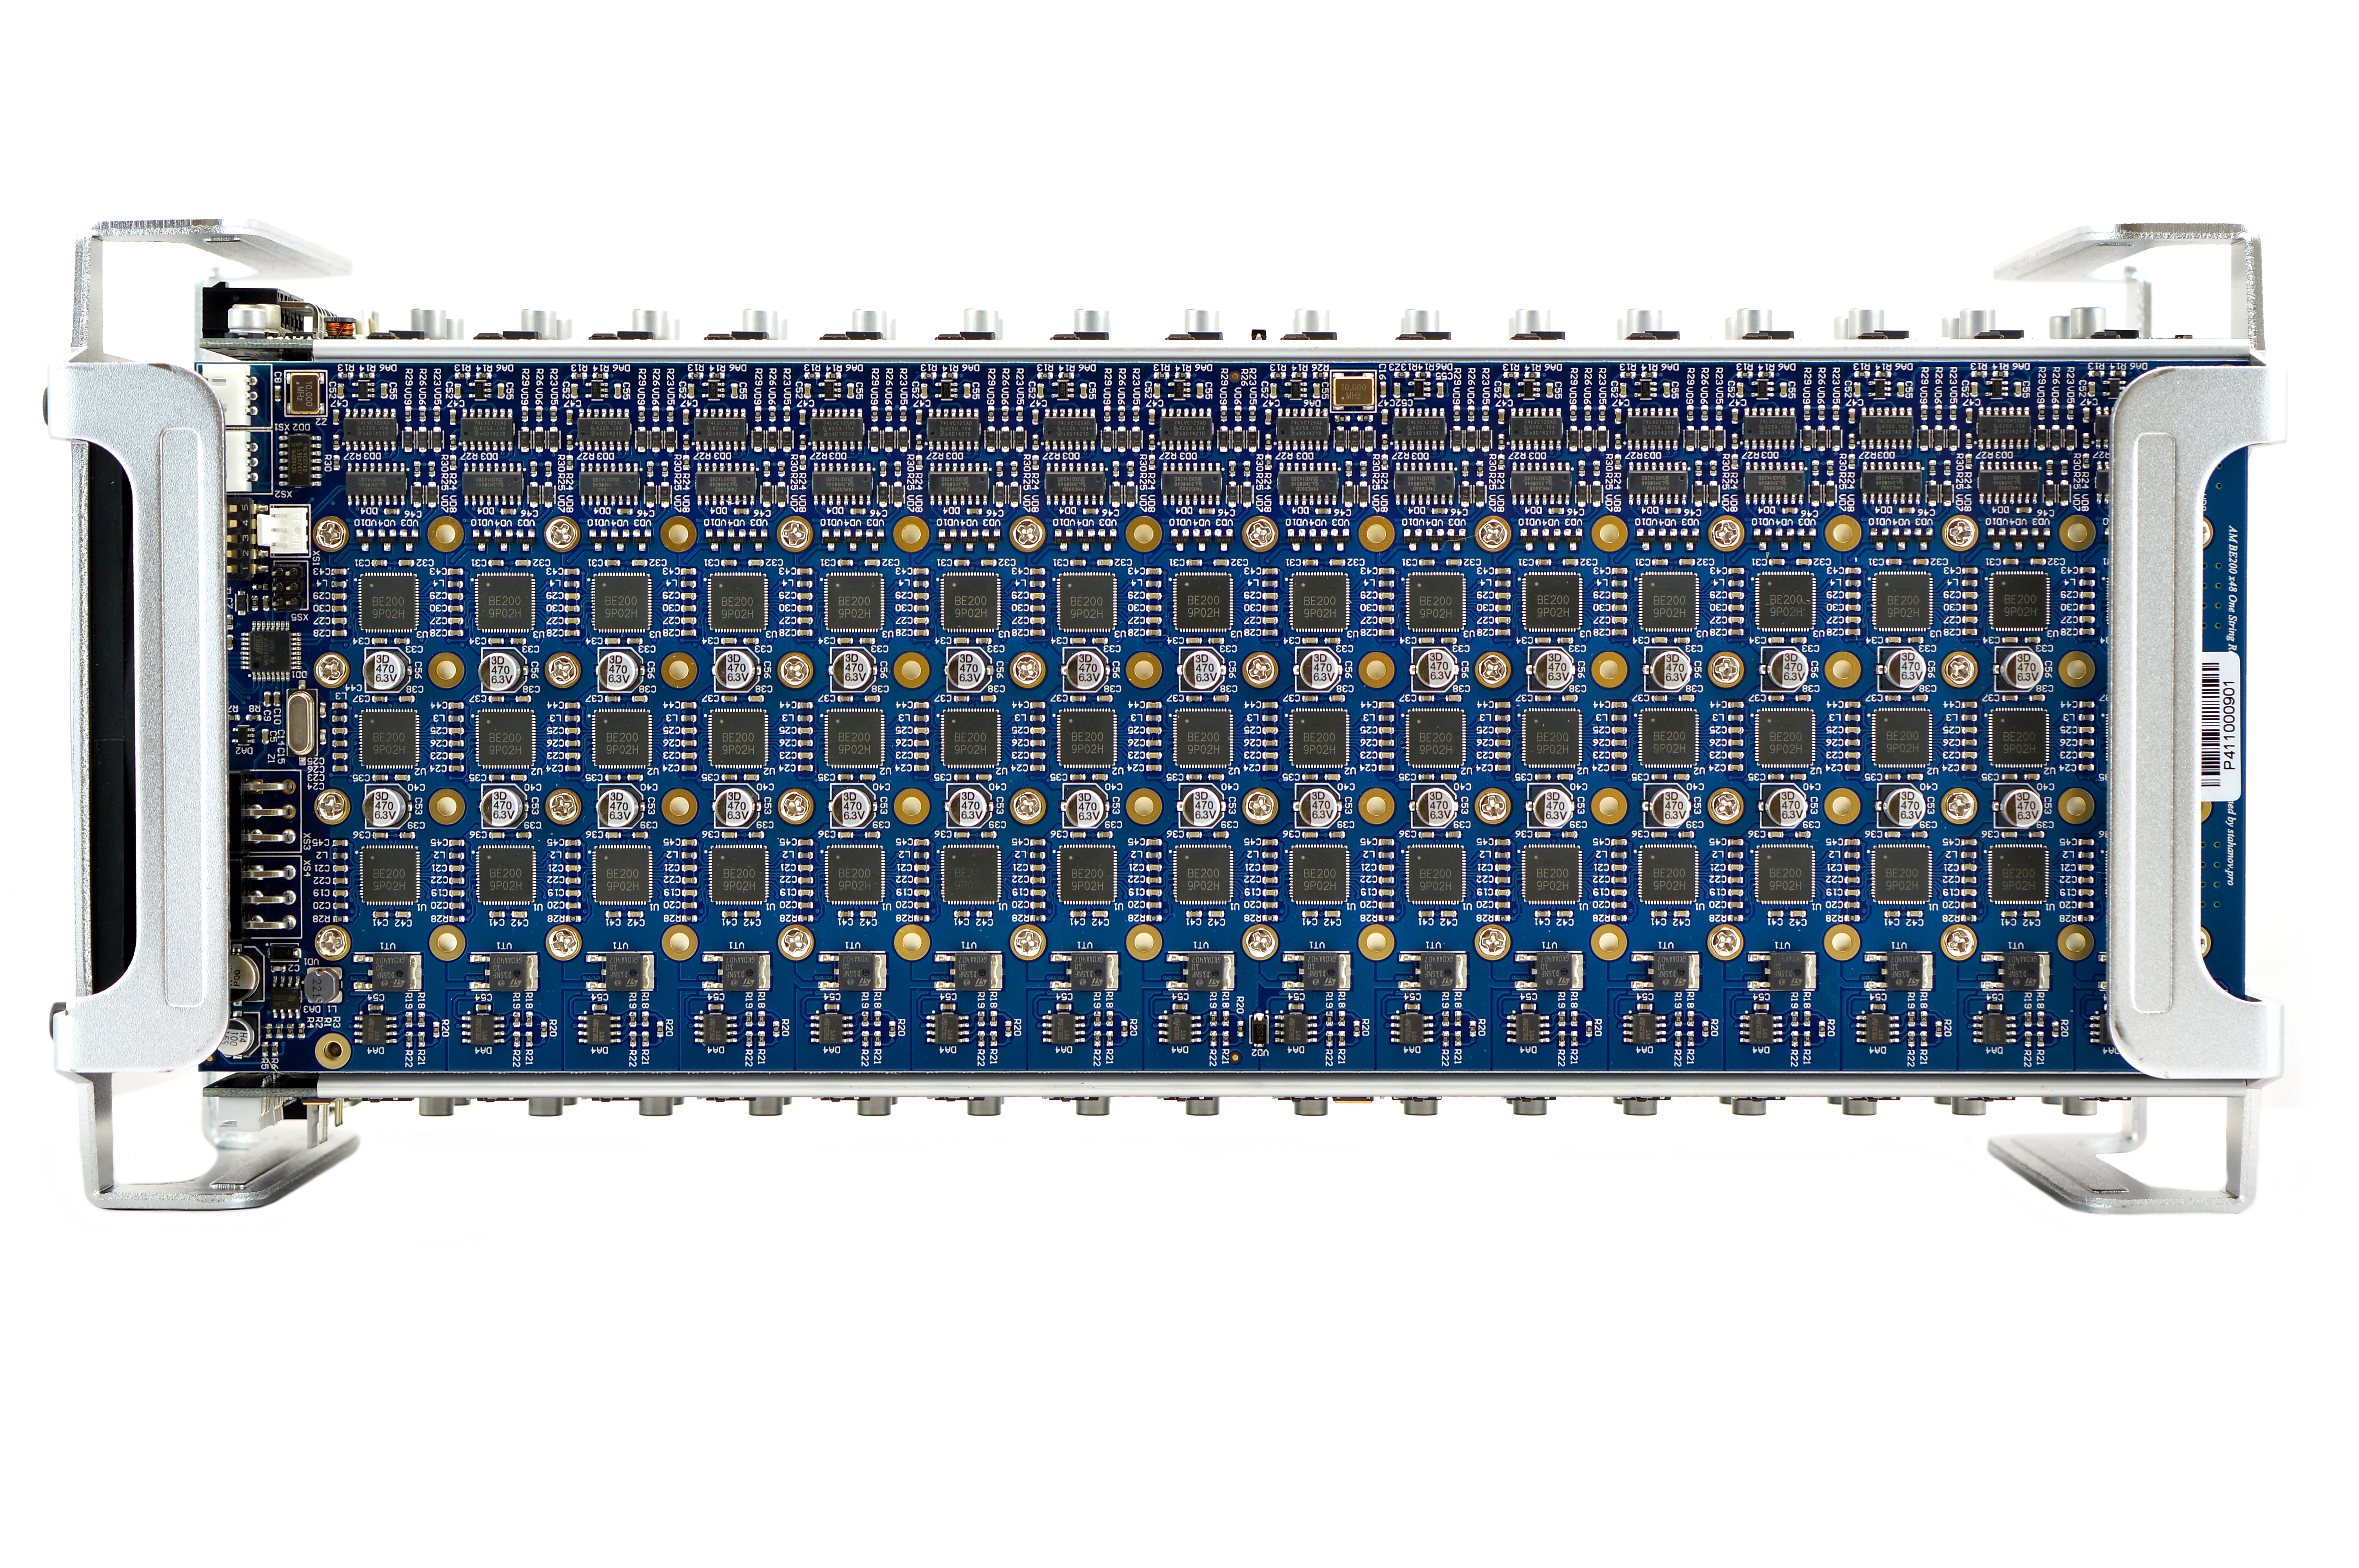
ASICMiner's Prisma is an updated and expanded replacement to the well received Tube. Each hashing board has been expanded to house 48 BE200 chips, powered using a string layout. Lightweight stands at each end allow the units to be stacked and 4 miners can be daisy chained to a BE controller, Windows PC or Raspberry Pi. A USB adapter and BE controller is included in the package.
ASICMiner's Prisma is an updated and expanded replacement to the well received Tube. Each hashing board has been expanded to house 48 BE200 chips, powered using a string layout. Lightweight stands at each end allow the units to be stacked and 4 miners can be daisy chained to a BE controller, Windows PC or Raspberry Pi. A USB adapter and BE controller is included in the package.
|
Chips
Rated Hash Rate Rated Voltage Rated Current Power Consumption |
- 192x ASICMiner Gen3
- 1.4TH - 12V - 96A - ~1150W |

|

|
0b) What You Need
You will need a few accessories and a power supply to get started.
You will need a few accessories and a power supply to get started.
Click your flag to find everything you need to get started at Amazon!


|


|


|
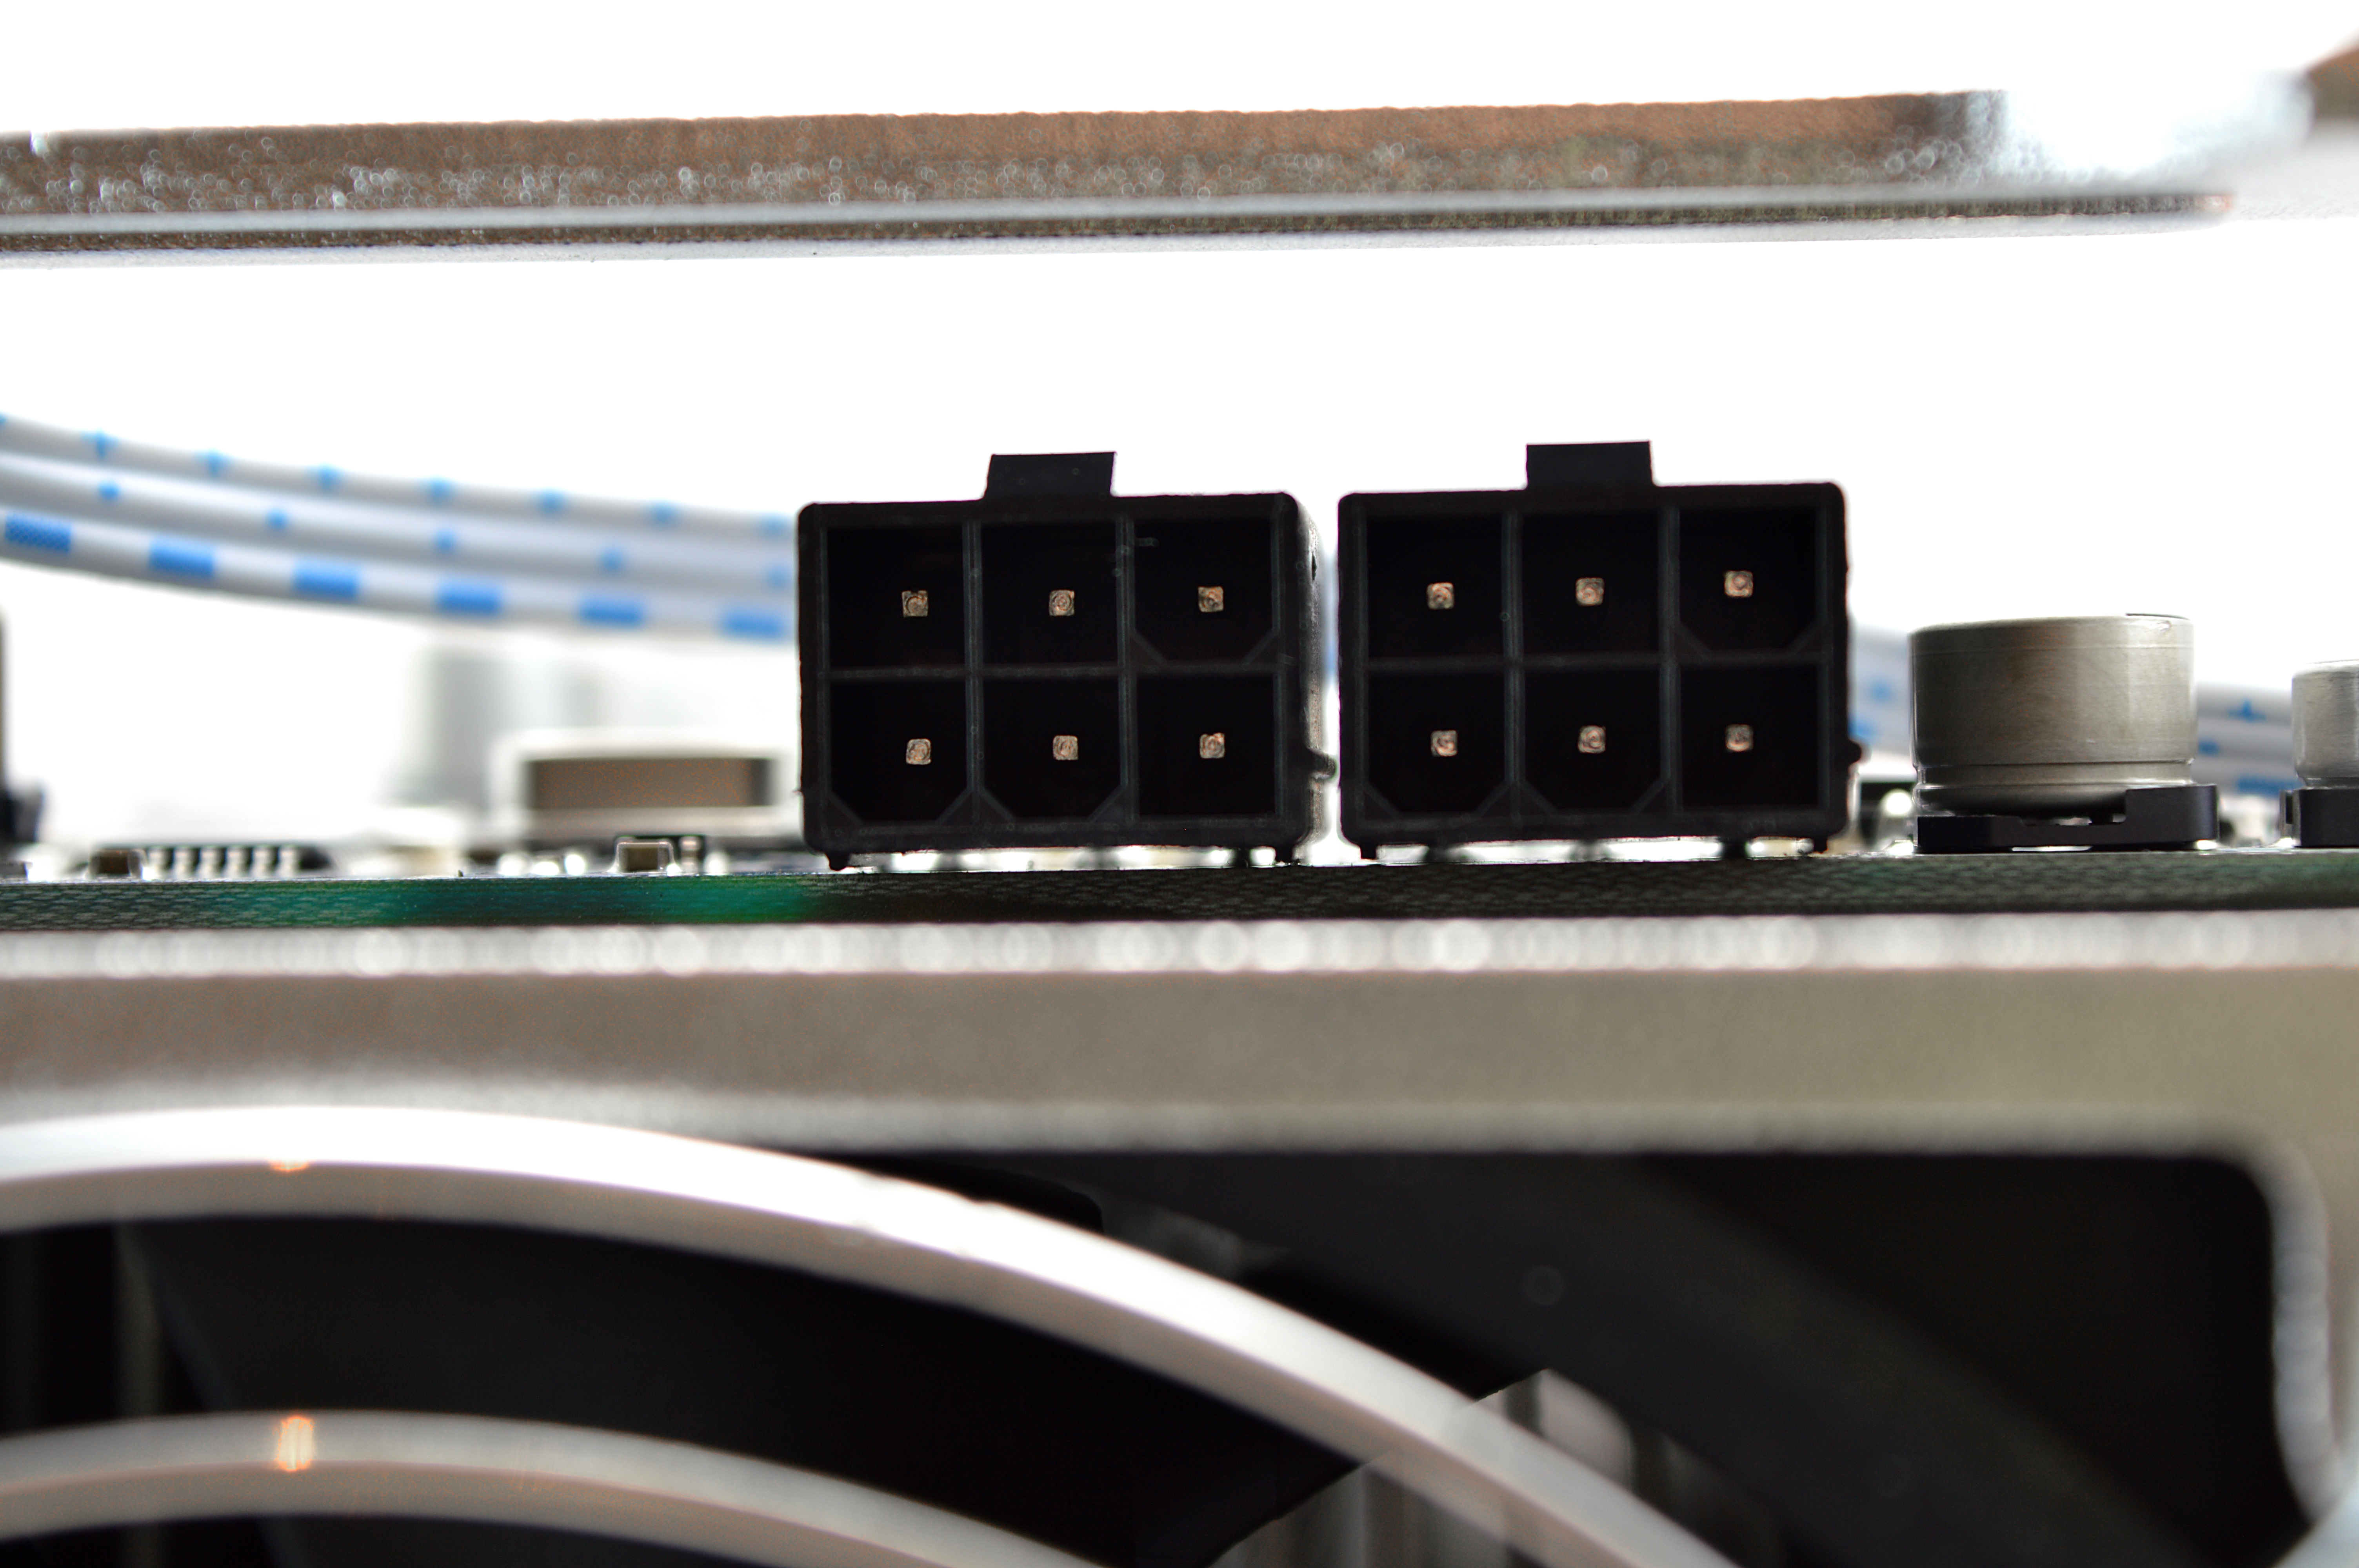
1) Powering
Prismas do not come with a power supply, and you will need a typical computer PSU with 8xPCI-E 6 pin power connectors. I would strongly recommend two of the PSU above to share the load. While you can power the same miner with multiple power supplies, under no circumstances should you attempt to power the same mining board with different power supplies.
We also need to tell the PSU to always be on, as there isn't a motherboard to do this. Cut a paperclip into a U and insert it into the green wire and either black wire to the side of the green wire. Tape it up for safety. The power supply will now be controlled by its switch on the rear socket.
The controller board also requires a 2.5mm barrel connector between 5V and 12V. 12V adapters require 1A minimum and 5V adapters 3A minimum.
|
|
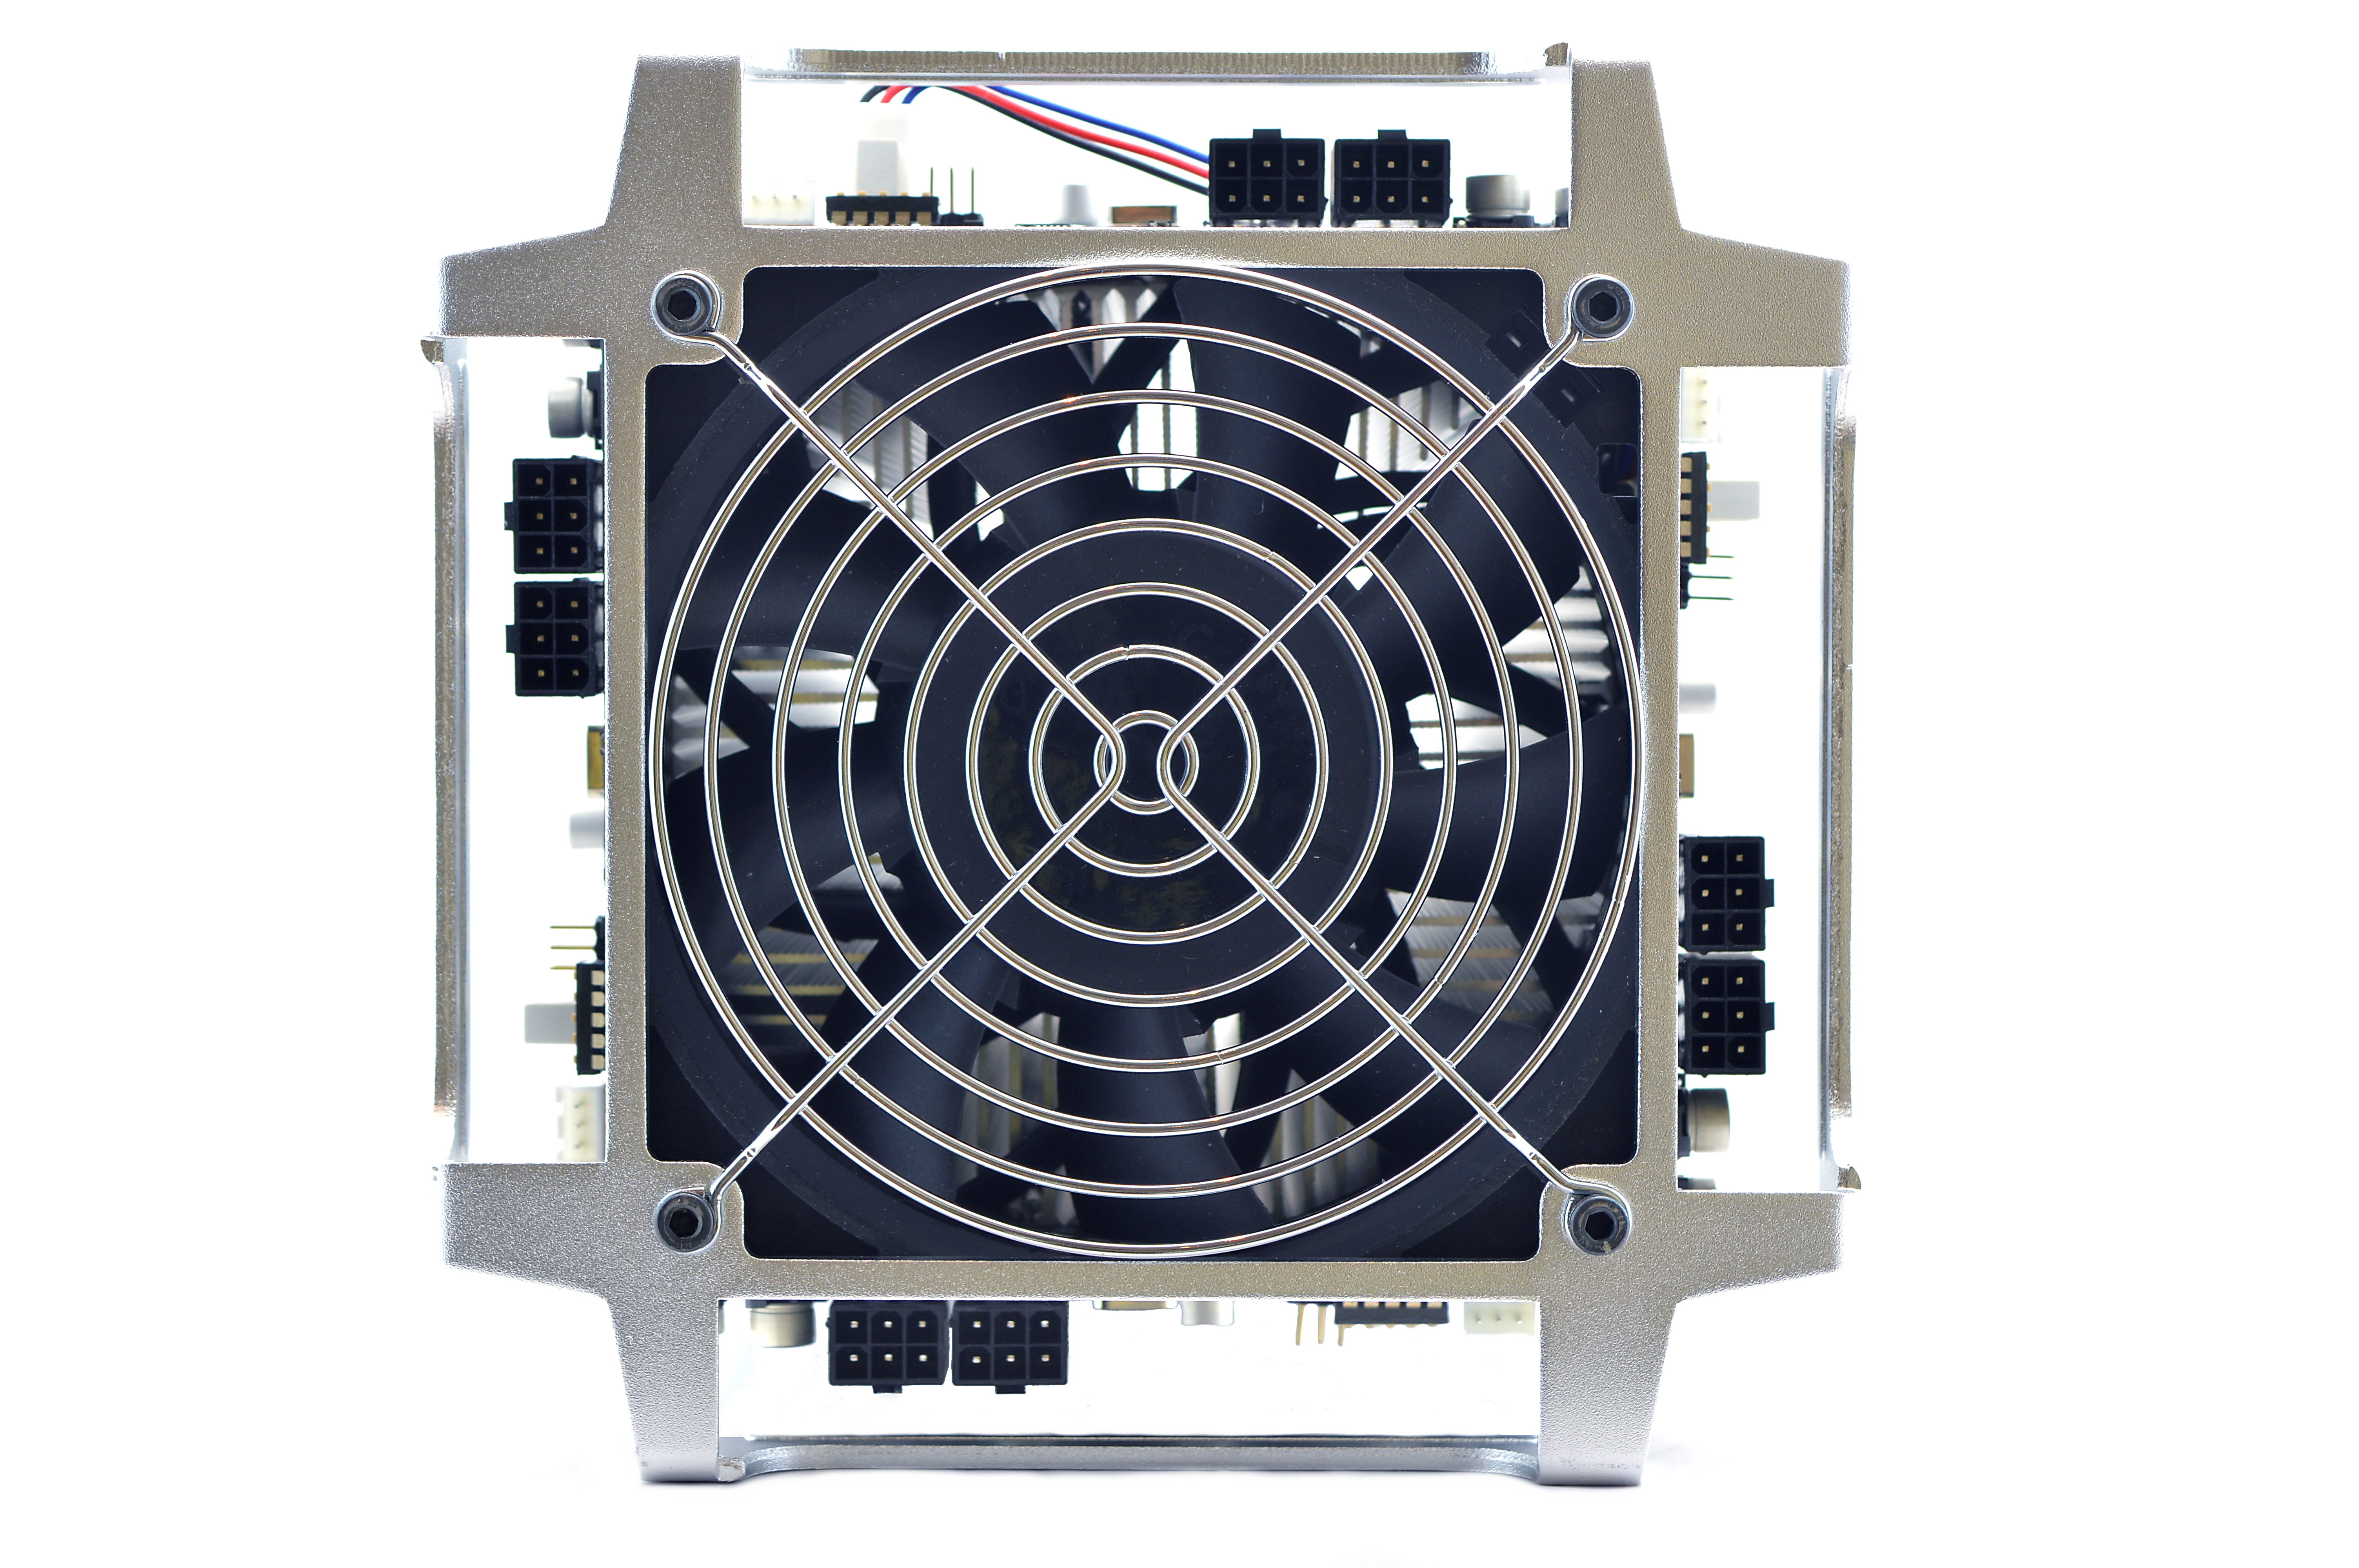
2) Cooling
A single, high static pressure 120mm fan is used to cool the central aluminium core. Prismas are very loud due to the fan spinning at ~4000rpm, and is not well suited to residential use. It is noteworthy that the end furthest away from the fan may become very hot to the touch extremely hot to the touch (including the handles) during operation, so please be careful during handling and maintenance.
A single, high static pressure 120mm fan is used to cool the central aluminium core. Prismas are very loud due to the fan spinning at ~4000rpm, and is not well suited to residential use. It is noteworthy that the end furthest away from the fan may become very hot to the touch extremely hot to the touch (including the handles) during operation, so please be careful during handling and maintenance.

|

|
|
|
3) Case
The central aluminium heatsink provides the core of the frame and structure of the miner, and is supplemented by radial feet at either end. Both are constructed of low weight aluminium, giving an overall miner weight 7.5kg. Prismas are stackable both side to side and top to bottom and the addition of a rubber strip between miners would be beneficial to reduce vibration.
Each unit weights 7.5kg and measures 450mm x 275mm x 275mm. The unpacked Prisma measures 380mm x 170mm x 170mm.
|
|
4a) Configuration - BE Controller
An external 32bit PIC board is used as the controller, and can handle 4 daisy chained Prismas. Alternatively, the USB adapter can be used to connect to any cgminer based device.
Wiring:
Software:
Alternative Subnet Change:
An external 32bit PIC board is used as the controller, and can handle 4 daisy chained Prismas. Alternatively, the USB adapter can be used to connect to any cgminer based device.
Wiring:
- Separate three of the shorter, white 3 pin cables.
- Starting on any of the four boards (board A), plug one end of the cable into the 3 pin connection near the fan end of board A and the other into board B.
- Repeat with boards B to C and C to D.
- Plug in a long cable from board D or A (doesn't matter) to the white socket on the controller board closest to the ethernet port, labelled "UART1".
- Plug in an ethernet cable from the controller board to you router.
- Make sure each mining board sharing a controller has a unique 5 bit switch code. See the troubleshooting section for all the codes.
- Plug in all eight PCI-E connectors into the Prisma.
- Plug in the 5V or 12V barrel connector into the controller board.
Software:
- Power on the power supply/supplies using its switch at the back.
- Make sure or your router's subnet is 0, ie 192.168.0.x. If not then change it to 0, this is just temporary. ***If this is not possible, see below***
- Using a browser, navigate to 192.168.0.254:8000 - this goes to the Prisma's configuration page.
- Navigate to Settings.
- Change IP to something memorable, and on your preferred subnet.
- Change gateway to the IP of your router.
- Change primary DNS to the IP of your router.
- Change secondary DNS to "8.8.8.8".
- Enter Pool URL in the format as below. Please see below notes on pool selection.
- Enter the port of your pool.
- Enter your miner username and password.
- Set ASIC clock at 240 for stock speeds.
- Click update and restart.
- Navigate back to the IP of the miner you set to check mining started.
- You can then change your router subnet back to whatever you are used to using.
Alternative Subnet Change:
- Unplug your computer from all internet sources.
- Plug in an ethernet cable from the controller to your computer.
- Navigate to Control Panel -> Network and Sharing Centre -> Change Adapter Settings.
- Right click on your ethernet adapter -> Properties.
- Click on "Internet Protocol Version 4" and click properties.
- Select "Use the following IP address" and enter the following:
- IP Address: 192.168.0.1, Subnet Mask: 255.255.255.0, Default Gateway: 192.168.0.254.
- Plug in an ethernet cable from the controller to you router.
- Restart the configuration instructions as above.
us1.ghash.io with port 3333
stratum.bitcoin.cz with port 3333
stratum-lb-usa48.btcguild.com with port 3333
geo.bitcoindigger.com with port 3333
|

|
4b) Configuration - Using Proxy (Optional)
To use pools outside of the above list, a proxy must be used. These instructions are for BFGMiner on Windows, but the same can be replicated on a Pi or Linux.
To use pools outside of the above list, a proxy must be used. These instructions are for BFGMiner on Windows, but the same can be replicated on a Pi or Linux.
Using BFGMiner:
Optional:
- Download BFGMiner. Extract it to "C:\Program Files (x86)".
- On the computer the proxy is running on, open a command prompt window (run/search and type cmd).
- Enter "ipconfig /all". Scroll down to your computer to find its IP address.
- Using a browser, navigate to the Tube's configuration page.
- Enter the computer's IP address into the "Pool URL" field. Enter "3333" into the "Pool Port" field.
- Username and password fields do not matter (enter x in both). Click Update/Restart.
- Create a .bat file in notepad (by saving it as .bat) and save it on your desktop. Put the following text inside, changing the pool url and miner login as desired.
Optional:
- If you want the proxy to start in the background when you turn your computer on, navigate to Control Panel -> Administrative Tools -> Task Scheduler.
- From the right hand list, select "Create Basic Task". Name it "Start Proxy" and click "Next". Select the trigger "When the computer starts" and click "Next".
- Select "Start a Program" and click "Next". Browse to your desktop and select the .bat we created. Click "Next", select the tick box and click "Finish".
- Select "Run whether user is logged on or not" and tick the check box "Run with highest privileges". Click "Okay".
cd C:\Program Files (x86)\bfgminer-4.7.0-win64
bfgminer -o mint.bitminter.com:3333 -u username_worker -p anypassword --stratum-port 3333 --set-device PXY:diff=1024
cd C:\Program Files (x86)\bfgminer-4.7.0-win64
bfgminer -o stratum.btcguild.com:3333 -u username_worker -p anypassword --stratum-port 3333 --set-device PXY:diff=1024
cd C:\Program Files (x86)\bfgminer-4.7.0-win64
bfgminer -o us1.ghash.io:3333 -u username_worker -p anypassword --stratum-port 3333 --set-device PXY:diff=1024
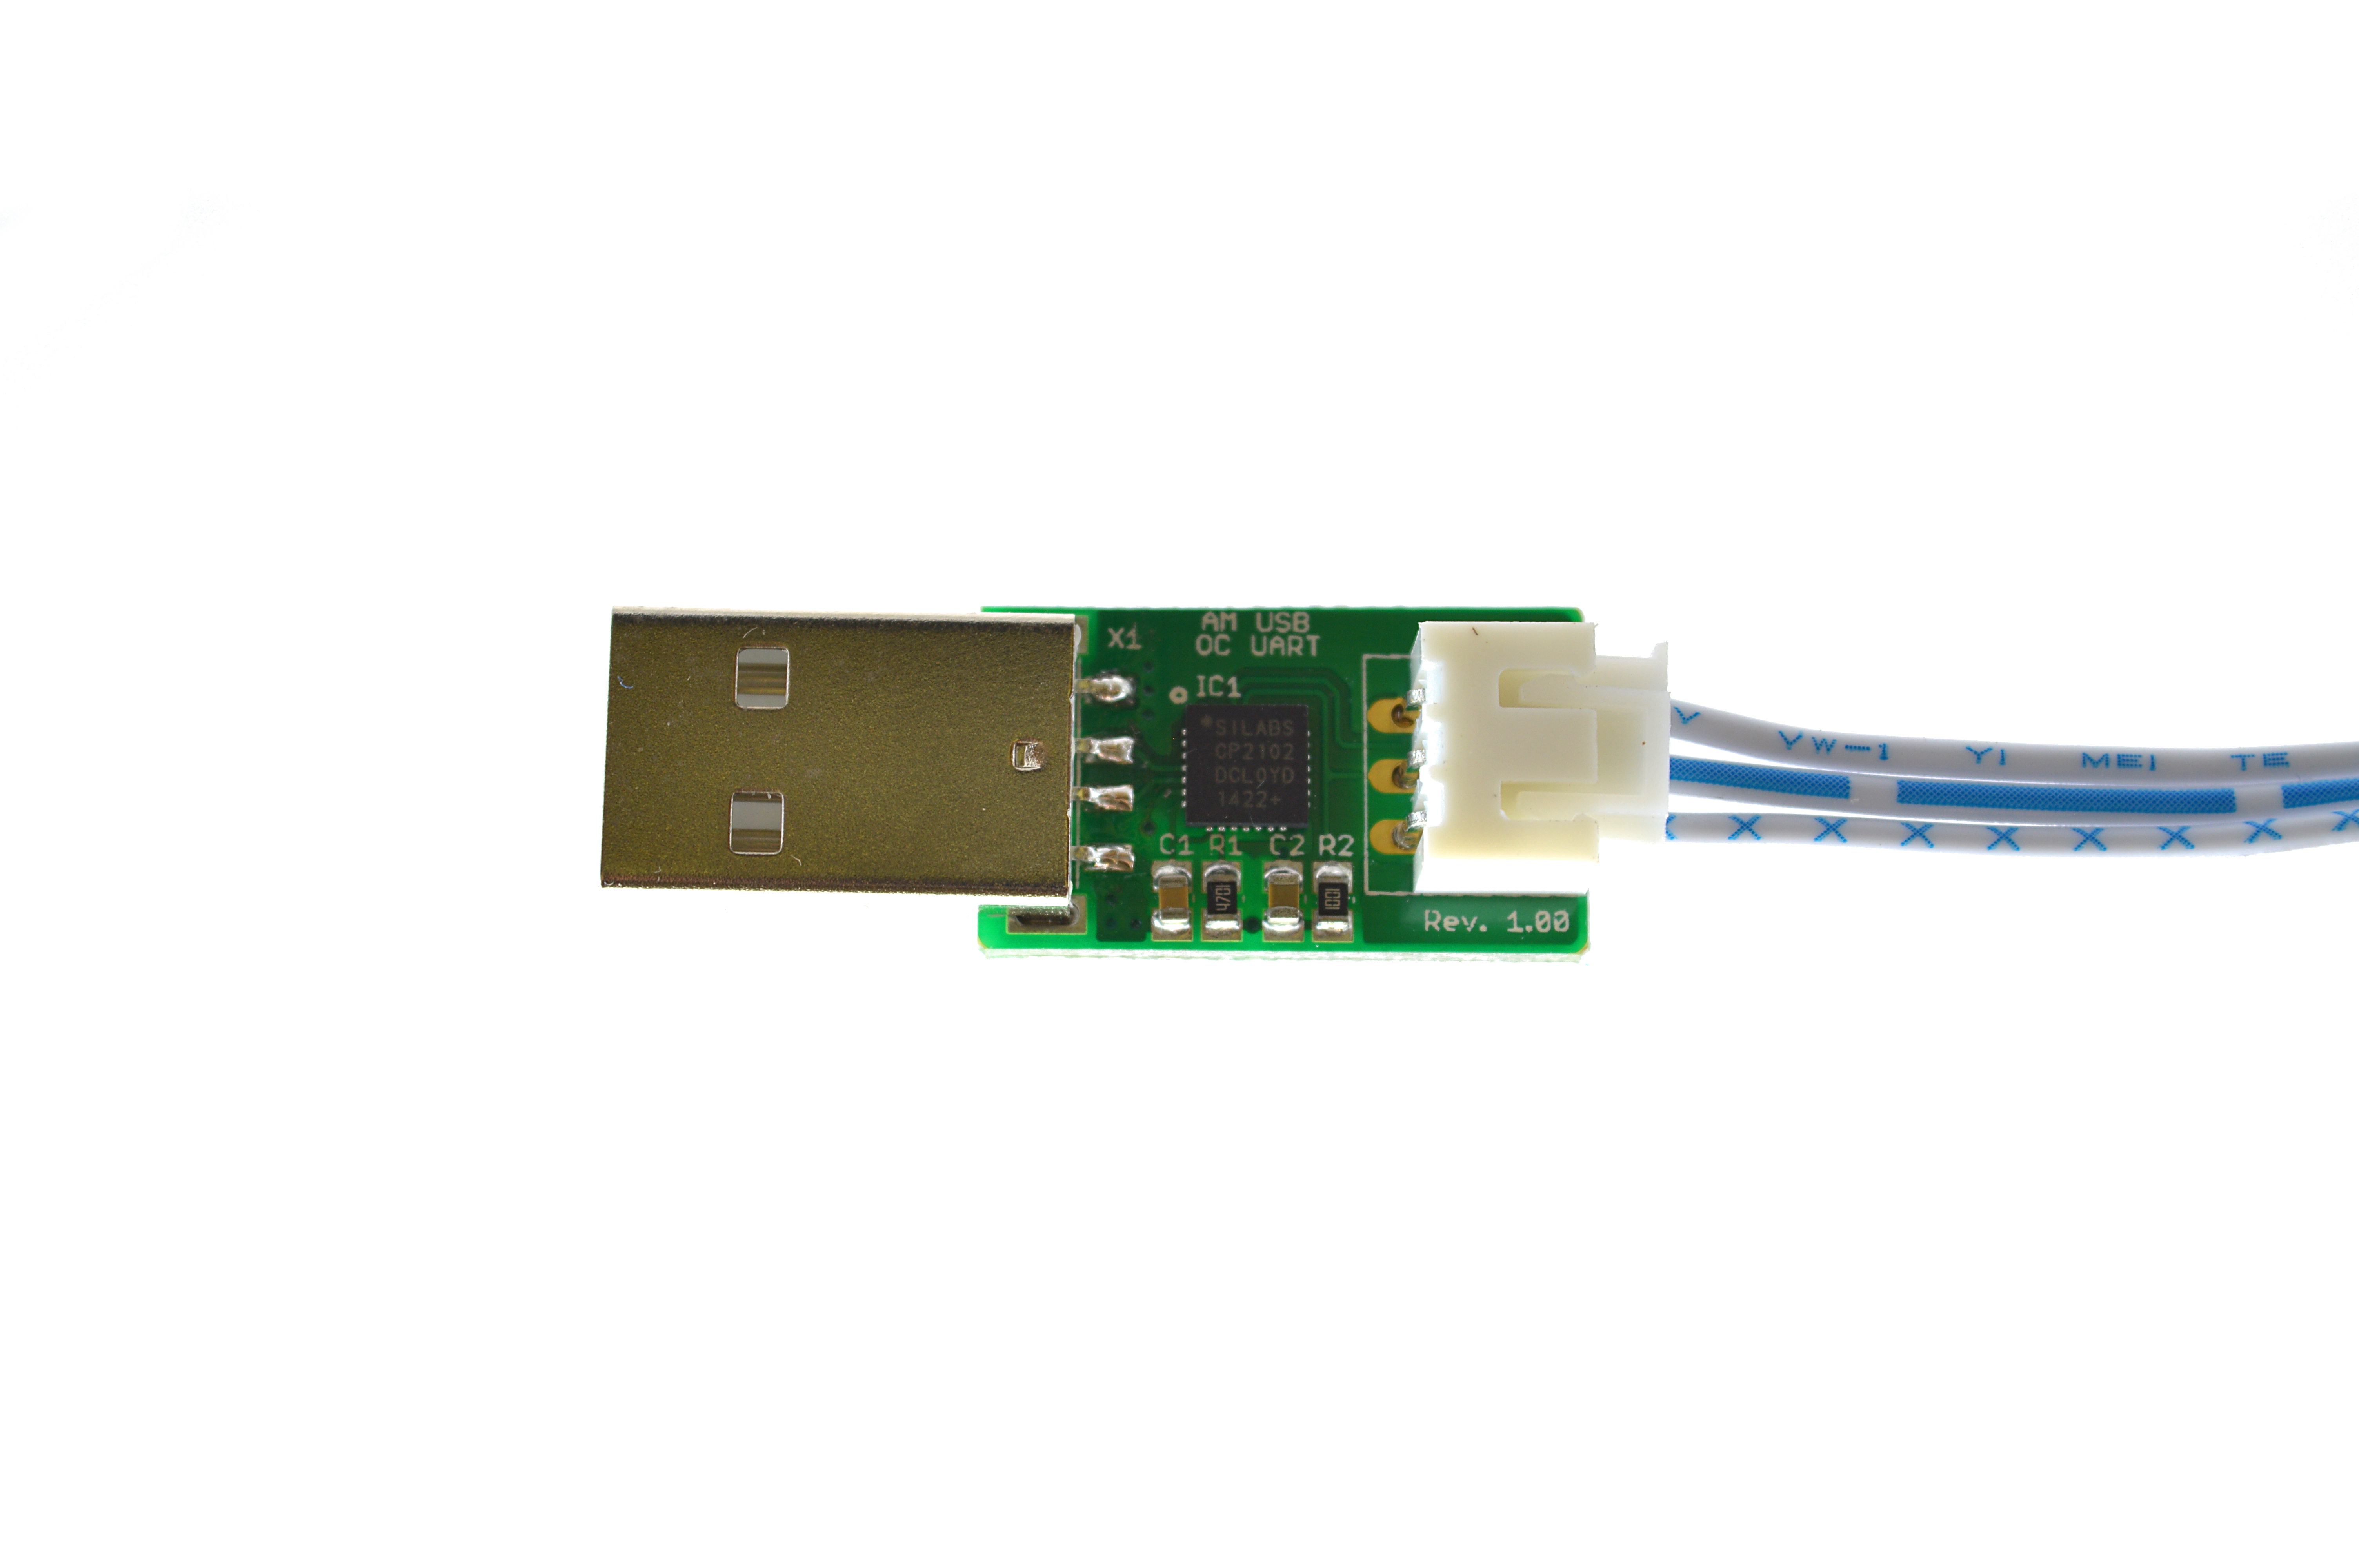
4c) Configuration - USB
The USB adapter can be used to run the Prisma on a Windows based PC or Raspberry Pi.
Wiring:
Software:
The USB adapter can be used to run the Prisma on a Windows based PC or Raspberry Pi.
Wiring:
- Separate three of the shorter, white 3 pin cables.
- Starting on any of the four boards (board A), plug one end of the cable into the 3 pin connection near the fan end of board A and the other into board B.
- Repeat with boards B to C and C to D.
- Plug in a long cable from board D or A (doesn't matter) to the USB adapter.
- Plug in the USB adapter into your controller device. Avoid USB3 slots.
- Make sure each mining board sharing a controller has a unique 5 bit switch code. See the troubleshooting section for all the codes.
- Plug in all eight PCI-E connectors into the Prisma.
Software:
- Download the latest version of CGMiner and Zadig.
- Extract, and run the zadig application.
- Select "CP21202 USB to UART Bridge Controller" and then click "Replace Driver". You only have to do this once per computer.
- Create a new file in notepad and enter pool information as below. Save it as a .bat in the same folder as CGMiner.
- Run the bat file to start mining.
cgminer.exe -o stratum.antpool.com:3333 -u dogie_Prisma -p 123
cgminer.exe -o stratum.btcguild.com:3333 -u dogie_Prisma -p 123
cgminer.exe -o us1.ghash.io:3333 -u dogie.Prisma -p 123
|
|
5) Troubleshooting
|
Problem
How do I set up more than one miner on one controller? How do I reset settings to default? My power supply's cables are braided or aren't color coded |
Solution
- There is a 5 bit switch on each hashing board which must be configured to be unique in order for the controller to detect it. Do not touch switch 5, but make sure the combination of switches 1-4 are unique across all 4 boards. - Hold and press the black push button on the controller board. - See below diagram for pin-outs. 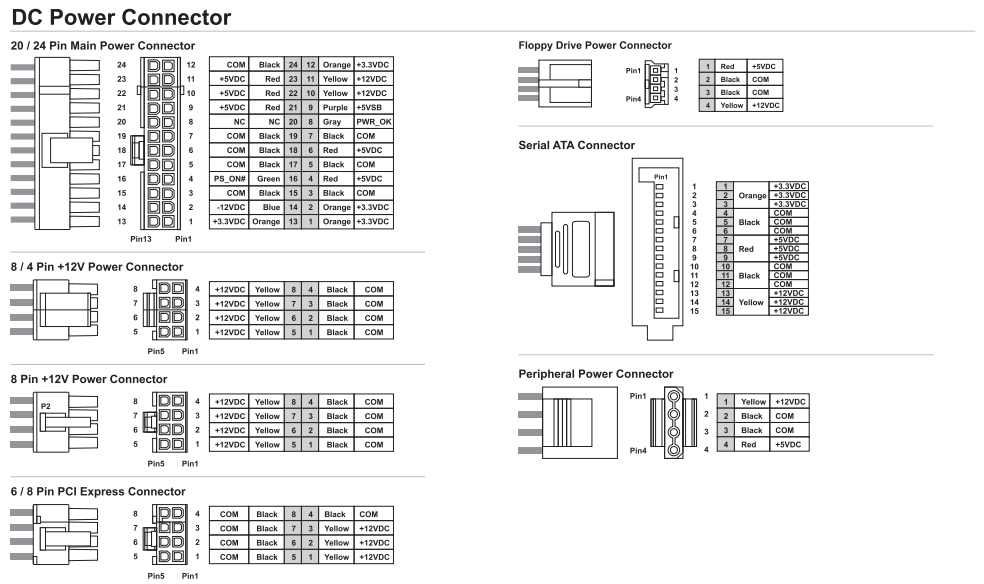
|

|

|
6) Where to buy


General Safety Tips


|
Do not touch equipment while powered, exposed electrical contacts may shock.
Fans may cause injury or shatter if material is ingested.
|


|
Sharp edges may be cut, especially around any internal casing or heatsinks.
If you are unsure of what to do, STOP and consult an expert.
|
|
|
|
Legal disclaimer: This information is for general guidance and does not constitute expert advice. We are not responsible if you, your property or a third party is injured or damaged as a result of any interaction with this information, and no warranty is provided. All text and images are covered under copyright law, dogiecoin.com.
|